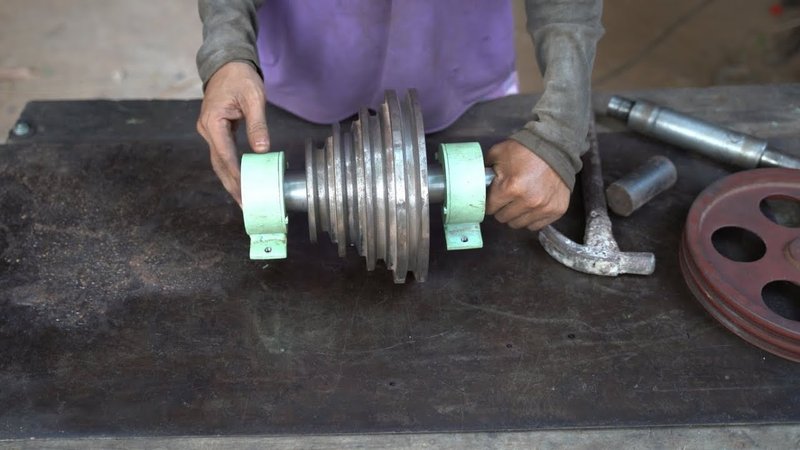
Let’s say you’ve got a Schlage, Kwikset, or Emtek handleset on your door. These handle brands are built to last, but even strong steel spindles can fail after years of twisting or if the door is slammed too hard. Instead of dropping cash on a whole new set, you can bring that spindle back to life. Think of it like fixing the crank on an old bike—it takes patience and the right technique, but it’s satisfying and sturdy when it’s done right.
Here’s the thing: repairing a handleset spindle that’s snapped isn’t your typical weekend project. It’s advanced DIY. That means you’ll need some real skills—especially if you decide to weld or braze the metal. But if you’re up for it, you’ll save money and keep those handles working like new. Let me walk you through what you’re really tackling, and whether it’s worth picking up that welding torch.
What Is a Handleset Spindle and Why Do They Break?
A handleset spindle is basically a square or flat bar that connects the two door handles through the lock, letting you turn the latch from either side. It’s the invisible MVP that takes all the twisting and pulling every time you use your door. Most spindles are made from solid steel or zinc, but cheaper brands sometimes use pot metal or hollow parts that just don’t hold up.
Over time, spindles fail because of:
- Wear and tear: Years of use can round out the spindle edges, making it slip or snap.
- Corrosion: Moisture creeps in, especially with exterior doors, rusting the spindle until it gives out.
- Poor alignment: If the hardware isn’t installed square, turning the handle puts extra stress on the spindle.
Let me explain. If you’ve ever noticed your handle getting “loose” or heard a grinding sound, that’s your early warning. Ignore it long enough and—snap—you’re left staring at a useless knob. Honestly, for heavy-duty brands like Kwikset or Emtek, it’s not super common, but it does happen. Spotting signs early can save you from a surprise repair.
Assessing the Damage: Can Your Spindle Be Repaired?
Before you break out the welding goggles, take a really good look at your broken spindle. Is it a clean break, or does it look twisted and mangled? If the spindle is snapped cleanly in two (and you can find both pieces), you’ve got a shot at a solid repair. But if it’s bent, stripped, or chunks are missing, you might be better off buying a new spindle or complete handleset.
Here’s what to check:
- Material: Steel, brass, or zinc can usually be welded or brazed. Pot metal or hollow spindles are much harder to fix reliably.
- Location of break: If the break is near the center, you can usually get a good weld. If it’s at the threaded end or too close to the handle, the repair might not hold.
- Clean surfaces: Rusty, dirty, or painted areas need to be cleaned down to bare metal before attempting any repair.
You might be wondering, “Why not just buy a universal spindle?” Sometimes you can—especially with older hardware. But for high-end sets like Schlage or Emtek, the spindle length and shape can be proprietary. That’s why repairing what you have can be smarter (and faster).
Insight: If you’re not 100% sure of the material, try a magnet. If it sticks, you’ve probably got steel or some iron alloy—both weldable!
Welding vs Brazing: Which Method Works Best?
When it comes to repairing a handleset spindle that’s snapped, you’ll usually be deciding between welding and brazing. Both join metal, but they do it in different ways. Welding actually melts the base metals together, while brazing uses a lower-temperature filler metal to “glue” them. Each method has its perks and tradeoffs.
- Welding (MIG, TIG, or stick): Makes the strongest bond, especially with steel spindles. But it takes more skill and can warp smaller parts if you’re not careful.
- Brazing: Easier to control heat, less risk of melting your spindle. You use a torch and brass or silver-based filler. The bond isn’t quite as strong as a weld, but for light-to-medium use, it’s usually plenty.
Here’s the thing: For door hardware, both methods can work. If you already have a MIG welder, go for it—just don’t overheat and melt the thin sections. If you’re newer to metalwork, brazing is more forgiving and generally safer for beginners.
Think of it like fixing a broken glasses frame: welding is a superglue-level fix; brazing is more like a strong epoxy. The choice comes down to what you already own, your confidence, and how much stress that spindle will face.
Tools and Safety Gear You’ll Need
Trying to repair a handleset spindle with makeshift gear is a recipe for disappointment—or worse, injury. Even if you’ve done a bit of soldering before, welding and brazing need real safety precautions.
Here’s your must-have tool and safety list:
- Bench vise: To hold the spindle securely without risking your hands.
- Angle grinder or sandpaper: For cleaning the break and prepping the metal.
- MIG welder, TIG welder, or torch setup (for brazing): Depending on your chosen method.
- Filler rod or welding wire: Pick the type recommended for your spindle material.
- Fireproof gloves and long sleeves: Molten metal is no joke—cover up!
- Welding helmet or safety glasses: Protect your eyes from sparks and UV light.
- Metal file or Dremel tool: For smoothing the weld or braze after it cools.
Honestly, don’t try to “eyeball it” or skip the safety gear—metal work can fling sparks or slag across the room. Not fun.
The safest DIYers are the ones who respect the gear. A few extra minutes getting fitted up can save hours (and medical bills) later.
Step-by-Step: Repairing a Snapped Handleset Spindle
Now for the main event: Here’s exactly how to repair a handleset spindle that’s snapped, whether you’re welding or brazing. Take your time—rushing can ruin the piece.
- Remove the spindle: Take apart the handleset and pull the spindle out. Clean off any oil, debris, or paint.
- Prep the break: Use a file or grinder to clean both ends down to bare metal. The smoother and shinier, the better your repair will bond.
- Align the pieces: Place both spindle halves in a bench vise, making sure they line up perfectly. Any misalignment will cause the handle to bind or not fit.
- Weld or braze: If you’re welding, tack both sides, check alignment again, then finish the bead around the break. If brazing, heat the joint with your torch, apply the filler metal, and let it “wick” into the seam.
- Cool and inspect: Let the spindle cool slowly—don’t dunk it in water, as that can weaken the metal. When it’s cool, check for gaps or weak spots.
- Smooth it out: Use a file or grinder to remove any sharp edges or excess weld. You want the spindle to slide smoothly back into place.
- Reinstall: Put the spindle back in your handleset, reassemble, and test it. If the handle turns cleanly and the latch retracts, you’re golden.
You might be tempted to rush the alignment, but don’t. Even a tiny angle can leave your handleset sticky or even jam it. Take a breather and double-check before making it permanent.
Common Problems and Troubleshooting After the Repair
Sometimes, things don’t go perfectly on the first try. Maybe the handle still feels “off” or the latch doesn’t pull back all the way. Don’t panic—most of these problems are fixable, and they usually come down to the repair itself.
Watch for these common issues:
- Spindle won’t fit: You might have excess weld or braze—file it down until it slides in smoothly.
- Handle feels loose or sticky: Check if the repair is perfectly straight. Even a slight bend can cause trouble. If you can’t fix it by filing, you may need to repeat the process.
- Metal discoloration or weakness: Overheating during welding or brazing can weaken the spindle. If it feels soft, replace it instead of risking a break.
Here’s a little story: I once fixed a neighbor’s broken spindle using brazing, only to realize I’d made a tiny mistake with alignment. The handle worked, but it rubbed inside the latch. A quick touch-up with a file fixed it in five minutes. Sometimes, the smallest adjustments make all the difference.
If you’re constantly having trouble, it might be time to look for a universal or manufacturer-supplied replacement spindle. Sometimes the fix is just not worth the hassle (or potential security risk).
Alternatives: Universal Handleset Spindles or Complete Replacement
Let’s be honest—there are times when repairing a handleset spindle that’s snapped just isn’t the best call. Maybe your weld didn’t hold, or you don’t have the equipment. In those cases, buying a universal spindle or replacing the entire handleset might make more sense.
Universal spindles: These are designed to work with lots of lock brands, especially Kwikset, Schlage, and other common types. You’ll need to check the length and thickness (most are 4–6 inches and around 5/16″ square), but they’re easy to find at hardware stores or online. They slide right in, and you’re done.
Complete handleset replacement: If your hardware is really old or corroded, this can be the smarter move. Most new handlesets come with everything you need, including fresh internal parts and a new spindle. The only downside? Some brands have tricky installations or unique designs. If you’re switching brands, you might have to drill new holes or adjust your door.
Pro tip: If you ever upgrade to a smart lock or keypad (especially ones like Schlage Encode or Yale Assure), make sure it’s compatible with your door and latch style.
Replacement isn’t a failure—it’s a practical choice if your repair tools or skills just aren’t up to the job. Plus, you get the bonus of a new look or even added security features, like stronger lock codes or better battery backup if you’re going smart.
When to Call a Locksmith or Professional
DIY isn’t always the answer. If you’re not comfortable with welding or brazing, or your handleset is a high-security type, sometimes it’s smart to get a pro involved. Locksmiths have specialty tools, access to rare parts, and know-how to sync new handlesets with your home’s security system.
Signs you should call a professional:
- The spindle is made from an unknown metal or is severely damaged.
- Your lockset is high-end (Emtek, Baldwin, or similar) and you want to keep it under warranty.
- You’ve tried repairing once and the fix didn’t hold.
- There are issues with the lock code, battery, or internal electronics (for smart handlesets).
Sometimes paying for a locksmith saves money in the long run, especially if you’d need to buy new welding equipment or risk damaging an expensive door.
Wrapping It Up: Is Spindle Repair Worth It?
Repairing a handleset spindle that’s snapped is one of those advanced DIY projects that delivers real satisfaction—if you’re ready for the challenge. Welding or brazing isn’t something everyone can or should do, but if you’ve got the right tools and a bit of patience, bringing a broken spindle back to life beats tossing the whole set in the trash.
You’ll learn a lot, flex your troubleshooting muscles, and maybe even save a trip to the hardware store (or a call to the locksmith). Just remember—safety, patience, and a careful touch are your best friends here. And if the repair doesn’t go as planned? There’s no shame in swapping out the spindle or getting expert help. In the end, what matters is a smooth-turning handle and a secure door—whether you fixed it yourself or got a little help along the way.
