Repairing a door hinge isn’t just about aesthetics; it’s about functionality, too. A sagging door can be a pain, making it hard to close fully or even lock. You might have a range of door styles, whether it’s a standard interior door or a solid front door. Your approach might vary slightly based on what you have, but the core of the problem—those worn hinge pins—is the same. Let’s dive into how to fix this!
Understanding the Anatomy of a Door Hinge
To tackle the problem, it helps to first understand what we’re dealing with. A door hinge is made up of several key parts: the leaves, the pin, and the knuckles. The leaves are the flat parts that attach to the door and the frame, while the pin runs through the knuckles, allowing the door to pivot. As the door opens and closes, the friction can wear out the pin, resulting in that annoying sag.
You might be wondering why this matters. Well, a well-functioning hinge supports the door’s weight and ensures smooth operation. If the hinge pin is worn, it can lead to other issues, such as misalignment or even damage to the door frame over time.
Here’s the thing: regular maintenance can save you from headaches later on. Checking your hinges every so often can help catch wear and tear before it becomes a bigger problem.
Identifying a Sagging Door Hinge
Before jumping into repairs, let’s figure out if your door is indeed sagging due to a worn pin. Close the door and examine the gap between it and the frame. Is there a noticeable difference on the top side compared to the bottom? If one side seems lower, you could have a sagging problem.
Another indicator is the door’s ability to latch properly. If the latch is misaligned or doesn’t catch, it’s a telltale sign of hinges that need attention. You might even hear some creaking or grinding as the door moves, which is another clue that the hinge isn’t in top shape.
So, what can you do? Start by checking the screws holding the hinge to the door and frame. Are they tight? If they’re loose, that can sometimes be the source of the sag. Give them a little twist to see if it helps.
Gathering Your Tools
Now that you’ve confirmed a sagging hinge, let’s gather the tools you’ll need for the repair. Here’s a quick list:
- Flat-head screwdriver
- Hammer
- Replacement hinge pin
- Lubricant (like WD-40 or graphite powder)
- Drill (if necessary, for new screws)
Having everything on hand will make the process smoother. You don’t want to be halfway through the repair and realize you’re missing something. Also, make sure to have a cloth handy for any mess from the lubricant.
Let me explain why each tool matters. The screwdriver is essential for removing screws, the hammer will help you tap out a stubborn hinge pin if needed, and the replacement pin is crucial for fixing the sag. Lubricant can provide a quick fix for creaking, but if the pin is worn, it’s time to replace it altogether.
Removing the Worn Hinge Pin
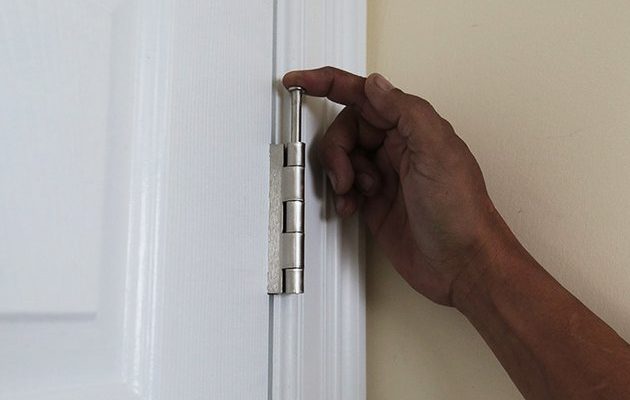
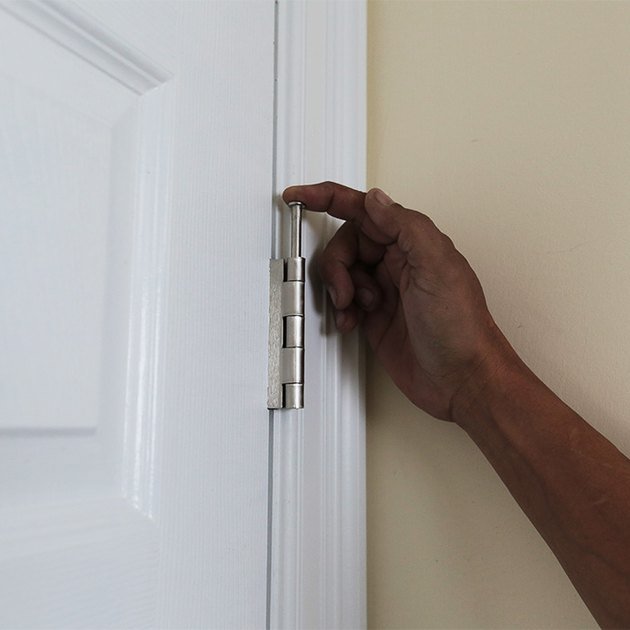
Once you’ve gathered your tools, it’s time to get to work! Start by taking the flat-head screwdriver and gently prying the pin out of the hinge. If it’s stuck, a few taps with the hammer can help loosen it without damaging the hinge itself. Be patient here; forcing it out can cause more problems.
As you remove the pin, take a moment to inspect it. A worn pin will often be smooth and shiny, while a new one might have some texture or a fresh appearance. If you see rust or wear, it’s definitely time for a replacement.
If your hinge is particularly old or has a lot of corrosion, consider replacing the whole hinge rather than just the pin. This can save you trouble in the long run, ensuring your door has stable support.
Installing the New Hinge Pin
With the old pin out, it’s time for the new one. Slide the replacement pin into the hinge. Make sure it fits snugly but isn’t overly tight. You want it to move smoothly without any resistance. If the door is still sagging after replacing the pin, the issue might be with the hinge itself or how it’s attached to the frame.
While you’re at it, apply some lubricant to the hinge for a smoother operation. A little goes a long way, so don’t overdo it. Too much lubricant can attract dust and dirt, causing more issues down the line.
Here’s a quick tip: if you notice the new pin isn’t holding well, double-check that the screws are tight. Loose screws can wreak havoc on your hinge and negate all your hard work.
Testing Your Door
Once you’ve installed the new pin and lubricated the hinge, it’s time to test your handiwork. Gently open and close the door a few times. Does it swing smoothly? Is it still sagging? If the door feels lighter and closes properly, congratulations! You’ve successfully repaired the sagging hinge.
If it’s still not right, take a closer look at the alignment. Sometimes, adjusting the hinge’s position can make a world of difference. You may need to loosen the screws a bit and shift the door before tightening them back up.
Remember, consistent door maintenance can help you avoid future issues. Make a habit of checking hinges periodically, especially if they start to creak or feel loose.
Repairing a door hinge that’s sagging due to a worn pin may seem daunting at first, but with the right tools and a little patience, it’s an achievable task. By understanding how hinges work and recognizing the signs of wear, you can keep your doors operating smoothly for years to come.
Whether you’re dealing with an interior door or a sturdy exterior one, don’t let a sagging hinge annoy you any longer. With your newfound knowledge, you can tackle this minor home repair like a pro. Next time someone asks about your handy skills, you can say, “Oh, I fixed my door hinge all by myself!”