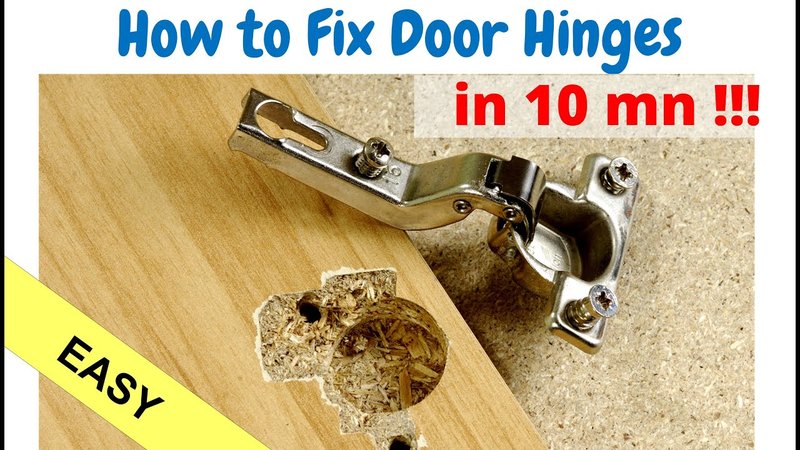
Repairing a door hinge that was installed off-center is totally doable, even if you’re not a seasoned DIYer. The task might sound intimidating at first, but with a few steps and some basic tools, you can set your door straight and make it function smoothly again. This guide will walk you through the process, making it as simple as possible. So, grab your tools, and let’s dive in!
Identifying the Problem
Before you grab a screwdriver, it’s essential to identify why your door isn’t functioning correctly. An off-center hinge typically leads to a door that won’t close fully or latches unevenly. This problem can stem from several issues:
- Misalignment: The hinge may be installed too high or too low.
- Wear and Tear: The hinge might be old and losing its grip.
- Installation Errors: Inexperienced installation can cause off-centered hinges.
Take a moment to observe your door closely. Does it sit too far away from the door frame? Or maybe it leans noticeably towards one side? You might even notice your door dragging against the floor when you try to open it. All these signs point to a hinge issue.
Gathering Your Tools
Once you’ve figured out the problem, it’s time to gather the tools you’ll need. Don’t worry, you don’t need a full workshop. Here’s the basic set:
- Screwdriver: A Phillips or flat-head, depending on your hinge screws.
- Wood Chisel: This is optional but might help if you need to adjust the hinge placement.
- Drill: If you need to create new screw holes.
- Measuring Tape: To ensure everything is aligned correctly.
- Level: A small level will help you get the hinge perfectly straight.
Honestly, having the right tools makes all the difference. Imagine trying to assemble furniture with just a pair of scissors — it’s frustrating! So, take a minute to collect everything you need before starting.
Removing the Hinge
Now that you’ve got your tools, it’s time to get to work. Start by removing the hinge from the door. Use your screwdriver to unscrew the hinge plates from both the door and the frame.
Here’s a quick step-by-step guide:
1. Open the Door: Open the door enough to get a good angle on the hinges.
2. Unscrew the Hinge: Start with the top screws, then follow with the bottom ones.
3. Remove the Hinge: Carefully pull the hinge away from the door and the frame.
Be gentle when removing the hinge. If it’s stuck, a little wiggling can help. Take your time to avoid stripping the screws, which can make reinstallation more complicated.
Adjusting the Hinge Position
With the hinge removed, now comes the tricky part — adjusting the position. You might need to reposition the hinge to achieve that perfect alignment. Here’s how you can do it:
1. Measure the Current Position: Use your measuring tape to note where the hinge was installed.
2. Decide on the New Position: Determine where it should be. Ideally, it should be evenly spaced and level with the door.
3. Mark New Holes: If needed, use a pencil to mark where new screws should go.
You might be wondering, “Why not just screw it back in the same place?” Well, moving it slightly can fix the alignment, allowing the door to hang properly. Here’s the thing — it’s like adjusting a picture frame on the wall; a tiny tweak can make a big difference.
Making Necessary Adjustments
If the hinge has left holes from previous screws, you may need to fill those in. Use wood filler to plug those holes, allowing it to dry completely. This step ensures that when you install the hinge in a new position, it stays secure.
While waiting for the filler to dry, you can smooth out any rough edges or use a chisel if needed. A smooth surface helps the hinge sit perfectly, reducing the chances of future problems.
Reinstalling the Hinge
Once everything is ready, it’s time to reinstall the hinge. Follow these steps:
1. Position the Hinge: Align it with your marked spots, ensuring it sits level.
2. Screw in the Hinge: Start with the top screws and move to the bottom. Make sure everything is tight but be careful not to overdo it — you don’t want to strip the holes you just fixed!
3. Check the Alignment: Once the hinge is in place, close the door slowly to ensure it operates smoothly.
Take a step back and admire your work. You’ve just tackled an off-center hinge! If something still feels off, don’t be discouraged. Sometimes, a little trial and error are part of the process.
Final Adjustments and Maintenance Tips
Now that your hinge is successfully reinstalled, give the door a good test. Open and close it a few times to make sure everything feels right. If you notice any remaining issues, adjustments might still be needed.
Regular maintenance is key to keeping your door functioning well:
- Lubricate the Hinge: A little oil goes a long way in preventing squeaks.
- Check Alignment Regularly: Doors can settle over time, so keep an eye out for any changes.
- Tighten Screws Periodically: Make it a habit to check the screws every now and then.
Taking these simple steps can extend the life of your door and keep it operating smoothly for years to come.
Repairing a door hinge that was installed off-center might seem daunting at first, but you’ve got what it takes to fix it. With a little patience and the right tools, you can bring your door back to a smooth function. Remember, just like a door, all it takes is a slight adjustment to make everything click into place. You’ve not only solved a practical problem but also gained some handy skills along the way. So go ahead, swing that door open with confidence!
