Imagine you have a favorite door that, after years of loyal service, has started to squeak or wobble. Maybe someone accidentally pushed it open too hard, or perhaps it’s just aged and needs a little TLC. The good news is that repairing a damaged door hinge doesn’t have to be a daunting task. With a few tools and a bit of patience, you can get that door swinging smoothly again.
Let’s walk through the steps of repairing a door hinge that has been damaged by force. We’ll cover everything from identifying the problem to gathering your tools, as well as some tips to ensure your door remains in top-notch condition.
Identifying the Damage
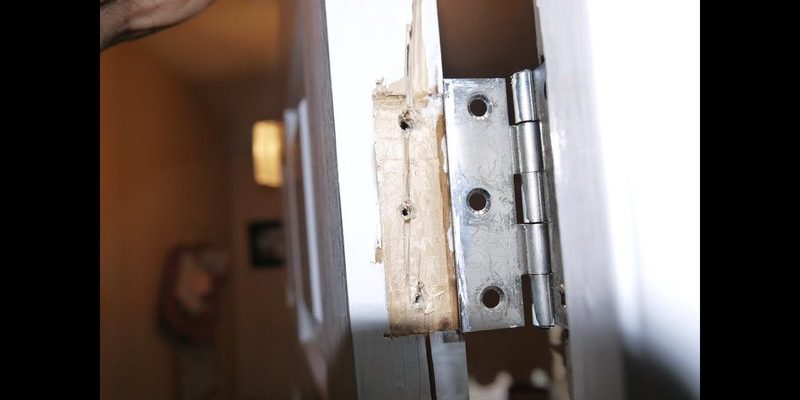
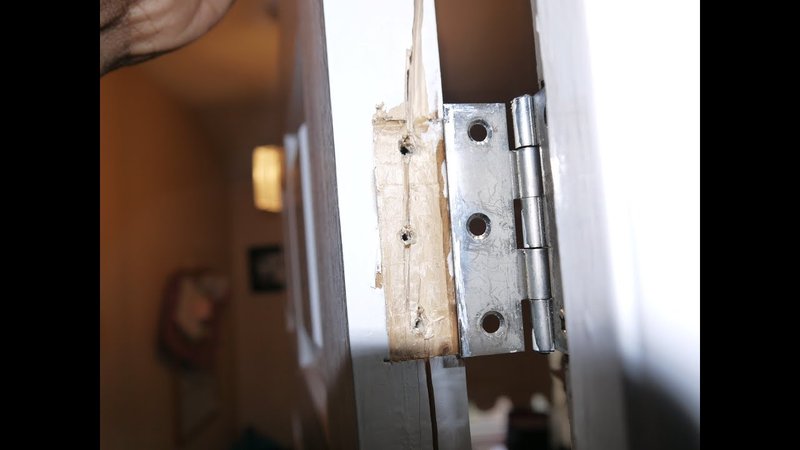
Before getting your hands dirty, you need to assess the damage to the door hinge. Start by taking a close look at the hinge itself. Is it bent, cracked, or simply loose?
– Bent Hinge: If the hinge is visibly misaligned, it might just need some straightening. You could use a hammer and a small piece of wood to gently tap it back into shape.
– Cracked Hinge: A cracked hinge might be a sign that it’s time for a replacement. Honestly, trying to repair a crack can result in further issues down the road, so consider purchasing a new one if this is the case.
– Loose Screws: If the screws are loose, the hinge won’t function properly. In this case, a quick tightening might resolve the issue without needing any replacements.
Once you’ve identified the problem, you can move on to the repair process.
Gathering Your Tools
Alright, let’s make sure you have everything you need before diving into the repair. Here’s a simple checklist of tools:
- Flathead screwdriver
- Phillips screwdriver
- Pliers
- Hammer
- Replacement hinge (if needed)
- Wood glue (optional)
- Wood filler (for damaged door frames)
Having the right tools makes all the difference! For instance, using a flathead screwdriver on Phillips screws isn’t just frustrating; it can strip the screws and make things even messier. If you’ve decided that you need a replacement hinge, make sure to bring the old one to the hardware store to find a match.
Repairing Loose Hinge Screws
If the screws are just loose, fixing them is usually pretty straightforward. Here’s how to do it:
1. Tighten the Screws: Start by using the right screwdriver to tighten each screw on the hinge. Sometimes, all a hinge needs is a little extra love. If the screws won’t hold tight, you might need to reinforce the area.
2. Use Wooden Dowels: If the screw holes are stripped (meaning they’re too wide to hold the screw firmly), take a wooden dowel, cut it to size, and glue it into the hole. Let it set for a bit, then drill a new pilot hole in the dowel and reinsert the screw. This will give it a sturdy grip.
3. Check the Alignment: After you’ve tightened or reinforced the screws, check whether the door swings open and shut properly. If it still feels off, it might be time to evaluate whether the hinge itself is damaged.
Straightening a Bent Hinge
Straightening a bent hinge can be a bit like fixing a crumpled piece of paper. It requires a gentle touch and some patience. Here’s what to do:
1. Remove the Hinge: If the hinge is still attached, use your screwdriver to take it off the door. It’s easier to work with it when it’s free.
2. Assess the Bend: Lay the hinge flat on a sturdy surface. Look closely to see where it’s bent.
3. Gently Bend Back: Use your hands or a hammer with a piece of wood to gently tap it back into shape. Be careful not to apply too much force—it’s all about finesse here.
4. Reattach the Hinge: After ensuring it’s straight, put the hinge back on the door and check for smooth operation.
Replacing a Damaged Hinge
If the damage is beyond repair, it’s time for a replacement. Here’s how to change out an old hinge for a new one:
1. Remove Old Hinge: Unscrew the damaged hinge from both the door and the frame. Save the screws if they’re still in good shape.
2. Install New Hinge: Align the new hinge in the same spot as the old one. Use a level to ensure it’s straight—this matters!
3. Screw It In: Secure the hinge with screws. Ensure they’re tight, but don’t overdo it; you don’t want to strip the holes.
4. Test the Door: Open and close the door a few times to make sure everything is working smoothly.
Regular Maintenance for Door Hinges
Now that you’ve repaired your hinge, you might be wondering how to keep it in good shape. Regular maintenance can extend the life of your hinges significantly. Here’s how to keep them running smoothly:
– Lubrication: Use a little lubricant or WD-40 on the hinges to reduce friction and noise. Just a few drops can work wonders!
– Check for Rust: If you notice any rust, it might be time to replace the hinge. Rust can weaken the metal and lead to further damage.
– Regular Inspections: Make it a habit to check your hinges every few months. Look for any signs of wear and tear, and tighten screws before they become problematic.
By being proactive, you can save yourself the headache of dealing with more serious issues down the line.
Repairing a door hinge that has been damaged by force may seem like a challenging task, but with the right approach, it’s entirely manageable. Whether you’re straightening a bent hinge, replacing a damaged one, or simply tightening loose screws, these steps can help restore the functionality of your door.
Remember, taking care of your door hinges with regular maintenance can save you time and effort in the long run. So, next time you face a door issue, just think of it as another chance to dance with those hinges, ensuring your home remains a place of ease and comfort. Happy repairing!