You might wonder why the strike plate even matters. Well, imagine the strike plate as the door’s best friend, holding everything in place and keeping your home secure. When it’s misaligned, you can end up with a door that either won’t lock or, worse, one that’s easy to push open. So let’s roll up our sleeves and get into it!
Understanding Door Frames and Strike Plates
Before we jump into the repair process, it’s crucial to understand what a strike plate is and its role in a door’s operation. The strike plate is a small metal piece mounted on the door frame that receives the latch from the door. When the door is closed, the latch fits into the strike plate, keeping your door securely shut. If the hole for the strike plate is drilled incorrectly, it can lead to all sorts of issues, like difficulty closing the door or it popping open unexpectedly.
You might be thinking, “How does this even happen?” Well, mistakes can occur during installation or even if the door frame shifts over time due to weather changes. Even small variations can throw off the alignment. Here’s where our repair journey begins.
Gathering Your Tools and Materials
Before diving into the repair, gather everything you’ll need. Here’s a handy list to set you up for success:
- Wood filler
- Drill and drill bits
- Screwdriver
- Tape measure
- Level
- Sandpaper
- Paint or stain (optional)
Having the right tools makes all the difference. Picture trying to bake a cake without a mixing bowl—frustrating, right? With these tools, you’ll be ready to tackle the problem step-by-step.
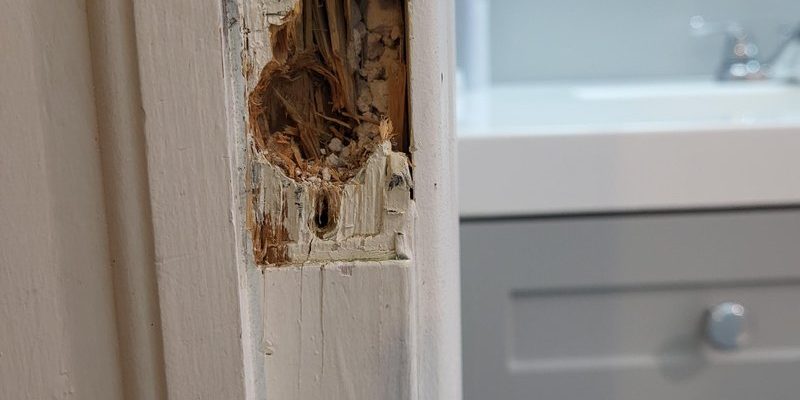
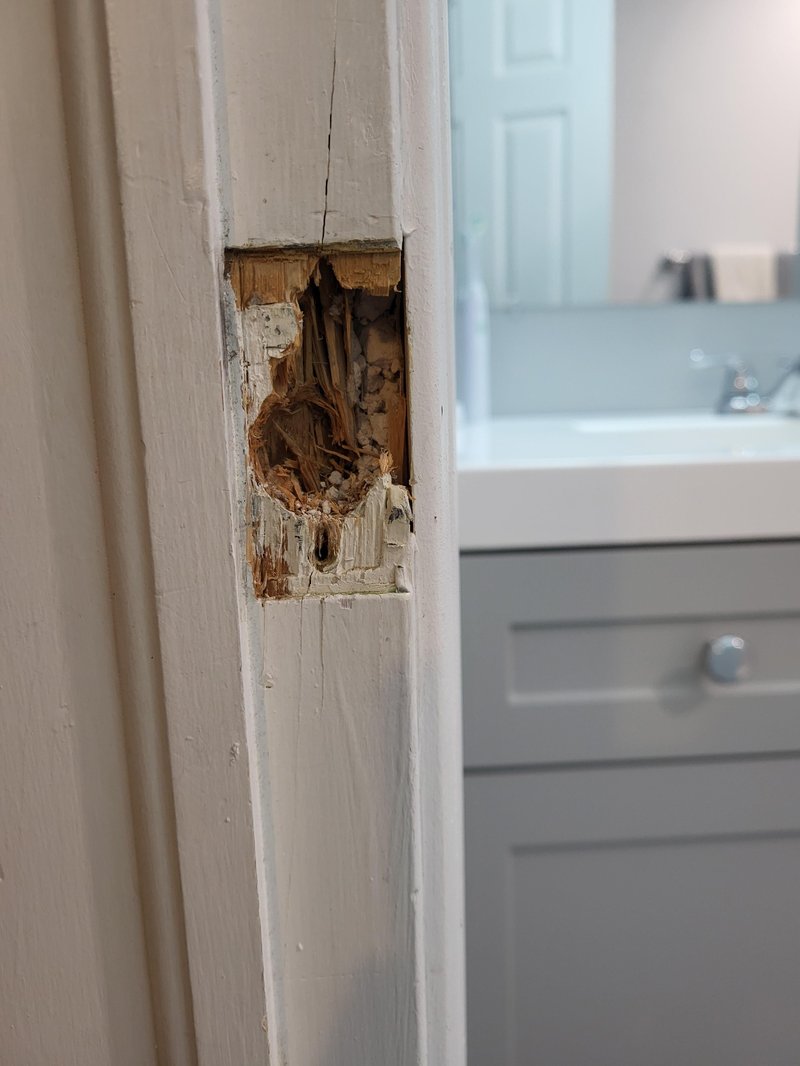
Assessing the Damage
Now that you have your tools, let’s assess what we’re working with. Start by inspecting the door frame and the strike plate area closely. Is the hole too high, low, or off to the side? Take notes on how far out of alignment the strike plate is.
Once you’ve pinpointed the issue, check to see if the latch from the door can even reach the strike plate. If it’s significantly misaligned, you might need to move the strike plate entirely. If it’s just a small shift, you might be able to adjust it without relocating. Think of it like diagnosing a problem; the clearer your assessment, the easier the fix.
Filling the Incorrect Hole
If the strike plate is way off, you might have to fill the incorrect hole before making a new one. This is where wood filler comes in.
1. Clean the Area: Start by cleaning out any debris or loose wood from the hole.
2. Apply Wood Filler: Use a putty knife to apply the wood filler into the hole. Make sure it’s packed in tightly.
3. Let it Dry: Follow the instructions on the wood filler product for drying time. This usually takes a few hours.
4. Sand It Down: Once dried, sand the area smooth with sandpaper. You want it to be flush with the rest of the door frame.
This step is crucial because if you don’t fill the incorrect hole properly, it can lead to complications down the line. You’ll want a solid foundation for the new hole to ensure everything stays secure.
Drilling the New Strike Plate Hole
After the old hole is filled and sanded, it’s time to drill a new hole for your strike plate. Here’s how to do it:
1. Measure Carefully: Using your tape measure, mark the spot where the new hole should be. Check that it aligns with the latch on the door.
2. Use a Level: To ensure everything is straight, hold a level against your mark. Adjust as necessary.
3. Drill the New Hole: Use a drill bit that matches the size of the screws for your strike plate. Drill the new hole carefully, making sure it goes in straight.
Take your time with this step. A clean hole will allow for a proper fit, so you won’t have to redo it later.
Installing the New Strike Plate
Now comes the satisfying part—installing the new strike plate!
1. Position the Strike Plate: Align it with the new hole you’ve drilled, making sure it’s level.
2. Screw It In Place: Using your screwdriver, attach the strike plate with the screws. Make sure they’re snug, but don’t over-tighten as this could warp the plate.
3. Test the Door: Close the door and check if the latch fits into the strike plate smoothly. If it doesn’t, you may need to make adjustments.
This is the moment when your efforts pay off! If everything is in place, your door should now operate smoothly and securely.
Final Touches
With the strike plate installed, don’t forget to add some finishing touches. If you used wood filler, you might want to paint or stain the area to match the rest of the frame. It’s those little details that make a big difference in how polished your repair looks.
While you’re at it, consider checking the rest of your doors. If one door frame had issues, others might too. A little preventive maintenance can go a long way.
Why Proper Installation Matters
You might be wondering why it’s so crucial to get the strike plate right. Besides keeping your door functional, a properly installed strike plate ensures your home is secure. A door that opens easily can be an invitation for unwanted guests.
Overall, fixing a door frame where the strike plate was drilled incorrectly isn’t just about aesthetics—it’s about safety and functionality. Taking the time to do it right can save you headaches down the line.
As you reflect on this process, remember that every home repair you tackle builds your skills and confidence. So, the next time you hear that *click* of the door latch, know that you had a hand in making that sound happen!
Now go ahead and put your new skills to the test! Whether it’s this repair or another around the house, you’ve got this.