Repairing a door frame where the strike plate is damaged might seem like a daunting task, but it’s easier than you might think. You don’t need to be a professional carpenter to tackle this project. With some basic tools and a little patience, you can have your door working like new again. Let’s walk through the steps together, so you can confidently restore your door frame and strike plate.
Understanding the Strike Plate’s Role
Before diving into repairs, it helps to understand what the strike plate is and what it does. The strike plate is a simple metal plate installed on your door frame, designed to receive the latch from the door. When the door is closed, the latch fits into the hole in the strike plate, holding the door securely shut.
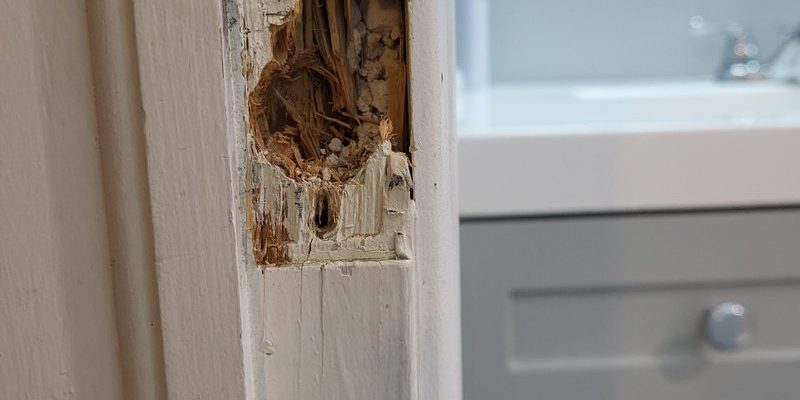
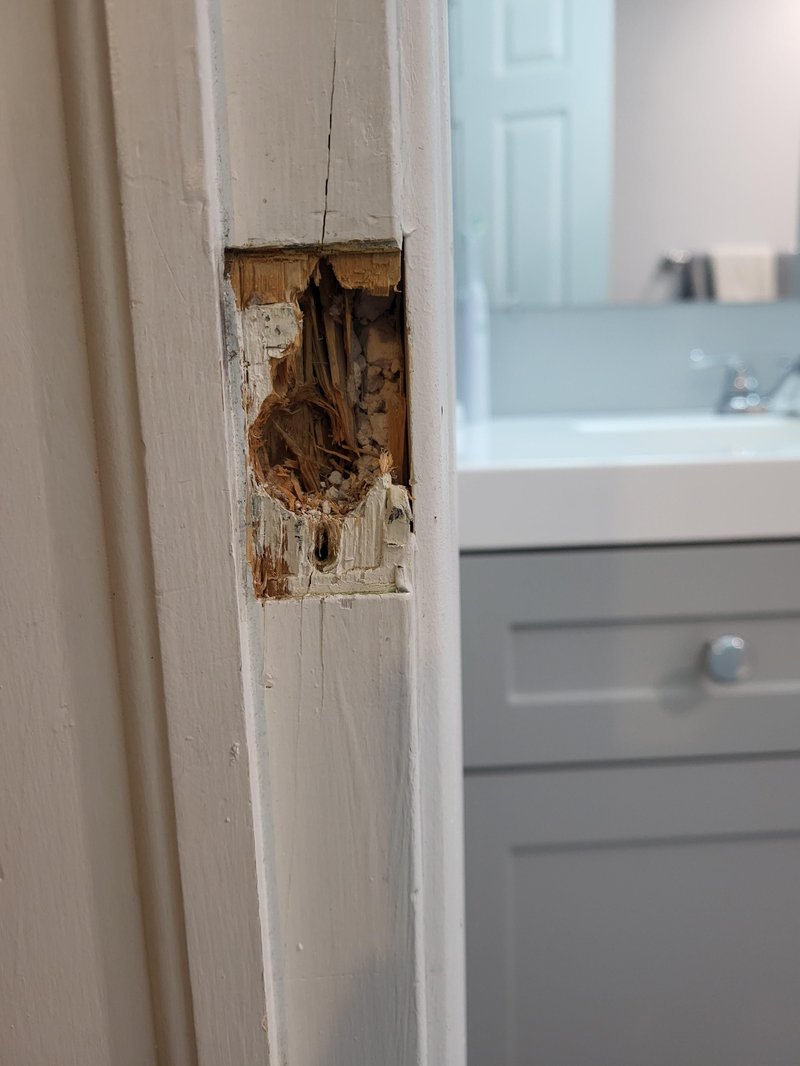
When the strike plate is damaged—perhaps it’s bent, cracked, or even missing—it can lead to issues like the door not closing properly or the latch failing to engage. This can compromise your home’s security and make it inconvenient to enter and exit. So, it’s crucial to check the condition of your strike plate regularly.
You might be wondering how to recognize a damaged strike plate. Look for signs like the latch not catching, gaps between the door and the frame, or visible wear on the plate itself.
Assessing the Damage
The next step is to assess the extent of the damage to both the strike plate and the door frame. This is essential because it determines how you’ll proceed with the repair. Here’s how to do it:
1. Inspect the Strike Plate: Check for any bends, cracks, or if it’s missing entirely. If the plate is only slightly bent, it may be possible to straighten it out with pliers.
2. Examine the Door Frame: Look for any damage around the area where the strike plate is mounted. If the wood is splintered or cracked, you’ll need to address that before installing a new strike plate.
3. Test the Door’s Functionality: Close the door gently to see how it interacts with the strike plate. Does the latch click into place? If not, that’s a clear sign there’s something wrong that you’ll need to fix.
Gathering Your Tools
Now that you know what you’re dealing with, it’s time to gather the tools you’ll need for the repair. Here’s a handy list:
- Flat-head screwdriver
- Philips screwdriver
- Pliers (if the strike plate is bent)
- Wood filler (if the frame is damaged)
- New strike plate (if the old one is too damaged)
- Drill (optional, if new screws or holes are required)
- Measuring tape
Having these tools ready will make the repair process smoother. You might think that some of these tools are optional—maybe you’ve got a friend with a drill you can borrow—but having everything at hand will save you time and stress.
How to Remove the Damaged Strike Plate
Removing the damaged strike plate is straightforward and critical to starting your repair. Here’s how you can do it:
1. Unscrew the Existing Plate: Use a Philips screwdriver to remove the screws holding the strike plate in place. Be careful not to strip the screws as they might be old or rusted.
2. Take Off the Plate: Once the screws are out, gently pull the plate away from the frame. If it’s stuck, a bit of wiggling should do the trick.
3. Check for Debris: After the plate is removed, examine the area for any debris, dust, or old paint that could interfere with a new installation. Clean this area thoroughly with a cloth.
Repairing the Door Frame
If you found damage to the door frame, your next step is to repair it before installing a new strike plate. Here’s how to do it:
1. Use Wood Filler: For small cracks or holes, apply wood filler directly into the damaged area. Smooth it out as you would with icing on a cake. Allow it to dry according to the manufacturer’s instructions.
2. Sand the Area: Once the filler is dry, sand it down until it’s flush with the surrounding wood. This helps the new strike plate sit properly.
3. Repaint or Stain: If the repair is visible, consider repainting or staining the area to ensure it matches the rest of the door frame. This step isn’t strictly necessary, but it can improve the overall look.
Installing a New Strike Plate
Now that you’ve prepared the frame, it’s time to install that shiny new strike plate. Follow these steps:
1. Position the New Plate: Align the new strike plate over the hole where the latch would go. Make sure it fits snugly and is level with the door frame.
2. Mark the Screw Holes: Using a pencil, mark where the screw holes on the strike plate should be on the frame. This will guide you when you’re ready to drill.
3. Drill Pilot Holes: If you need to create new holes for the screws, use a drill to make pilot holes where you marked. This will help prevent the wood from splitting.
4. Screw in the New Plate: Finally, attach the strike plate with screws. Don’t overtighten, as this may cause the frame to crack again. Just make it snug enough to hold securely.
Testing the Door
Once everything is installed, it’s time to put that hard work to the test. Here’s how:
1. Close the Door: Gently close the door and listen for the latch. It should click into the strike plate without any resistance or awkward movements.
2. Check for Alignment: Make sure there are no gaps between the door and the frame. If it’s misaligned, you may need to adjust the strike plate or the door hinges slightly.
3. Repeat as Necessary: If everything works smoothly, celebrate! If not, you might need to double-check your installation to ensure the door frame and strike plate fit together correctly.
Maintaining Your Door Frame
Now that you’ve successfully repaired your door frame and strike plate, it’s important to maintain it to prevent future issues. Here are some tips:
- Periodically check the strike plate and frame for any signs of wear.
- Keep hinges lubricated to ensure the door opens and closes smoothly.
- Address any small issues before they turn into bigger problems.
By regularly inspecting your door and maintaining the components, you can keep everything functional and secure for years to come.
Repairing a door frame where the strike plate is damaged doesn’t have to be a hassle. With a little effort and some basic tools, you can handle it on your own. Not only does this save you money, but it also gives you a sense of accomplishment. Now you can confidently tackle future home repairs, knowing you’ve got the skills to maintain your door effectively.