You’re not alone if you’ve been there. Whether you’re working on a wooden door or a metal frame, this issue can crop up for various reasons. Maybe the door was poorly installed, or perhaps it’s just aged over time. Thankfully, fixing a door frame with this problem doesn’t require a degree in carpentry; it’s a DIY job that you can tackle with some basic tools and a little know-how.
Identifying the Problem with the Hinge Mortise
Before diving into the repair, it’s crucial to understand what’s causing the issue. A hinge mortise is the indentation in the door frame where the hinge sits. If it’s too deep, the hinge won’t hold the door properly, leading to misalignment and unwanted gaps. You might notice the door sticking or the screws pulling out, which can be frustrating.
To start, check how the door aligns with the frame. If it leans or doesn’t close all the way, that’s a sign the mortise might be too deep. Get a straight edge, like a ruler or a level, and place it along the door’s edge. If there’s a noticeable gap, you’re looking at a hinge mortise issue. Sometimes it’s subtle, but over time, even a small gap can lead to bigger problems.
Another thing to consider is the type of hinge you’re using. For instance, residential doors usually use butt hinges, while heavier doors might require continuous or piano hinges. If you’ve swapped hinges recently, make sure you have the right size for your mortise. A mismatch can exacerbate the depth issue.
Tools You’ll Need for the Repair
Now that you’ve pinpointed the problem, it’s time to gather your tools. You won’t need a full workshop, just a few essentials that can make the job easier. Here’s a quick list:
- Wood filler or epoxy putty for filling in the deep mortise.
- Chisel (preferably a 3/4 inch one) to reshape the mortise if needed.
- Screwdriver for your hinges.
- Paint or stain to touch things up after the repair.
- Sandpaper to smooth over any rough edges.
Having these tools ready will make the process smoother. Honestly, you don’t need to be a pro to fix the hinge mortise, but having the right tools can save you a lot of time and hassle.
Filling the Deep Mortise
Once you’ve gathered your tools, it’s time to tackle the repair. If the mortise is too deep, you’ll want to fill it so that the hinge has something solid to hold onto. Here’s how to fill a deep mortise:
1. Clean Out the Mortise: Use your chisel to remove any loose or splintered wood. Be careful not to widen the mortise; you just want a clean surface.
2. Apply Wood Filler or Epoxy Putty: Follow the instructions on your wood filler or epoxy. Typically, you’ll want to mix it if using epoxy. Fill the mortise completely, making sure it’s packed in tightly. Leave a little excess above the mortise since it will shrink as it dries.
3. Smooth It Out: Once filled, use your putty knife to smooth the surface. This will help it blend with the surrounding wood.
4. Let It Cure: Be patient and let the filler dry completely. This can take anywhere from a few hours to overnight, depending on the product.
This process will create a solid base for your hinge screws. You might be wondering why this step is crucial—without a filled and stable mortise, your door will continue to misalign.
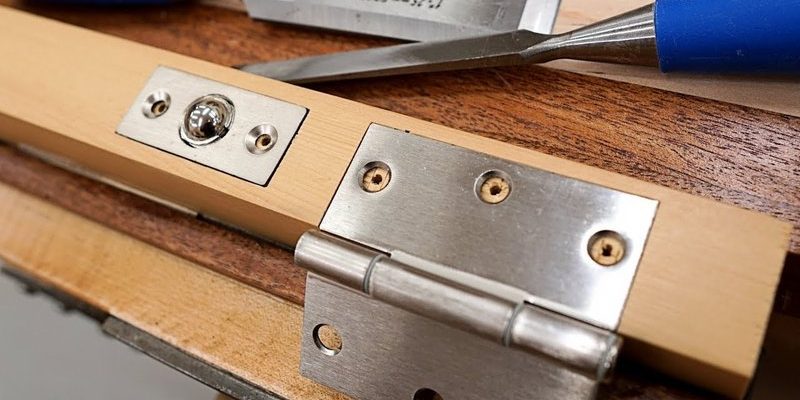
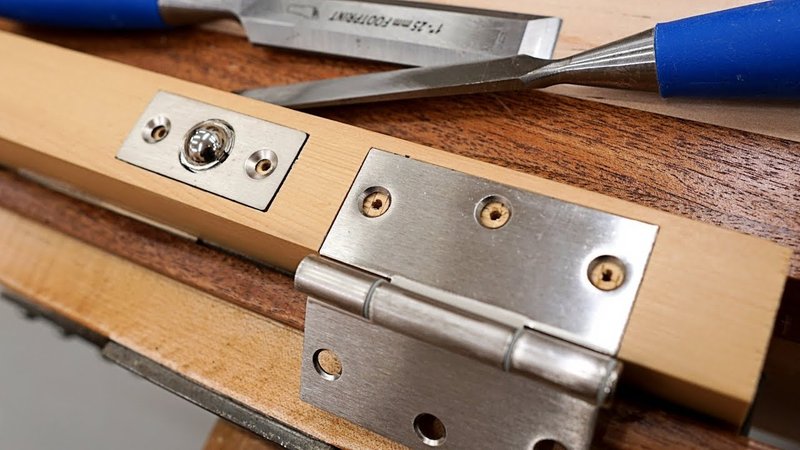
Repositioning the Hinge
After the filler has dried and cured, it’s time to reset your hinge. First, look at the original hinge placement and determine if it’s correct. If the mortise was too deep, you might want to position the hinge slightly higher to avoid future issues. Here’s how to do this:
1. Mark the New Hinge Position: Using a pencil, outline where you want the hinge to sit, or you can use the original holes as a guide.
2. Drill New Pilot Holes: If you’re moving the hinge, carefully drill new pilot holes in the wood filler. This step is vital because it prevents the wood from splitting.
3. Attach the Hinge: Place the hinge over the pilot holes and use the screws to secure it. Start with the top screw and work your way down to ensure it sits flat.
4. Check the Door Alignment: Fully open and close the door a few times to test for smooth operation. It should open and close without sticking or wobbling.
Repositioning the hinge can often solve misalignment issues without requiring a complete door replacement. If everything feels good, you’re on your way to a properly functioning door!
Touching Up the Repair
Once you’ve successfully repositioned the hinge, it’s time to make your repair look seamless. After all, a good-looking door adds to your home’s charm. Here are some steps you can take:
1. Sand the Area: Once the filler is dry, use sandpaper to smooth out any rough spots. This step ensures a clean surface for painting.
2. Paint or Stain: Match the color of your door as closely as possible. Apply paint or stain with a small brush for precision. If you’re using a stain, make sure to follow the manufacturer’s instructions regarding drying times.
3. Final Touches: After the paint or stain dries, consider reapplying a coat of clear sealant for durability. This can protect against future damage and increase the lifespan of your repair.
Taking these steps not only ensures that your repair is functional but also keeps your door looking great. You want your home to feel welcoming, and a well-maintained door plays a big part in that.
Preventing Future Issues with Hinges
Now that you’ve fixed your door frame, it’s essential to consider how to prevent similar issues in the future. Here are some tips to keep your hinges and mortises in good shape:
- Regular Maintenance: Check your hinges periodically for any signs of wear or loosening. Tightening screws can prevent misalignment.
- Use Proper Hinges: Make sure you’re using the right sized hinge for your door. This can make a world of difference in stability.
- Monitor Door Usage: If you have kids or pets, be mindful of how they open and close doors. Sometimes rough handling can damage hinges.
Taking these preventative steps will help keep your door functioning well for years to come. It’s all about being proactive to avoid another repair down the line.
Repairing a door frame where the hinge mortise is too deep might seem daunting at first, but with the right tools and a step-by-step approach, it’s a task you can handle. Just like any project around the house, it’s about taking the time to understand the problem, gathering what you need, and following through with care.
Remember, filling the moritse correctly and ensuring your hinge is securely attached can restore your door to its intended function. And if you keep an eye on maintenance, you can prevent similar issues in the future. So roll up those sleeves, and don’t hesitate to take on this home repair challenge—it’s all part of making your space the best it can be!