If you’ve got a brand like M-D Building Products or Frost King installed, you’ll know these sweeps are built to last, but no door bottom sweep can stand up to years of kicking, vacuuming, and temperature swings forever. Here’s the thing: fixing a door sweep broken at the ends isn’t just about patching up a small gap. It’s about restoring the barrier that protects your home from the elements. And, honestly, the fix is simpler than most folks think—even if you’ve never done any door repair before.
Why Door Bottom Sweeps Break at the Ends
Let me explain why the ends of door bottom sweeps are usually the first to go. The edges of the sweep take the brunt of all the action. Every time you open or close the door, those ends rub against the frame or threshold. Add in constant foot traffic, pets scratching, and the occasional bash from a vacuum cleaner, and it’s no wonder the material starts to split, curl, or crack at the tips.
You might be wondering if this is just a cosmetic issue. Far from it. When the ends are damaged, the seal is compromised in the most vulnerable spots. Drafts sneak through faster, bugs find an easy entry, and, if you’re unlucky, the next rainstorm could push water where it definitely doesn’t belong. Over time, what starts as a small tear at the ends can split down the length, ruining the entire sweep.
If you’re like most homeowners, you might try sealing the ends with tape or a glob of caulk, but those fixes only last so long. To really solve the problem, you need to tackle the sweep itself—either by reinforcing or replacing the damaged section.
Spotting the Signs of a Broken Door Bottom Sweep
Before you dive into repairs, it’s worth confirming that the sweep is really the issue. Sometimes the problem can look subtle. Have you ever noticed tiny specks of daylight at the bottom corners of your closed door? Maybe you feel a faint draft or spot dust collecting along the edges—these are classic signs the sweep’s ends are shot.
Other times, the clues are more obvious. Check for:
- Visible cracks or splits at the ends of the rubber or vinyl sweep.
- Curling or missing pieces where the sweep should cover the threshold.
- Unusual noises—like scraping or whistling when the door moves.
- Light or bugs sneaking in at the corners, even when the door looks closed tight.
Here’s the thing: Sometimes, the sweep pulls loose from the mounting channel, especially with sweeps that slide in. If you notice the ends shifting out of place, don’t just push them back—check for a tear or break that’s causing it. Addressing the root cause now will save you more repairs later.
Choosing the Right Door Sweep Replacement
If your sweep is simply broken at the ends, you might be tempted to patch it with some tape or glue. While that can work as a temporary fix, a proper replacement is usually best. Modern sweeps come in a variety of types—some are held on with screws, others slide into an aluminum channel, and some use adhesive backing. Honestly, you’ll want to match your new sweep to your door type and usage.
Here’s how to pick the right option:
- If you have a metal or fiberglass door, look for a slide-in vinyl sweep or an aluminum U-channel sweep with replaceable inserts.
- For wood doors, a nail-on or screw-on sweep usually works best. These provide a sturdier hold, especially on older doors.
- If you want something quick, adhesive sweeps can work—but they’re usually less durable where the ends are most at risk.
Measure the width and thickness of your door, and check the distance from the bottom of the door to the threshold. Brands like M-D Building Products and Frost King even offer universal kits that can be trimmed to fit. Just remember, if your sweep includes a plastic rigid strip, also check that the profile matches what you already have; it’ll save you a headache during install.
Step-by-Step: How to Remove an Old Door Sweep
Here’s where you roll up your sleeves. If you’ve never tackled a door repair before, don’t stress. Removing an old, broken sweep is usually straightforward, but there are a couple of tricks.
- First, open the door fully so you can see and reach the sweep easily. Prop it open with a wedge if needed.
- If your sweep is nailed or screwed on, use a screwdriver or drill to take out the fasteners. Keep them in a cup—you might need them again.
- For slide-in sweeps, there’s usually a groove along the bottom edge. Grab the sweep at one end (the least broken side if possible) and gently pull or tap it free. If it’s stuck, try wiggling it side-to-side or carefully prying with a flathead screwdriver.
- If you run into resistance, especially at the broken ends, don’t yank. Instead, cut away the stubborn parts with a utility knife until the sweep slides out.
Once the sweep is off, scrape away any old adhesive and dirt. A clean surface makes everything easier when it’s time to install the new sweep.
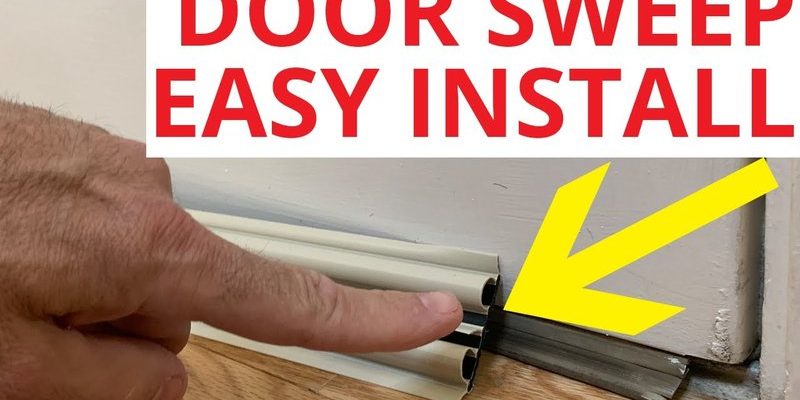
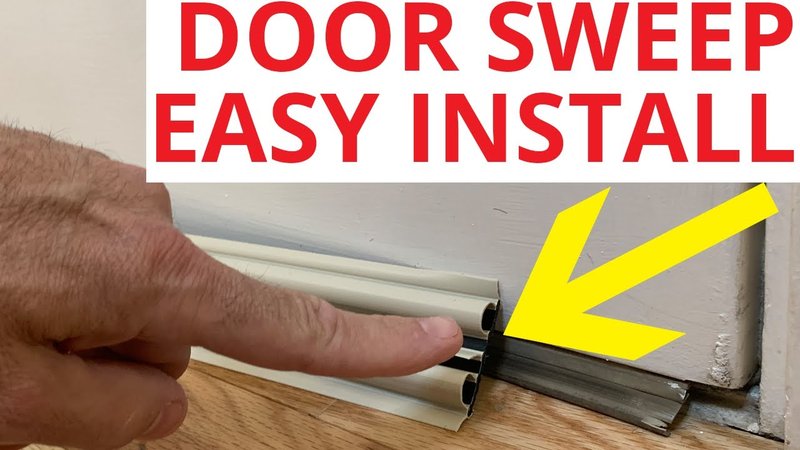
How to Install a New Door Bottom Sweep
Now for the fun part: actually restoring your door’s “weather shield.” Installing a new sweep isn’t tricky, but it pays to go slow and double-check your alignment.
- Hold the new sweep alongside the door to check the length. Most sweeps are made to be trimmed, so grab a hacksaw or utility knife if it’s a little too long. You want the ends flush with the door’s edges—no overhang.
- If you’re using a slide-in sweep, line up the groove on the door with the edge of the sweep. Gently push or tap it in place. If it doesn’t slide smoothly, a little soapy water can help.
- For screw-on or nail-on sweeps, hold the sweep against the bottom of the door and mark the screw holes with a pencil. Pre-drill if necessary, then attach the sweep snugly—but not so tight that it warps or binds.
- With adhesive sweeps, peel off the backing and press the strip firmly into place, starting at one end and working across.
Tip: The sweep should lightly contact the threshold, not drag or bunch up. Open and close the door a few times to check for smooth movement. If you hear scraping or see the sweep folding under, loosen or reposition it.
Reinforcing the Ends of Your New Door Sweep
You might be wondering—if the ends broke before, how do I keep that from happening again? Here’s a trick many pros use: reinforce the ends with a dab of strong adhesive or flexible sealant after installation. This holds the ends in place, even if they take a beating from shoes or vacuums.
- Choose a waterproof, flexible adhesive (like clear silicone caulk or construction adhesive).
- Apply a small bead where the end of the sweep meets the door edge. Smooth it in with a gloved finger to seal gaps.
- Let the adhesive cure fully before testing the door. This gives the ends extra grip and reduces stress at those weak spots.
Pro insight: If your sweep uses a plastic or metal retainer, trim the new insert slightly shorter than the retainer. That way, the rigid part can shield the flexible sweep from getting snagged at the corners.
When to Replace vs. Repair a Door Sweep
Let’s face it—not every broken sweep needs a full replacement. Sometimes, only the ends are damaged, and you can get away with a patch or partial repair.
If you’re in a pinch:
- Use a high-quality weatherproof tape to cover small cracks. It’s not pretty, but it’ll block dust and bugs until you can swap the sweep out properly.
- If your sweep slides in, you might be able to trim off the damaged ends and shift the sweep over. Not perfect, but it restores the seal until you replace it.
- For screw-on types, try cutting a small piece from a matching old sweep and overlap or fit it at the end as a makeshift patch.
But here’s the thing:
If the sweep is brittle, missing large sections, or causing the door to stick, it’s time for a full replacement. A fresh sweep restores energy efficiency and stops all the tiny annoyances at once.
Trying to patch up a seriously damaged sweep is like taping up holes in your favorite socks—it works for a day, but they’ll never be quite right again.
Comparing Door Sweep Brands and Types
There are a lot of sweep options out there, and picking the right one can feel overwhelming. Honestly, most household doors are happiest with universal or brand-specific replacements. Popular choices like M-D Building Products and Frost King offer a range of sweeps for wood, metal, and even custom-sized doors.
Here’s a quick rundown:
| Slide-In Vinyl Sweep | Easy to replace, great seal, but ends are more prone to sliding loose if not reinforced. |
| Screw-On Aluminum Sweep | Very durable, can be trimmed to size, lasts longer but takes more time to install. |
| Adhesive-Backed Sweep | Easiest to install, but less durable and can peel at the ends if exposed to water or heavy use. |
If you want a “set it and forget it” solution, go with an aluminum or screw-on sweep. If you need something fast, adhesive works for light-use doors or rentals. And if your door is oddly sized, look for universal sweeps that can be cut to fit.
Keeping Your Door Sweep in Good Shape
Now that your sweep is fixed, a little maintenance goes a long way. Honestly, most people forget the sweep even exists until there’s a problem. But a quick check every few months will save you future hassles.
- Vacuum or wipe the sweep and threshold area regularly to avoid dirt buildup that causes wear.
- If you spot a crack forming, add a dab of flexible sealant right away to prevent it from growing.
- Make sure the door alignment is correct—the sweep should just touch the threshold, not scrape or stick.
- Replace the sweep every few years or sooner if you live somewhere with harsh weather.
Maintaining a healthy door sweep is like replacing batteries in your smoke detectors—it’s a tiny job that prevents way bigger problems down the road.
Wrap-Up: Why Fixing a Broken Door Bottom Sweep Is Worth It
Fixing a door bottom sweep that’s broken at the ends isn’t just about comfort—it’s about protecting your space from drafts, pests, and moisture. Whether you’re patching it up with a quick fix or swapping in a heavy-duty replacement, you’re improving your home’s energy efficiency and peace of mind.
The process is straightforward, even if you’ve never tackled a repair before. With some patience and the right tools, you’ll have your door sealed up tight and working like new. Trust me, once you feel the difference (and stop hearing that annoying whistle), you’ll wish you had done it sooner.