Let’s break it down together. You don’t need fancy tools, and you definitely don’t have to replace the entire door just because one hole is loose. Whether you have a Schlage, Baldwin, or even a budget-brand kick plate, the steps are simple and work on almost any door type. Honestly, knowing how to repair a damaged screw hole comes in handy for all sorts of small home fixes—once you get the hang of it, you’ll see.
Why Screw Holes Get Damaged When Installing Kick Plates
Most doors are made from wood, MDF, or sometimes metal with a wooden core. Over time, each of these materials can wear out where screws attach things like kick plates, handles, or remotes. When you install or replace a kick plate, you may find that a screw hole has become *stripped*—meaning the threads inside the hole are worn out.
Constant opening and closing puts stress on those screws. Sometimes, if you overtighten them (we’ve all done it, let’s be real), you chew up the wood fibers inside the hole. Other times, repeated attempts at installing or removing the plate make things worse. That can leave you with a hole that’s way too large for the screw, which means it can’t grip and hold the kick plate tight.
A damaged screw hole matters because if the kick plate isn’t secure, it’s not protecting your door. Plus, a loose plate just looks unfinished—and if you have little ones or pets, it can be a safety issue. This is one of those small problems that’s easy to ignore until it becomes a hassle every time the door swings open. Let me explain how you can tackle it head-on.
Common Problems You’ll Notice With Damaged Screw Holes
If a screw won’t stay tight, or if it just spins and spins but never really grabs, you’re probably dealing with a stripped hole. Sometimes, the screw will go in partway and then suddenly lose all resistance. You push a little harder, hoping it’ll catch, but the result is often worse—the screw head ends up flush, but the whole thing feels wobbly.
You might also spot issues like:
- The screw falls out whenever you open or close the door.
- The kick plate rattles or visibly shifts around, making an annoying sound.
- The hole looks chewed up, or you can actually see splinters or crumbling wood around it.
Here’s the hard truth: ignoring these signs usually means the problem gets worse. The larger the hole becomes, the less likely a simple fix will work. And when it comes to troubleshooting other door hardware (think remotes for smart locks, battery panels, or keypads), a bad screw hole can cause all kinds of sync and reset headaches, too. It’s always better to address this before it turns into a door you can’t safely use.
Supplies You’ll Need to Fix a Damaged Screw Hole
You don’t need to raid a hardware store or own a pro repair kit to fix a stripped screw hole. Most of these supplies are probably hiding in your garage or toolbox already. Here’s the short list:
- Wood glue or carpenter’s glue (for wood doors)
- Toothpicks, wooden dowels, or matchsticks
- Hammer and utility knife
- Drill with bits
- Replacement screws (sometimes a size up)
- Sandpaper
If you’re working with a metal door, you might need a little bit of epoxy filler instead of wood glue and sticks. And if you really want to do it right, a simple wood filler or dowel repair kit (found at most hardware stores) works for pretty much any standard or universal-sized kick plate screw. Honestly, don’t over-complicate it. Half the battle is just having the materials ready.
Step-by-Step: How To Repair a Stripped Screw Hole for a Kick Plate
Here’s where we get into the meat of it. Slow down, grab some coffee, and work through the steps. No need to rush—doing this right the first time saves you from future sync issues (with your smart lock remote) or endless troubleshooting down the road.
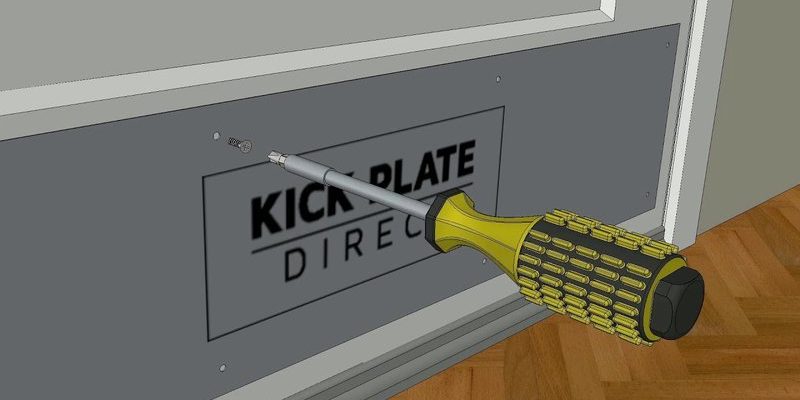
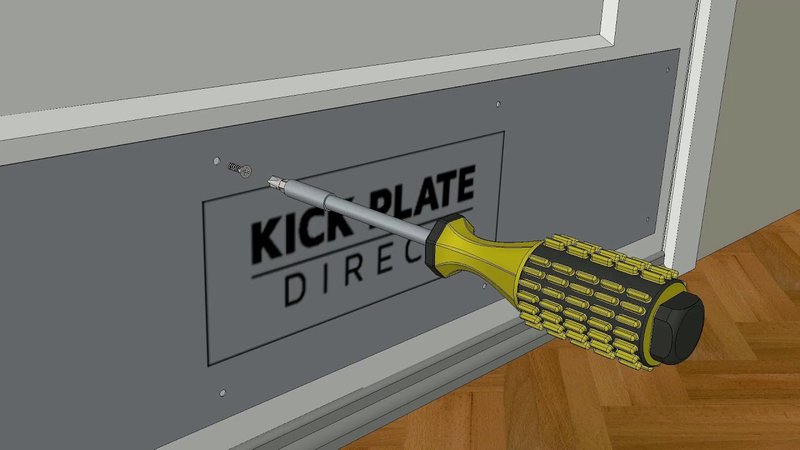
1. Remove the Kick Plate and Clean the Hole
Carefully unscrew and remove the kick plate if it’s hanging loose. You don’t want to try fixing the hole with everything still attached. Once it’s off, clear away any debris, crumbling wood, or glue residue. Sometimes a quick pass with sandpaper helps smooth things out.
2. Fill the Hole With Wood (or Filler)
If it’s a wood door, this is the classic fix—grab a few toothpicks or matchsticks, dab them in wood glue, and then wedge them into the stripped hole. You want them packed tight, so don’t be shy about adding a few extra. Snap or cut them flush with the door surface. For a larger hole, a wooden dowel (with a bit of glue) works even better. For metal or hollow-core doors, mix up a little epoxy and fill the hole, following package directions.
3. Let the Filler Dry Completely
Here’s where patience pays off. Let the glue or filler set according to its instructions. Rushing means the repair won’t hold, and you’ll be right back where you started. Usually, this takes about 30 minutes for wood glue, but overnight is ideal if you can wait.
4. Drill a New Pilot Hole (Optional but Helpful)
Using a drill bit the size of your screw (or a little smaller), make a *pilot hole* in the filled area. This makes it much easier for the screw to “grab” when you reinstall the kick plate. If you skip this, you risk splitting the wood again.
5. Reattach the Kick Plate With a Screw
Now, line up the kick plate and drive the screw in. You should feel it catch firmly—no spinning, no fuss. If the old screw was damaged or seems too small, swap it for a slightly larger one. This helps make the repair even more secure. Check that everything feels solid and aligned. That’s it!
Here’s an insight: This simple method also works for other stripped hardware spots, like remotes, cabinet handles, or switch plates. It’s one of those repairs that makes you feel handy—for real.
Other Methods for Bigger or Repeatedly Damaged Holes
Sometimes, you find a screw hole that’s so big or damaged, the toothpick trick just isn’t cutting it. Or maybe you’ve tried patching it before and nothing seems to last. In these cases, you have a couple of alternatives.
One option is the dowel and glue method. This involves drilling out the damaged hole to fit a wooden dowel (about the diameter of your pinky), gluing it in place, letting it dry, and then drilling a fresh hole for the screw. It’s more work, but it creates a brand-new “anchor” in the door, almost as sturdy as the original.
For metal or hollow doors, look for epoxy hole fillers. These come as a putty or two-part mix, and once cured, you can drill into them just like wood. They’re especially useful if you’re mounting remotes, battery packs, or anything that will need to be synced or reset regularly, since you want those screws to hold without wobbling.
Finally, you can buy threaded inserts or repair kits at hardware stores. These let you create a permanent metal thread inside the hole—a great fix if you find yourself troubleshooting this same spot again and again. Is it overkill for a single kick plate install? Maybe. But if you’re a fixer at heart, it’s good to know your options.
How To Avoid Damaged Screw Holes Next Time
Now that you’ve fixed it, it’s smart to think about prevention. The main cause of stripped screw holes is overtightening. We all want things snug, but cranking down with all your might just destroys the threads. Instead, tighten screws firmly, but stop as soon as they’re flush.
If you’re adding anything else to your door—like a universal mount, a smart lock, or a remote battery pack—try to use existing holes or pre-drill pilot holes. This reduces splitting and keeps everything tight for years. Choose the right screw length, too: too short, and it won’t hold; too long, and you risk poking through or damaging the door from the inside.
Regularly check your kick plate and hardware every time you clean your door or change out batteries on your remote keypad. A quick touch-up now saves a headache later. Honestly, the more proactive you are, the less you’ll have to think about these tiny fixes.
Comparing Quick Fixes vs. Permanent Repairs
You might be tempted to just grab some glue, jam in a toothpick, and call it a day. Sometimes, that’s all you need—especially if it’s a single installation and the door doesn’t get much use. For rental properties or budget repairs, a quick fix can last for years without a problem.
But here’s the thing: for high-traffic doors, or if you’re installing a kick plate on a main entryway you use every day, a more permanent repair is worth the extra five minutes. Using a wooden dowel, quality filler, or even a threaded insert means you won’t be troubleshooting this problem again any time soon. It’s kind of like resetting a remote or syncing a new device—sure, the quick hack works, but a proper setup lasts longer and saves you resets down the line.
So, weigh your options. If it’s a simple repair, start with the easy fix. If you keep having trouble, take the time for a stronger solution. You’ll thank yourself later.
Final Thoughts: Keeping Your Door And Kick Plate Secure For Good
Repairing a damaged screw hole when installing a kick plate isn’t rocket science, but it’s one of those little skills every homeowner should know. With a handful of supplies and a little patience, you can make sure your kick plate—and everything else on your door—stays snug and secure. Whether you’re working with fancy brands or something universal, these fixes work across the board.
And here’s a bit of reassurance: everyone runs into this kind of repair sooner or later, whether it’s trying to reset a stripped-out smart lock mounting hole or pair a new remote keypad. The good news? Each time, it’s a little easier. Next time you face a wobbly screw or a plate that just won’t stay put, you’ll know exactly what to do—and that’s a win in any homeowner’s book.