Repairing a cracked composite threshold isn’t as complicated as it might sound, especially with the right repair kit. Brands like Thermatru, Endura, and Pemko make repair kits designed for these situations, so you don’t have to replace the whole threshold. Instead, you fix only what’s needed, save time and money, and get a result that’s strong and looks good, too. Whether you’re a DIY newbie or just want to stop that crack from spreading, let’s break down how these repair kits work and how you can confidently handle the repair yourself.
What Causes Cracks in Composite Thresholds?
Here’s the thing: composite thresholds are built to take a beating—but they’re not invincible. Over time, a few things can lead to those frustrating cracks in your doorway.
For starters, temperature swings play a huge role. Composite materials may handle moisture better than pure wood, but they still expand and contract as seasons shift. That constant movement can eventually stress the threshold just enough for a hairline crack to appear. When you add in heavy foot traffic, slamming doors, or even shoving furniture over the threshold, the risk goes up.
Another big factor is moisture. Even though these thresholds are designed to resist rot, water seeping into small gaps or underneath can weaken the material. Over time, this can turn a tiny chip into a more significant split—especially if the threshold wasn’t perfectly sealed or if the weatherstripping is worn out.
Let’s not forget installation issues. Sometimes thresholds get installed with the wrong screws or don’t sit quite flush, leading to stress points that eventually crack under pressure. Or maybe the composite material was lower quality to begin with, making it more prone to damage. Honestly, once you spot a crack, it’s just a matter of time before it gets worse, especially if you live in a busy household.
Why Use a Composite Threshold Repair Kit?
You might be wondering, “Can’t I just slap on some wood filler or use duct tape and move on?” I get it—quick fixes are tempting. But with composite thresholds, those old-school patches rarely last. Here’s why a specifically designed repair kit is the better choice.
Composite threshold repair kits are tailored for the unique material properties of thresholds, blending strength, flexibility, and weather resistance. Unlike generic fillers, these kits usually include resins or epoxy that bond tightly to composite surfaces, so the repair doesn’t crack, warp, or pop out when you step over it.
Most kits from brands like Endura or Thermatru offer color-matched compounds, so when you’re done, the fix blends right in. Forget the “patched-up” look. The end result is durable enough to stand up to everyday use—no more catching your sock or tracking in splinters. Plus, these kits often come with all the tools you need, taking out the guesswork.
If you want a fix that lasts through every shoe, boot, or muddy paw that crosses your threshold, using a repair kit designed for the job just makes sense.
How Do Composite Threshold Repair Kits Work?
Let me explain how these kits actually fix the problem. Most composite threshold repair kits use a combination of epoxy resins and reinforcing materials that bond with the damaged area. Here’s what’s usually inside:
- Two-part epoxy or resin filler for strength
- Mixing stick and applicator for even spreading
- Sandpaper or smoothing tool
- Color pigment or paint for blending
- Sometimes, mold release sheets or putty knives
The repair process is pretty straightforward—think of it as mixing and frosting a cake, but for your doorway. After cleaning out the crack, you mix the resin and hardener, fill the crack, and smooth it over. Once it dries, a little sanding and touch-up paint help hide the repair. The material cures tough, so you’re not dealing with a soft patch that squishes under pressure.
What’s great is that even if you’re not handy, these kits are made for homeowners, not pros. The instructions are usually clear, and drying times are short. You can often walk on your newly repaired threshold within a day.
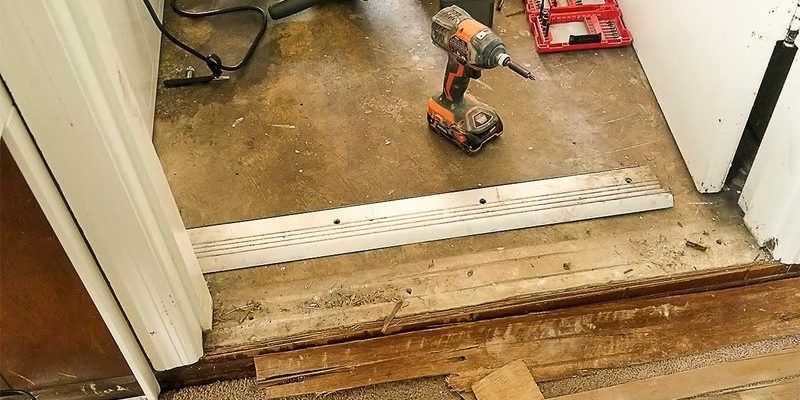
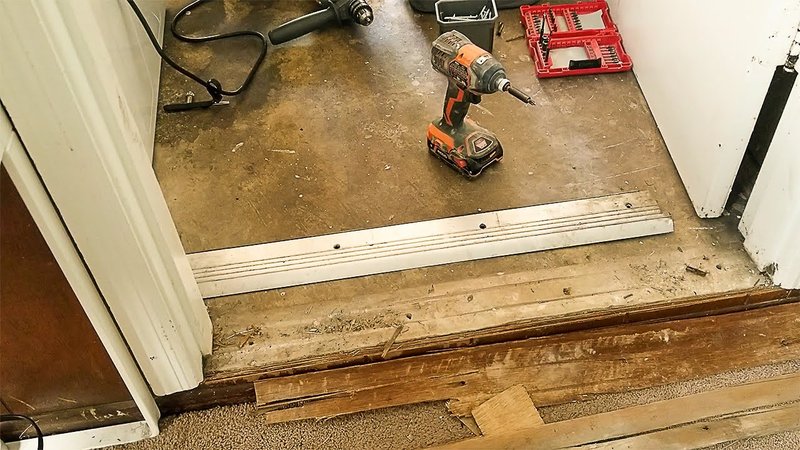
Step-By-Step: Repairing A Cracked Composite Threshold
Ready to jump in? Here’s a step-by-step guide for using a composite threshold repair kit. Remember to read your specific kit’s instructions, since brands like Pemko or Thermatru might have slight differences.
- Clean the crack. Use a vacuum and a damp rag to remove any dirt, debris, or loose material. If there’s paint or sealant in the crack, gently scrape it out.
- Prep the surface. Lightly sand around the crack to roughen the area. This helps the epoxy stick better. Wipe it clean afterward.
- Mix the epoxy. Following the kit’s instructions, combine the resin and hardener thoroughly. Work quickly—most epoxies set fast.
- Apply the filler. Use the included stick or putty knife to fill the crack. Slightly overfill, since epoxy might shrink a bit as it dries.
- Smooth and let cure. Smooth the surface with a tool or your finger (gloved, of course). Let the repair cure as directed—this can take a few hours to overnight.
- Sand and touch up. Once fully cured, sand the repair flush with the threshold. Add matching pigment or paint for a seamless finish.
That’s it! The most important part is patience—rushing the drying process can ruin all your hard work. Think of it as waiting for a cake to finish baking. If you step on it too soon, you’ll have to start over.
Troubleshooting Common Repair Problems
So what if things don’t go perfectly? Don’t worry, that’s normal. Composite threshold repairs can run into a few snags, especially if you’re new to the process.
If the epoxy won’t cure or feels tacky even after hours, you probably didn’t mix the two parts thoroughly. It’s easy to get impatient, but blending both ingredients evenly is what makes the bond strong. If needed, scrap off the sticky patch and try again with a fresh mix.
Sometimes, the repair stands out or feels rough. This usually means you didn’t sand it enough or skipped the color blending. Go back in with fine-grit sandpaper, then touch up with whatever pigment or paint your kit recommends. If you notice the patch sagging or shrinking, you may have underfilled it or applied too much at once. Multiple thin layers work better than one thick glob.
Most rookie mistakes are fixable, so don’t panic. The more patient and methodical you are, the better the end result will look—and the longer it’ll last.
When To Replace Instead Of Repair
Here’s the honest truth: not every threshold can be saved with a repair kit. Sometimes, the damage goes deeper than the surface crack you can see.
If you find the threshold feels soft, spongy, or bends when you step on it, the underlying support might be rotted or broken. In that case, a patch won’t hold. Likewise, if the crack is wider than a pencil or runs the entire length of the threshold, you’re usually better off replacing it. Persistent water leaks or visible mold are also signs you need a fresh threshold, not just a touch-up.
Still, for most small to moderate cracks—especially those less than six inches long and not gaping—a repair kit does the trick. If you’re torn between patching and replacing, stand back and look at the threshold’s overall shape and stability. If the repair kit feels like putting a bandage on a broken arm, it’s time to call a pro or swap out the whole piece.
Choosing The Right Repair Kit For Your Threshold
Not all composite thresholds are the same, and neither are the repair kits. It’s worth taking a few extra minutes to find one that matches your brand and color. Here’s what to look for:
- Brand-specific kits. If you know the manufacturer—like Endura, Thermatru, or Pemko—search for their recommended repair products. They’re usually the best match.
- Color compatibility. Some kits offer color options or pigment packs. Closest match is best, unless you plan on repainting the whole threshold.
- Kit contents. Make sure it includes everything: filler, applicators, sanding pads, and pigment. If it doesn’t, you might need to buy sandpaper or paint separately.
- User reviews. Don’t overlook these. A kit that’s easy for others could be a headache for beginners if directions aren’t clear.
If you’re feeling unsure, snap a photo of your threshold and either take it to a local hardware store or email it to the manufacturer’s support. Many brands are happy to help you find the best fit.
Alternatives To Composite Threshold Repair Kits
Let’s say your threshold’s damage is minor, or you can’t find a repair kit that fits. There are a couple of backup options, but be aware of their trade-offs.
Some folks use wood filler or two-part automotive epoxy as a homemade solution. While these can work for a short-term fix, they often don’t bond as well with composite materials. Plus, they might not hold up to heavy foot traffic or moisture the way a proper threshold kit will.
In rare cases, you can use a threshold cover—a thin metal or composite strip that overlays the damaged area. This method hides the crack but doesn’t actually fix the structural problem. It’s more of a cosmetic band-aid.
If you’re dealing with a specific branded threshold, many companies offer replacement parts or retrofit solutions. For example, Endura and Thermatru sell replacement sills or threshold caps, letting you swap just the damaged section rather than ripping out the whole thing.
Honestly, a purpose-built repair kit is always the best bet—but sometimes creativity (and a little luck) can buy you time until a proper repair is possible.
Final Thoughts: Keeping Your Composite Threshold In Top Shape
Repairing a cracked composite threshold with the right repair kit doesn’t have to be intimidating or expensive. With some patience and the right tools, you can bring your entryway back to life and avoid bigger headaches down the road. Remember, most small cracks are normal signs of wear and tear—nothing to be embarrassed about.
Try to keep your threshold clean, dry, and check it once or twice a year. If you spot tiny cracks early, you’ll save yourself a lot of work later. And if you ever feel stuck, don’t hesitate to ask for help or reach out to your threshold’s manufacturer. Doorways are where life happens—fixing them up just makes your home that much more welcoming.