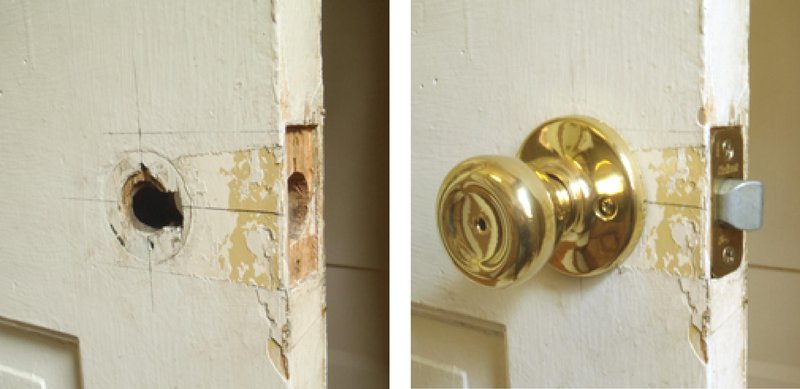
Now, I’m not talking about a major home improvement project here. Fixing a door knob is surprisingly simple and can be done with items you probably already have at home. Whether you’ve got a classic brass knob or a sleek modern finish, the basics of repair remain the same. Let’s dive in and learn how to restore that door knob to its former glory.
Assessing the Damage
Before jumping into the repair, take a moment to assess the damage. Is it just a light scratch, or has some of the finish chipped away? Knowing the extent of the damage helps you determine the best course of action.
– Light Scratches: If your door knob only has a light scratch, you might not need extensive repairs. A simple polishing may do the trick.
– Chips or Deep Scratches: For deeper imperfections, you’ll need to be a bit more hands-on. This might involve filling in the chips before you can restore the finish.
Here’s a tip: use a flashlight to get a better view. The angle of the light can highlight imperfections that are hard to see otherwise. Once you’ve identified the problems, you can gather the materials you’ll need.
Gathering Your Supplies
Now that you know what you’re dealing with, it’s time to gather your supplies. Most of these items you can find around the house or at a local hardware store.
- Fine Steel Wool: Ideal for buffing out light scratches.
- Touch-Up Paint: Look for a color that closely matches your knob’s finish.
- Clear Coat Spray: This will help seal your repair and give it a polished look.
- Lint-Free Cloth: Great for cleaning and drying the knob.
You might be wondering where to find touch-up paint. Many hardware stores offer small sample pots of paint, or you can often find them online. Just make sure you pick a shade that closely matches your knob’s finish.
Cleaning the Door Knob
Before you start any repairs, you’ll want to clean the door knob thoroughly. Dust, dirt, and oils from your hands can interfere with the repair process.
Here’s what to do:
1. Use a Lint-Free Cloth: Dampen it slightly with water.
2. Wipe Down the Knob: Focus on the areas around the damage, but give the whole knob a good once-over.
3. Dry It Off: Use another clean, dry cloth to remove any moisture.
Cleaning is a crucial step. If you skip it, you risk sealing in dirt or oils that could ruin your repair. So, take your time with this step.
Repairing Light Scratches
For light scratches, you can often achieve great results with fine steel wool. Here’s how:
1. Gently Buff the Scratch: Use the steel wool to rub the scratch in a circular motion. Don’t press too hard; the aim is to smooth out the surface, not to damage it further.
2. Wipe Away Residue: After buffing, use your lint-free cloth to remove any metal shavings or dust.
3. Inspect the Area: Check if the scratch is still visible. If it is, you might want to repeat the buffing process.
Honestly, this step can be quite satisfying as you watch the scratch diminish. And, if it’s not fully gone, don’t worry just yet. You’ll tackle that in the next step.
Filling in Deep Scratches or Chips
If you have deeper scratches or chips, you’ll need to fill them in. Here’s how you can do it:
1. Clean the Area: Just like before, give the affected area a quick clean with a lint-free cloth.
2. Apply Touch-Up Paint: Use a small brush or even a toothpick to dab a bit of paint into the chip or scratch. Try to stay within the damaged area.
3. Let It Dry: Follow the instructions on your touch-up paint. It usually takes a few hours to dry completely.
Filling in chips requires a steady hand. Don’t rush this part! Take your time to ensure even coverage.
Sealing the Repair
After your paint is dry, it’s time to seal the repair. This step is crucial for durability. Here’s what to do:
1. Choose a Clear Coat Spray: Opt for a product that matches your door knob’s finish—matte, satin, or glossy.
2. Spray Evenly: Hold the can about 6-12 inches from the surface and spray a light, even coat over the repaired area.
3. Allow to Dry: Follow the instructions to ensure it sets properly.
Sealing your work not only protects your repair but also gives your door knob that shiny new look.
Preventing Future Damage
Once you’ve successfully repaired your door knob, it’s essential to take steps to prevent future damage. Here are a few tips:
– Regular Cleaning: Dusting and cleaning your knobs regularly will help keep them in good shape. Just remember to use gentle cleaners; harsh chemicals can strip finishes.
– Mindful Use: When using your door knobs, stay aware not to bang them with bags or other items. This can lead to chips and scratches over time.
– Touch-Up Kits: Keep a small touch-up kit handy for any future scratches. A little prep can save you a lot of hassle later.
Here’s the thing: keeping your door knobs looking great doesn’t take a lot of work, especially if you stay proactive about it.
At the end of the day, repairing a chipped or scratched interior door knob is a straightforward process. With just a few simple steps and some basic supplies, you can restore its appearance and maintain the charm of your home. It’s small fixes like these that can make a big difference in how your space feels. So, don’t shy away from taking on this DIY project; your door knobs—and your home—will thank you!