Imagine the latch bolt as the bouncer at a club—it’s supposed to keep unwanted guests out. If it’s not doing its job because it’s bent or stuck, you could find yourself locked out or dealing with a door that just won’t shut properly. Thankfully, with a bit of guidance and the right tools, you can tackle this issue yourself, saving you both time and the hassle of calling in a professional.
In this guide, we’ll break down the steps to repair a bent latch bolt spring on a door latch, using a common brand like Schlage or Kwikset as our reference. Let’s dive in!
Understanding the Latch Bolt Spring
Before we jump into the repairs, it’s essential to understand what a latch bolt spring is and where it fits into the door latch assembly. The latch bolt is the part that extends from the door into the door frame to secure it in place. The spring is what helps retract it when you turn the doorknob or handle. If that spring is bent, your latch might not work as it should.
Think of it like a rubber band. When it’s stretched properly, it works well. But if it gets twisted or bent out of shape, it might not retract or extend effectively. In many cases, a bent spring can lead to a latch that sticks or does not catch at all, which can be inconvenient. Understanding this can help you diagnose issues more quickly.
You might be wondering, “How do I know if my latch bolt spring is bent?” Look for signs like the latch not retracting fully, hearing a strange noise when operating the lock, or visual inspection if you can access the internal parts.
Tools You’ll Need for the Repair
Before starting your repair, it’s crucial to gather the right tools. Here’s a quick list to help you get prepared:
- Screwdriver: For removing the latch assembly.
- Pliers: To handle the spring and any adjustments needed.
- Lubricant: A silicone spray or WD-40 can help with any movement issues.
- Replacement parts: If the spring is beyond repair, you may need a new one.
- Flashlight: To see inside those not-so-well-lit areas.
Having everything at hand will make the repair process smoother and more efficient. You wouldn’t want to be halfway through fixing it and realize you’re missing a tool, right?
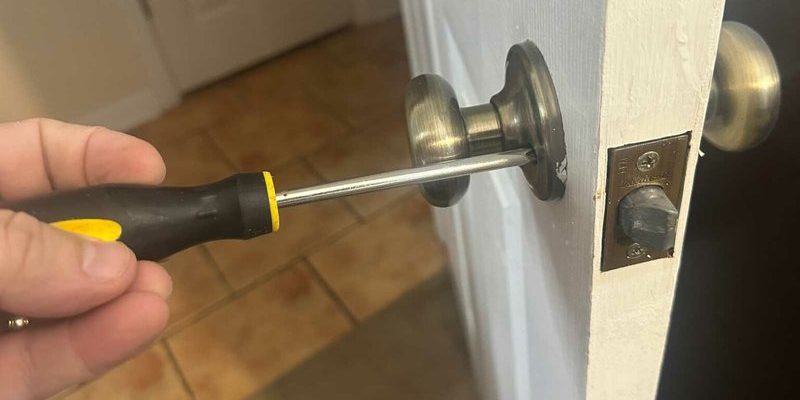
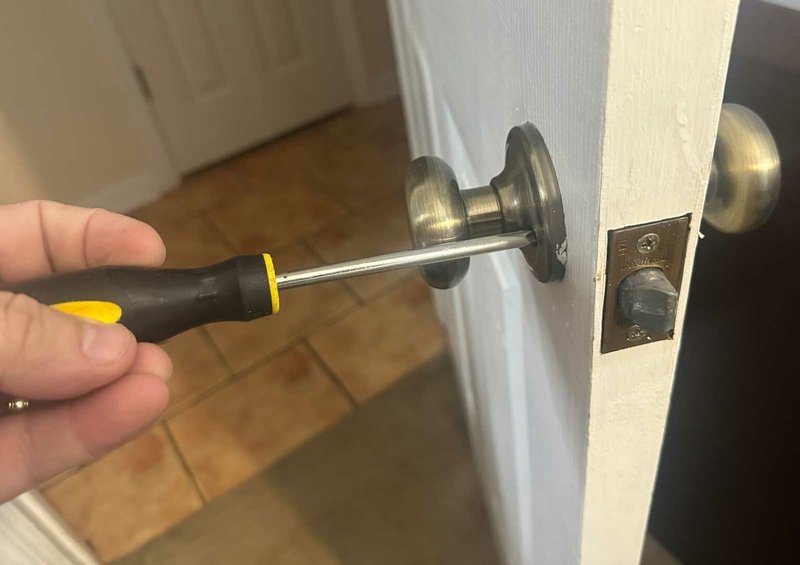
Removing the Latch Assembly
Once you’ve gathered all your tools, the next step is to remove the latch assembly. Here’s how you can do it:
1. Locate the screws on the latch plate. Depending on your door, you might find them on the side or facing the door.
2. Use your screwdriver to remove these screws carefully. Keep them in a small bowl or container so they don’t get lost.
3. Gently pull the latch assembly out from the door. Be cautious not to force it; you want to avoid any damage to the surrounding wood or hardware.
This step is often easier than it sounds. If you’re having trouble, check if any screws are hiding or if the door needs a little jiggle to loosen up that stubborn assembly.
Inspecting the Spring and Latch Bolt
With the latch assembly out, it’s time to inspect the latch bolt and the spring itself. Look for the following:
– Bends or twists: The spring should have a smooth, even shape. If it looks warped, that’s likely your problem.
– Wear and tear: Check for any rust or corrosion that might affect its function.
– Movement: Manually operate the latch bolt to see if it’s sticking or jamming.
If everything looks good but it’s still not functioning properly, it could be a matter of lubrication. A little spray can go a long way in making sure everything moves freely.
Repairing the Bent Latch Bolt Spring
If you’ve discovered that the spring is indeed bent, don’t panic. You can often fix it with a pair of pliers. Here’s a step-by-step guide to help:
1. Carefully grasp the bent portion of the spring with your pliers.
2. Gently bend it back into shape. Apply even pressure to avoid snapping it. Think of it like straightening a paperclip—slow and steady wins the race.
3. Test the spring after bending. It should now retract correctly and not appear warped.
If the spring has too much damage, a replacement might be your best option. Many hardware stores carry universal latch bolt springs that can fit various brands. Just make sure to take your old one with you to find a compatible match.
Reassembling the Latch
After you’ve repaired the spring, it’s time to reassemble the latch. Here’s how you can put everything back together smoothly:
1. Insert the latch assembly back into the door. Make sure everything fits snugly.
2. Replace the screws you removed earlier, tightening them until secure but being careful not to overtighten.
3. Test the latch bolt by turning the knob or handle to see if it operates smoothly.
Make sure the door closes and locks properly. If it still has issues, you may need to revisit your work or consider if other components are also in need of repair.
Final Thoughts on Door Latch Spring Repair
Repairing a bent latch bolt spring on a door latch might seem daunting, but with a bit of patience and the right tools, you can do it. Keeping your door latch in good working order is essential for your home’s security and convenience. Whether you’re dealing with a common brand like Schlage, Kwikset, or another, the principles are largely the same.
Remember, it’s always better to tackle these small fixes yourself rather than waiting for them to turn into bigger problems. Plus, think of the sense of accomplishment you’ll feel once everything is in working order again.
Now that you’ve got the knowledge, you can confidently handle this simple repair whenever it arises. Happy fixing!