You might be wondering, “How hard can it be?” Honestly, it’s simpler than you think. Let’s consider this like a mini DIY project. Whether you’re looking to install a wall-mounted door stop or a baseboard model, I’ll walk you through the steps. You’ll have everything you need to fix that wall and restore order to your living space.
What You’ll Need for This DIY Project
Before diving into the actual installation, let’s gather our tools and materials. It’s always easier to work when you have everything in one place. Here’s a quick list of what you’ll need:
- New door stop
- Drill or screwdriver
- Pencil
- Level (optional)
- Anchor plugs (for drywall)
- Measuring tape
- Stud finder (if needed)
- Putty or wall filler (to repair any damage)
The door stop you choose will also matter. You can opt for a simple rubber tip or a more stylish metal one. Just make sure it fits your door and matches your decor.
Assessing the Damage
Before you install your new door stop, take a good look at the area. Was it just the stop that broke, or is there significant wall damage? If the wall is full of dents or holes, you’ll want to address that first.
Here’s the thing: if the damage is minor, you can often just fill it in with putty or wall filler. Simply apply the filler, let it dry, then sand it smooth. For larger holes, you may need a patch kit which includes a piece of drywall, a patch, and joint compound.
Don’t skip this step! A clean, stable surface will ensure your new door stop sticks well and functions properly.
Choosing the Right Location for Your New Door Stop
Once your wall is ready, it’s time to choose where your new door stop will go. Typically, you want to place it about 2-3 inches from the door frame if you’re using a wall-mounted version.
Here’s a quick checklist:
– Measure from the floor to where the bottom of the door reaches when fully opened.
– Mark this spot with a pencil.
– If you’re using a baseboard stop, place it flush against the baseboard where the door swings.
Don’t forget to take your door’s height and swing into account! If the door doesn’t open fully or gets stuck, you might need to adjust the position.
Preparing to Install the Door Stop
Before you get to the actual installation, you’ll want to prepare the area. If you’re using wall anchors (which is often necessary for drywall), mark where you’ll drill.
If you’re using a stud finder, now’s the time to check for studs behind the wall. It’s best to attach your door stop to a stud for maximum strength. If you can’t find one, anchor plugs will help keep your stop secure.
Make sure every mark is level, too! If it’s tilted, it can look odd and won’t function as well.
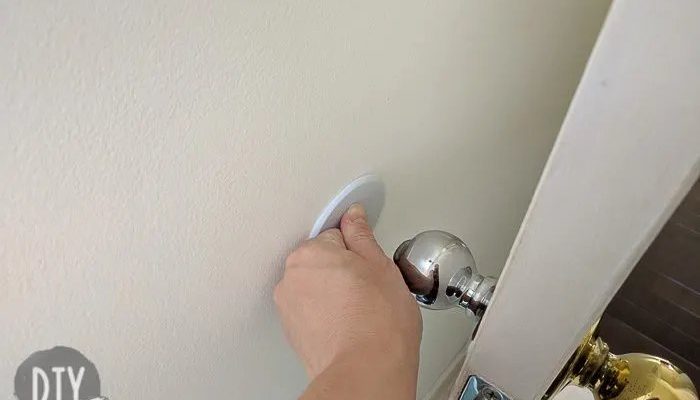
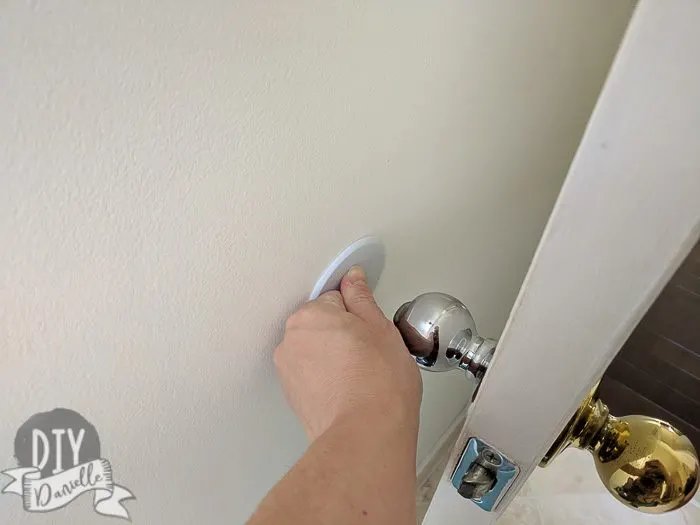
Installing the New Door Stop
Now, let’s get into the fun part! Here’s a step-by-step process to install your door stop:
1. Drill Pilot Holes: If you’re attaching to wood, drill the holes where you marked. For drywall, insert your anchors first, drilling where necessary.
2. Attach the Door Stop: Align your door stop with the pilot holes or anchors. If it’s a wall-mounted stop, you might need to use screws that came with it.
3. Check Alignment: Use a level to ensure it’s straight. If it’s off, adjust it now before you tighten everything down.
4. Secure Everything: Tighten screws firmly, but don’t overdo it. You don’t want to strip the holes or damage the wall.
5. Test the Installation: Open and close the door to ensure it hits the stop correctly. If it doesn’t work smoothly, make necessary adjustments.
Finishing Touches
Once your new door stop is installed, take a moment to check your work. Look for:
– Tightness: Make sure everything is secured properly.
– Level: Check that it aligns with the door’s motion.
– Aesthetics: Ensure it looks nice and matches your decor.
If you used wall filler, remember to paint over it to match the wall color, creating a seamless finish.
Common Problems and Troubleshooting
Sometimes things don’t go as planned, and that’s perfectly okay. Here are some common issues you might run into with your door stop installation:
– Door Hits the Wall Instead of the Stop: This often means that the stop is too low or misaligned. Just adjust the position and it should work.
– Stop Comes Loose: If your door stop isn’t staying put, check to see if it’s attached to a stud. Using drywall anchors can make a big difference.
– Multiple Holes in the Wall: If you misplaced your marks, use a wall filler to patch any mistakes before re-drilling.
With a little patience and these troubleshooting tips, you can have a sturdy, new door stop that protects your walls—and maybe even a little pride in your DIY skills.
Installing a new door stop after your old one tore the wall might seem daunting, but it’s a manageable DIY task. With the right tools and a bit of care, you can restore both your wall and your door’s functionality. It’s all about taking it step by step, from assessing the damage to ensuring that tight finish.
So next time you see that little door stop, you can smile knowing you took the time to fix it. Not only have you protected your wall, but you’ve also added your own touch to your living space. Enjoy your fresh installation, and may your doors swing freely!