Using a chisel might seem daunting at first, but it’s a handy skill to have. You don’t need to be a seasoned handyman to get the job done. In this guide, we’ll walk through the steps to widen that door strike plate hole, and by the end, you’ll feel confident about tackling this project. Grab your tools, and let’s get started!
What Is a Door Strike Plate?
A door strike plate is a small metal plate attached to the door frame. Its job is to provide a receiving area for the latch when the door closes. When the latch hits the strike plate, it helps secure the door. If you’ve noticed that your door isn’t closing seamlessly, it’s likely a problem with the strike plate.
You might often hear people mention different types of strike plates, such as standard, deadbolt, and mortise plates. Each serves a specific purpose, but the principles for widening a hole remain the same. Knowing what you’re dealing with will help you understand why adjusting the hole might be necessary.
If you’re dealing with a traditional wooden door and a standard strike plate, you’re in luck! This process is especially straightforward.
Tools You’ll Need for the Job
Before we dive into how to widen that hole, let’s gather the necessary tools. Having the right tools on hand can make all the difference. Here’s a handy list of what you’ll need:
- Chisel: A sharp chisel is essential for this task. A quarter-inch chisel works well for most strike plate holes.
- Hammer: You’ll use this to tap the chisel and help it do its job effectively.
- Screwdriver: This will help you remove the existing strike plate from the door frame.
- Measuring Tape: To help ensure you widen the hole just enough.
- Pencil: Use this to mark any measurements or alignment points.
With these tools ready, you’re set to begin. Be sure to grab some safety goggles too. Protecting your eyes is never a bad idea, even for small jobs!
Step-by-Step Instructions to Widen the Strike Plate Hole
Now, let’s get into the nitty-gritty of how to widen that strike plate hole. Like assembling a puzzle, this process has its steps, and we’ll take it one piece at a time.
1. Remove the Strike Plate
First things first: you’ll want to remove the strike plate from the door frame. Use the screwdriver to take out the screws holding it in place. Keep these screws safe; you’ll need them later. Once you’ve removed the plate, set it aside so you can work on the hole itself.
2. Mark the Area Around the Hole
Next, take your measuring tape and check the dimensions of the current hole. If you need to make it wider, mark the area around the existing hole with your pencil. You might want to increase the width by about an eighth of an inch. This gives the latch just enough room to slide in smoothly.
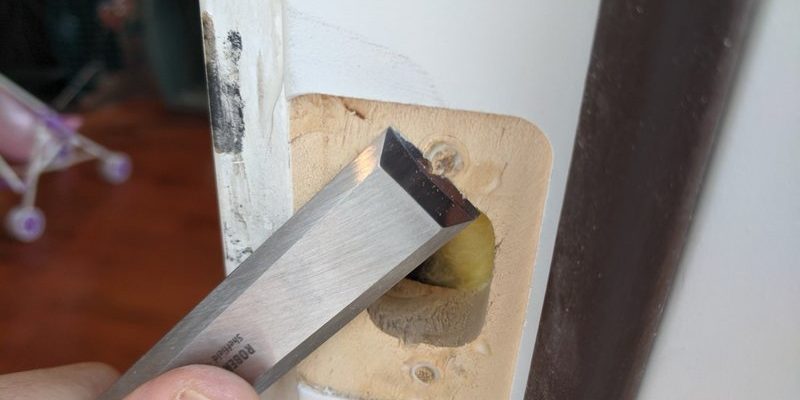
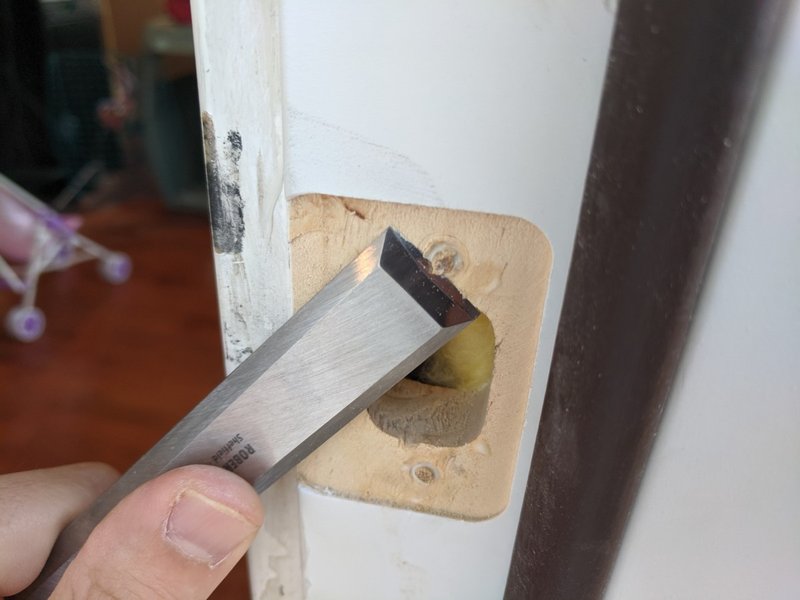
3. Use the Chisel to Widen the Hole
Here’s where the magic happens! Position your chisel at an angle against the edge of the hole you’ve just marked. Tap it gently with your hammer to make the first incision. You may feel a little resistance, but that’s okay; just keep your hand steady.
As you chisel, try to work in small amounts. Gradually widen the hole, testing the fit of the latch periodically. This will help ensure you’re not overdoing it. Remember, you can always take a little more off, but you can’t add it back on!
4. Clean Up the Edges
Once you’ve reached the desired width, take a moment to clean up any rough edges inside the hole. Use the chisel to smooth out any splinters or uneven bits. This will help prevent any damage to the latch and create a cleaner fit when you reattach the strike plate.
Reinstalling the Strike Plate
Now that the hole is widened, it’s time to put everything back together.
Start by positioning the strike plate back into its original place. Use your previously saved screws to secure it. Before tightening them all the way, double-check that the latch aligns properly with the new hole.
If everything looks good, go ahead and tighten the screws completely. You want a snug fit that won’t wobble over time.
Testing Your Work
Once the strike plate is back in place, it’s time for the moment of truth. Close the door slowly and listen for that satisfying click when the latch engages with the strike plate. If it moves smoothly, congratulations! You’ve successfully widened the hole.
If it doesn’t fit quite right, don’t worry. You can always make minor adjustments with your chisel. Just remember to work slowly and test as you go.
Why This Matters for Your Home
Addressing issues like a misaligned strike plate isn’t just about convenience; it’s also about safety. A properly functioning door latch keeps your home secure. If your door won’t latch, it can leave your space vulnerable. By widening the strike plate hole, you’re ensuring that your door locks properly, providing peace of mind.
Additionally, learning how to widen a door strike plate hole empowers you to handle similar fixes in the future. Small home repairs can save you time and money, and you’ll feel a sense of accomplishment after completing them.
Final Thoughts
Widening a door strike plate hole using a chisel isn’t as complicated as it might seem. With a little patience and the right tools, you can improve the functionality of your door in no time. Plus, you’ll gain confidence in your DIY skills—a win-win!
So, the next time you notice that pesky latch sticking, remember you have the skills to fix it. Don’t hesitate to grab that chisel and get to work. Happy DIYing!