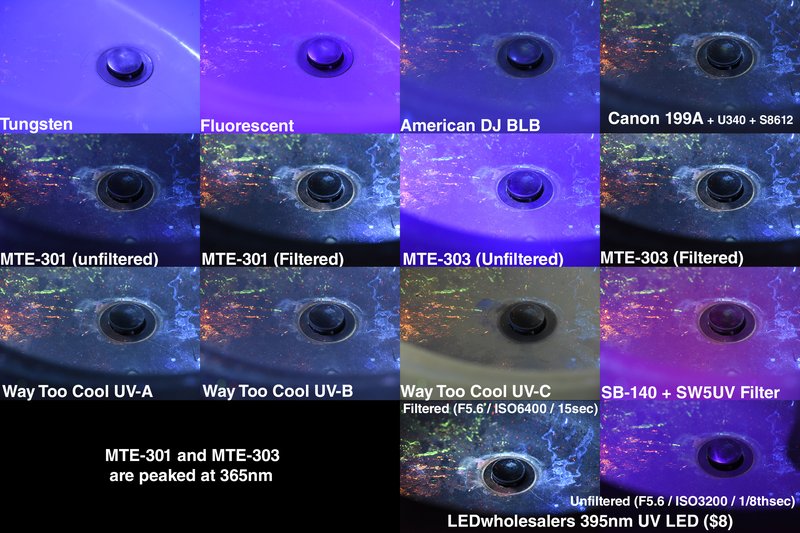
Honestly, when someone first told me you could use a UV flashlight—like those from brands such as EverBrite or GearLight—to spot leftover glue on weatherstripping, I was skeptical. But after seeing how the light made stubborn, clear adhesive glow like a neon sign, I was hooked. It’s a simple trick, easy enough for anyone to try, and once you get the hang of it, it feels like a superpower for tiny repairs.
Why Old Adhesives on Weatherstripping Matter
Before you start hunting glue with a UV light, it helps to know why this step matters so much. Leftover adhesive, even if it looks harmless, messes with how well new weatherstripping sticks. It’s like trying to paint over dust—things just won’t hold together.
Let me explain: most factory adhesives are designed to last. They’re made to survive years of rain, heat, and cold. When you remove old weatherstripping but skip cleaning every last bit of glue, the new strip can’t “sync” or bond with the surface. That means leaks, drafts, or squeaky doors that drive you nuts.
I’ve seen people try shortcuts—like just slapping a new strip on top of the residue. Results? It comes loose, or water sneaks in, and you’re back to square one. The adhesive might even react with the new glue, causing a gunky mess. That’s why pros—and anyone who wants to do it right—always check for hidden residues before sticking down anything new.
How UV Light Reveals Hidden Adhesive
You might be wondering why a UV light works for this job. Glue, especially the kinds used on cars, windows, or doors, often picks up invisible oils, dyes, or other chemicals over time. When you shine a UV flashlight—sometimes called a “blacklight”—on these spots, parts of the old adhesive glow. It’s like turning on a forensic light in a crime show, but for sticky stuff instead of fingerprints.
The science is simple. UV light, which is just outside the range of what we see, makes certain materials fluoresce—meaning, they light up. With EverBrite or similar brands, you get a strong, focused beam. Sweep it slowly across the weatherstripping channel, and any leftover glue stands out, often as a milky white or blueish haze. Even if the adhesive is practically clear in daylight, it can’t hide under UV.
In tight spaces—like car door grooves or window frames—a small UV penlight is perfect. Larger areas, like garage door seals, might need a bigger flashlight. Either way, hold the light close to the surface and move it slowly. You’ll start to notice patterns: a perfect, clean channel looks dull, while sticky sections almost “reset” the color under the UV, glowing brighter.
What You Need to Get Started
Don’t worry—you don’t need a science lab to try this. Here’s what most people find handy:
- UV flashlight: Go for a model labeled at 365nm or 395nm wavelength. EverBrite and GearLight are solid brands you’ll see online.
- Protective gloves: Old adhesives can be gross, sticky, or even a bit toxic.
- Isopropyl alcohol and rags: For cleaning up once you spot the glue.
- Plastic or wooden scraper: Metal can scratch painted or rubber surfaces, so stick with something softer.
- Fresh batteries for your UV remote (if you’re using one): Nobody wants a dead flashlight halfway through the job.
Set everything up before you start. If you’re working on a car, open all doors and work in a dim garage—UV light works best where sunlight won’t “wash out” the glow. The process is a bit like pairing a remote: prep, scan, clean, and double-check.
Step-by-Step: How To Use UV Light for Adhesive Detection
Let’s break down the process, so you’ll know what to expect from start to finish:
- Prep your space. Turn off nearby lights and close blinds if you’re inside. If you’re outside, aim for dusk or pull into a garage.
- Insert batteries and test your UV flashlight. Make sure it switches on, just like checking a remote control before use.
- Hold the UV flashlight close to the weatherstripping area. Move slowly, keeping the beam pointed right where the old adhesive might be hiding.
- Watch for glowing spots. Old glue will often glow white, blue, or green—while clean surfaces stay dark
- Mark or mentally note each glowing patch. Some folks use a bit of painter’s tape to “code” the toughest spots for later cleaning.
- Use your scraper and alcohol to remove each glowing patch. Wipe with a clean rag, then shine the UV light again to “reset” your progress. Repeat until nothing glows.
The trick is patience. Go slow, almost like you’re troubleshooting a tricky remote control. If you rush, you’ll miss spots. If you take your time, you’ll see results.
Common Problems and How To Fix Them
Sometimes, you’ll run into challenges. For example, some adhesives might not glow under certain UV wavelengths, especially if they’re really old or degraded. Here’s how to tackle the usual troubles:
- Weak or patchy glow: Try a UV light with a different wavelength if the glue isn’t lighting up. Some people keep both a 365nm and a 395nm flashlight handy, just in case.
- Lots of glare or reflection: Matte surfaces work best. If you’re scanning shiny metal or glass, tilt your flashlight at an angle to avoid the beam bouncing back at you.
- Sticky residue won’t come off: Switch to a stronger solvent (check it won’t damage paint or rubber first). A plastic scraper is usually safe, but if you’re really stuck, a nylon brush can help “reset” stubborn patches.
- UV light not working: Check battery connections, or swap out for a different brand. Sometimes a remote-style flashlight just needs a quick reset or pair to stay bright.
If nothing glows at all, it’s possible that the adhesive type is just too old or the wrong chemical mix for UV detection. In that case, look for dull, greasy patches by eye, or try a gentle solvent rub—sometimes you have to trust the old-school approach.
Where This Trick Works Best
This isn’t just a car hack. UV light detection is handy for any weatherstripping job, from old home windows to freezer doors. If you’ve ever fought with sticky residue on a shower door or tried to reset a loose garage seal, you’ll see why this matters.
- Car door weatherstripping: The most common use. Getting every bit of old glue out means leaks and noise stay gone.
- Home windows and doors: Older adhesive (especially on aluminum or painted frames) often glows strongly under UV.
- Appliances and tools: Freezers, coolers, or even toolboxes with rubber seals can benefit from a quick check before repair.
If you’ve got a universal remote for repairs—a toolkit you keep ready—drop a UV flashlight in there. It’s surprisingly useful, even for spotting pet stains or checking for scuffs on sneakers (not kidding).
Alternatives: Other Ways to Spot Old Adhesive
Not everyone has a UV flashlight sitting around, so here are a few other tricks:
- Bright LED flashlight: Sometimes, holding a strong white light at an angle will make dried glue patches shine or look different from the rest of the surface.
- Fingertip test: Carefully run your finger along the channel—old adhesive usually feels sticky, rough, or different from clean metal or rubber.
- Solvent swipe: Dab a rag with isopropyl alcohol and wipe along the groove. If the rag picks up anything sticky or discolored, there’s still residue.
Of course, these methods can work, but a UV flashlight is faster and more “foolproof.” If you do enough repairs, investing in one makes things a lot easier—like having a universal remote for sticky messes.
Precautions and Safety Tips
UV light may sound harmless, but it’s still light you don’t want to stare into or shine on your skin for long. Common sense rules apply:
- Don’t shine UV light in your eyes—even a quick flash can be uncomfortable or damaging over time.
- Wear gloves when handling solvents or scraping adhesives. Old glue can be sticky or irritating, and some solvents are rough on skin.
- Test solvents on a hidden spot first. You don’t want to “sync” a strong cleaner with delicate paint or rubbers and find out the hard way it does damage.
- Keep batteries out of reach of kids and pets. Remote-style flashlights look like toys, but the batteries can be dangerous if swallowed.
If you’re using a UV light for the first time, start slow. It’s tempting to rush, but moving too quickly means missing patches—and rushing with solvents can leave streaks or even etch surfaces. Patience is your best tool.
Wrapping It Up: Making Weatherstripping Repairs Easier
Using a UV light to detect old adhesives on weatherstripping feels like having x-ray vision for home and car repairs. Instead of guessing where that pesky glue is hiding, you get real answers—letting you clean better, stick new rubber faster, and avoid leaks or squeaks down the line.
If you keep a UV flashlight around—especially one from a reliable brand like EverBrite—you’ll find yourself reaching for it way more often than you expect. It’s a simple trick, but one that saves time, cuts down on frustration, and helps your repairs actually last. And hey, once you’ve seen that first spot of glue light up under the beam, you might just find the process a little bit addictive.
So next time you’re replacing weatherstripping, give the UV method a try. It’s one of those small tricks that makes a big difference—and after that, you’ll probably never want to go back to the “scrape and hope” method again.
