Now, before you start yanking and pulling, let’s dive into how to use a small pry bar effectively. Whether it’s a well-used tool like the Stanley 55-120 or a budget-friendly option from your local hardware store, learning the technique will save you time and keep your projects looking professional.
What is a Small Pry Bar?
A small pry bar is a hand tool typically made of metal, featuring a flat end and a curved or forked end. It’s designed for leveraging force to separate two objects or to remove nails and other hardware. Picture it as a friendly helper that can sneak between tight spaces, prying things apart carefully without causing damage.
The most common applications for a small pry bar include:
- Removing nails or screws
- Taking off trim or molding
- Separating material during repairs
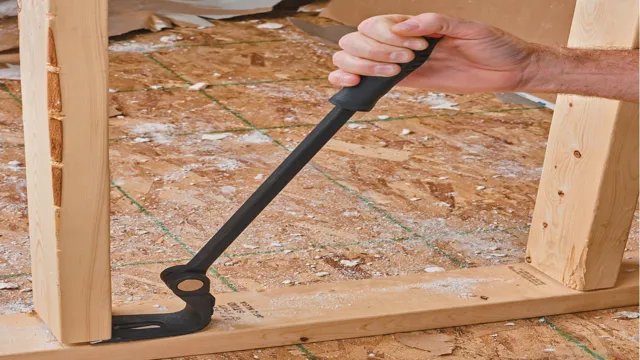
- Pulling apart furniture joints
Using one is straightforward, but knowing the best practices and techniques makes a world of difference.
Choosing the Right Small Pry Bar
When selecting a small pry bar, consider a few factors to get the right tool for your job. You might notice options in various sizes, materials, and designs. Picking a model that feels comfortable and suits your needs will make the job smoother.
Here are a few things to look for:
- Size: A small pry bar usually ranges from 8 to 12 inches in length. The smaller the bar, the easier it is to maneuver in tight spaces.
- Material: Most pry bars are made of durable steel. Look for one that’s sturdy but lightweight enough for extended use.
- Design: Some models have a curved end, while others are more flat. Choose one based on your specific needs. Curved ends often work better for pulling nails.
Once you have your pry bar, you’re ready to jump into the action.
Preparing for the Job
Before you start using your small pry bar, it’s essential to prepare both the area and yourself. You want to set yourself up for success, so take a moment to gather what you need.
Here are some helpful steps:
1. Clear the area: Remove any nearby objects that could get in your way. This will prevent accidents and give you ample space to work.
2. Inspect the hardware: Take a look at what you’re trying to remove. Is it a nail, screw, or something else? Knowing what you’re dealing with helps you choose the right technique.
3. Wear safety gear: Depending on what you’re doing, it might be wise to wear gloves to protect your hands. Safety goggles are also a good idea if you think there might be splinters or debris flying around.
By ensuring you’re prepared, you’ll reduce the chances of mishaps and make the entire process smoother.
Using the Small Pry Bar
Now, here’s where the magic happens! Using a small pry bar involves a few straightforward techniques. It’s not about brute force; it’s about finesse.
Follow these steps for effective use:
1. Position the pry bar: Slide the flat end of the pry bar under the hardware or nail you want to remove. Make sure you’re in contact with a solid surface to create a lever.
2. Create leverage: Apply downward pressure on the opposite end of the pry bar. This is where the tool’s design helps you lift the object. Remember to apply even pressure to avoid snapping or bending the tool.
3. Work slowly: If you’re removing nails, tap the other end of the pry bar gently with a hammer to help loosen the nail. Patience is key here; pulling too hard too quickly can damage surrounding materials.
4. Lift gently: Once the hardware starts to give, lift it slowly and carefully. If it’s stubborn, reposition your pry bar and try again rather than forcing it out.
Using a small pry bar effectively can really save you time and prevent damage, turning what could be a frustrating task into a straightforward experience.
Common Problems and Troubleshooting
You might encounter a few hiccups when using your small pry bar. Here’s how to handle common issues that come up during hardware removal.
Stuck hardware: It’s frustrating when hardware just won’t budge. If your pry bar isn’t getting the job done, try adding some penetrating oil to loosen the grip. Let it sit for a few minutes before trying again.
Damaged surfaces: If you’re worried about scratching or damaging surfaces, place a piece of wood or cardboard under the pry bar. This acts as a cushion, helping to protect the underlying material from marks.
Overextending the tool: Be cautious about how much leverage you’re using. A small pry bar helps with gentle removal, but if you force it, you might bend it. Always ensure you’re using it within its limits.
Being aware of these potential problems can save you a lot of time and headaches later on.
Alternatives to a Small Pry Bar
While a small pry bar is handy, it’s not the only tool in the shed. Depending on what you’re doing, you might also consider the following alternatives:
- Flathead screwdriver: In a pinch, a flathead screwdriver can work for smaller jobs, like prying off small screws or clips.
- Putty knife: For removing trim, a putty knife can be more gentle and provide a wider surface area, making it less likely to damage the wall.
- Hammer and chisel: If you’re dealing with more robust fixtures, a hammer and chisel could help break things apart more effectively.
Each tool serves its purpose, so it’s worth assessing what you need based on the specific job at hand.
Final Thoughts on Using a Small Pry Bar
Understanding how to use a small pry bar for gentle hardware removal is invaluable. It’s not just about having the tool; it’s about knowing how to use it wisely. By following the right techniques and preparing effectively, you can remove hardware smoothly, keeping your projects neat and professional.
Remember, a little patience goes a long way! Whether it’s removing a stubborn door handle or a rusty nail, a small pry bar can be your best friend in the toolbox. So the next time you face a hardware removal challenge, grab that small pry bar with confidence. You’ve got this!