Think of using a chisel a bit like trimming split ends off hair: you want to take off just enough, only where it’s needed, and no more. The trick is being careful and slow, especially when you’re working with a *hairline* gap. You don’t need a carpenter’s workshop for this—just a sharp chisel, a steady hand, and maybe a favorite mug of coffee while you work.
Before we dive in, let’s get specific: this guide covers how to use a *small chisel* (think 1/4 or 1/2 inch) to fine-tune a door strike plate, like you’d find on most Kwikset, Schlage, Yale, or off-brand interior doors. Whether you’re dealing with a squeaky old bedroom or a brand-new install that’s just a smidge off, I’ll walk you through how to fix it cleanly and confidently.
What Causes a Hairline Gap at the Strike Plate?
A hairline gap at the strike plate might not sound like a big deal, but in practice, it can keep your door from latching, leave drafts, or just annoy you every time you hear that faint rattle. Let me explain what’s going on.
Most doors—and almost all household interior doors—use a latch-and-strike plate setup. The *strike plate* is that little piece of metal attached to the door jamb, with a rectangular or oval hole where the latch fits in. If the plate isn’t perfectly aligned with the latch, you get…problems. Maybe the latch just barely catches. Maybe it scrapes, sticks, or bounces out. The tiniest shift in wood from humidity, paint build-up, or even a sloppy install can create a hairline gap. It’s the kind of thing you don’t notice until it’s driving you nuts.
Honestly, a fraction of a millimeter can make the difference between “solid click” and “maddening jiggle.” And doors move. Wood swells and shrinks, hinges sink, screws loosen. Twelve months after you moved in, that perfectly swinging door might not latch so perfectly anymore.
So if you’re dealing with that telltale sliver of daylight or a latch that hovers just on the edge, you’re in the right place. The problem is common, normal, and—yes—fixable.
Why Use a Small Chisel Instead of Other Tools?
Let me be real: there are a lot of ways people attack a sticky strike plate. I’ve seen folks try everything from kitchen knives to rotary tools. But using a small chisel is the right move when you want both control and a clean result.
A small chisel—by which I mean something like a 1/4″ or 1/2″ wood chisel—lets you nibble away at just the wood you need to remove. Think of it like using tweezers, not pliers. You’re not hacking away; you’re shaving, sculpting, adjusting. This is key for a hairline gap, where removing even a hair too much will make things sloppy fast.
Here’s the thing: screwdrivers can gouge. Utility knives can slip and slice. Power tools can overcut in a blink. A sharpened chisel, guided with two hands, can peel off slivers of wood so thin you can practically see through them. Plus, you get to keep all your fingers. That alone is worth doing it this way, right?
A small chisel is safer, neater, and—if you go slow—almost foolproof. Even if you’ve never worked with wood before, you’ve got this.
Gathering the Right Tools and Prepping Your Workspace
Before you start, gather everything you need so you’re not running around mid-project. Here’s what you’ll want:
- Small chisel (1/4″ or 1/2″): Sharp is best. Dull = dangerous and frustrating.
- Hammer or mallet: For gentle taps.
- Phillips screwdriver: To remove and reattach the strike plate.
- Pencil: For marking where you need to remove wood.
- Utility knife: To score clean edges if desired.
- Vacuum or brush: For cleaning up wood shavings.
- Safety glasses: Just to keep splinters out of your eyes.
Let me explain why the prep matters. Working cleanly—clearing the area, laying down a towel to catch debris, having everything at hand—makes a ten-minute job take, well, ten minutes. You’ll be less likely to slip, scuff your floor, or lose tiny screws under the furniture. Don’t rush the setup. A little patience now saves a lot of cursing later.
Take off the strike plate before you chisel, unless you’re only adjusting the hole. It’s tempting to work around it, but you’ll get a neater finish and you won’t dull your chisel on the metal.
Step-by-Step: How To Adjust a Strike Plate With a Small Chisel
All right, let’s walk through the process. I’ll break it down as slowly and clearly as possible so you can follow along, even if you’re holding the chisel for the first time.
1. Identify Exactly Where the Adjustment Is Needed
Close the door and watch where the latch hits the strike plate. If it’s just catching at the edge, you’ll see a shiny spot or even a scrape. Mark the problem area with a pencil. Every millimeter counts.
2. Remove the Strike Plate
Use your screwdriver to take out the screws and set the plate aside. This gives you full access to the mortise (the little pocket in the wood) and lets you see what needs to change.
3. Score the Wood (Optional but Recommended)
If you want a super-clean cut, use your utility knife to score along the pencil mark. Press just deep enough to cut through the finish. This keeps the wood from splintering past your cut when you chisel.
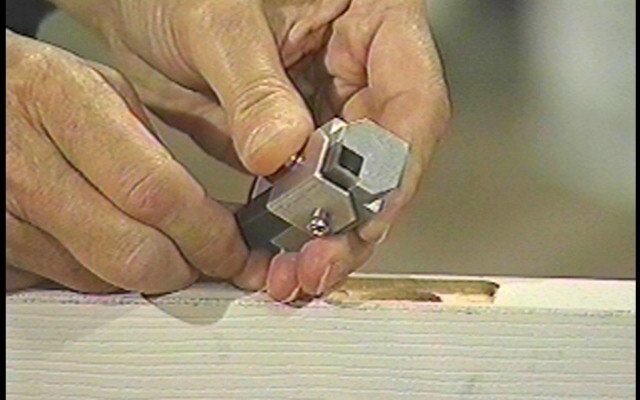
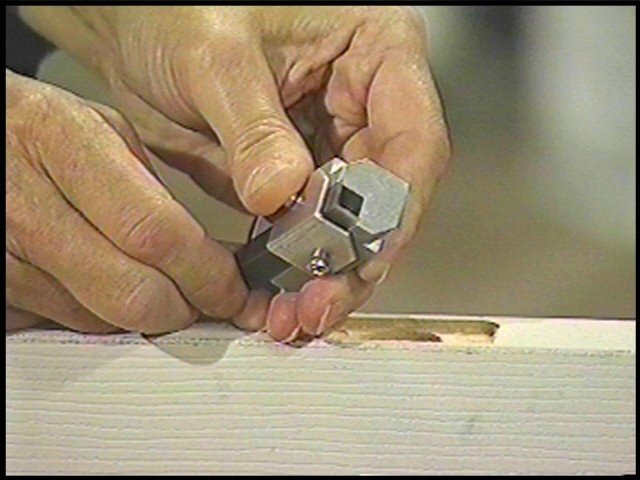
4. Chisel Away Small Amounts
Hold the chisel flat side down against the wood, bevel facing up. Tap the handle gently with your hammer or mallet. Go slow—remove a *tiny* layer, then check your fit. It’s amazing how little you often need to remove for a hairline gap. Brush away shavings as you work.
5. Test and Repeat if Needed
Reinstall the strike plate and check the latch. Still not closing? Remove another sliver. The secret is never to overdo it. The moment your door clicks shut without force, you’re done.
6. Clean Up and Tighten Screws
Once everything lines up, vacuum or sweep up the mess. Tighten the strike plate screws firmly but don’t overtighten—otherwise, you can strip the holes and make things worse.
Tip: If you go too far and the gap is now too large, you can glue in a thin wood shim, let it dry, and chisel again. It happens to the best of us!
How To Avoid Common Mistakes When Using a Small Chisel
Here’s the part where most people slip up—literally and figuratively. Using a small chisel seems simple, but it’s easy to get uneven cuts, tear out splinters, or gouge too deep if you’re not careful.
Here’s what I recommend:
- Keep your chisel razor-sharp. Dull tools need more force and are much less precise.
- Always chisel with the grain, not across it. This helps prevent splintering and makes a smoother finish.
- Take off wood in thin layers. One deep cut is never as good as a few delicate ones. Think “peeling an apple,” not “chopping firewood.”
- Check your progress often. Test the fit after each pass. If you go too far, it’s a pain to fix.
- Be careful near the corners. Strike plate mortises often have sharp corners. Use the tip of the chisel or a knife to make these crisp.
You might be wondering if you could just wiggle the strike plate over or file the metal itself. While that works in some emergency cases, it usually leads to loose screws, ugly scars on your jamb, and more frustration down the line. Honestly, the small chisel is the pro move here.
What To Do If the Strike Plate Still Doesn’t Align
Sometimes, after all your careful chiseling, the latch just won’t catch—or the hairline gap is stubbornly still there. It’s frustrating, but don’t give up! There are a few troubleshooting moves you can try.
- Check your hinges. If your door is sagging, no amount of strike plate work will fix the issue. Tighten all hinge screws and see if the door lifts back into place.
- Look for swollen wood. If humidity has puffed up your door or jamb, you might need to sand the edge of the door instead.
- Check the latch bolt. Sometimes, the problem isn’t the plate—it’s the latch itself sticking or not retracting fully. A drop of graphite or silicone spray can help, or you may need to reset or replace the latch mechanism.
- Consider a slightly wider mortise. If nothing else works, you can slightly widen the mortise and reattach the strike plate so it’s positioned just right. Just don’t overdo it—less is more.
If you need to move the strike plate itself, fill the old screw holes with toothpicks and wood glue before redrilling. That’ll hold the screws tightly and keep things solid.
Comparing Chisel Sizes and Other Strike Plate Adjustment Methods
You might be comparing a small chisel to other tools, or maybe you’re tempted to try a file, rotary tool, or even a different size chisel. Here’s my honestly biased take, based on plenty of door-fixing afternoons.
Small chisels are ideal because:
- They give the most control for delicate jobs like a hairline gap.
- They’re less likely to splinter or damage the jamb compared to power tools.
- You can make adjustments in increments as thin as a hair—perfect for this scenario.
Larger chisels are better for big adjustments or when installing new hardware, but they’re too clumsy for a job where precision is key. It’s like using a snow shovel to spread icing on a cupcake—technically possible, but messy and silly.
Files and rotary tools can be quicker but they’re riskier. They remove material fast and can leave rough edges. I only recommend them if you’re experienced or desperate.
Screwdriver “nudges” (where you try to force the plate or jamb to move with a screwdriver) can work in a pinch but usually damage the wood and leave an ugly scar.
Bottom line: for adjusting a strike plate for a hairline gap, a small chisel is the way to go. You’ll work slower, but the result will look cleaner and last longer.
Safety Tips and Final Cleanup
Anytime you’re working with a chisel—no matter how small—safety matters. A slip can mean scratched paint, punctured fingers, or even a nifty new scar. Here’s how to keep things safe and tidy:
- Always cut away from your body and hands.
- Wear safety glasses to keep wood shavings out of your eyes.
- Keep your workspace clear of loose screws, tools, and mess.
- After you’re done, vacuum or sweep the work area. Even tiny wood shavings can scratch hardwood or tile floors.
- Wipe the strike plate and jamb with a slightly damp cloth to remove dust before reinstalling.
- If you loosened or stripped any screws, swap them for longer ones, or use wood glue and matchsticks to fill the holes and reset tightly.
Paying attention now will save you work later. Plus, you’ll leave behind no evidence you ever had to “fix” anything—which, let’s be honest, is half the fun.
Wrapping Up: Why Precision with a Small Chisel Pays Off
Adjusting a strike plate for a hairline gap is one of those home fixes that seems intimidating—until you do it. And then you realize a small chisel, handled with care, is the secret weapon for a snug, beautiful door latch.
Let me say: most times, people think they need brute force or fancy tools to solve these tiny alignment issues. But with patience, a simple small chisel, and the steps above, you can make small, precise changes that last. You’re not just “fixing” a problem; you’re tuning your door so it works like new.
The next time you hear that gentle *click* where once there was a rattle or resistance, you’ll know it was worth the effort. And hey—next time a friend complains about a sticky door, you’ll have a new trick up your sleeve (and maybe one less hairline gap to worry about).