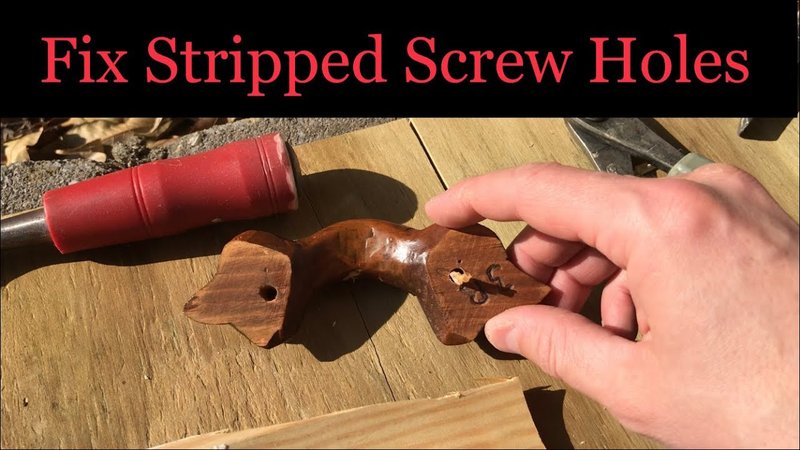
So, what is a plug cutter? In simple terms, it’s a tool designed to carve out wood plugs from a scrap piece of wood to fill in stripped holes. Often, it’s easier and more effective than trying to re-thread or use larger screws. Brands like Irwin Tools offer reliable plug cutters that get the job done without breaking the bank. Let’s walk through how you can use a plug cutter step by step.
Understanding Stripped Screw Holes
Before we dive into the repair process, it’s important to understand what a stripped screw hole really is. Imagine a screw that once held two pieces of wood together but now spins freely, refusing to tighten. That’s a stripped hole—where the threads inside the wood have worn out. This can happen due to overtightening, using the wrong size screw, or simply age.
Sometimes, you might also find that the wood around the screw has crumbled. This makes it even trickier because reusing the same screw won’t work effectively. Instead, you’ll need a robust method to refill that hole with something solid. That’s where our hero, the plug cutter, comes into play.
Gather Your Materials
Before you start, let’s gather everything you’ll need. Here’s a simple list:
- Plug cutter (preferably a reliable brand like Irwin)
- Drill or drill press
- Wood glue
- Wood scraps (solid wood works best)
- Chisel or flush-cut saw (optional)
- Sandpaper (fine grit)
Having everything on hand will save you from the frustration of hunting for tools mid-project. It’s like prepping for a cooking session—you don’t want to start chopping onions only to realize you’re out of garlic, right?
Choosing the Right Size Plug Cutter
Plug cutters come in different sizes, and picking the right one is crucial. You’ll want the diameter of your cutter to match the size of the screw hole you’re repairing. If the hole is larger than the screw, a bigger cutter will help you create a plug that will fill the hole neatly.
For example, if you’re dealing with a
Using the Plug Cutter
Now, onto the fun part! Using a plug cutter is relatively simple. Follow these steps:
1. Set Up Your Drill: Insert the plug cutter into your drill and secure it tightly. It’s essential to ensure it’s stable to avoid any accidents when cutting.
2. Select Your Wood Scrap: Choose a piece of wood that matches the essence of what you’re repairing. If your furniture is oak, go for oak scraps.
3. Start Cutting: Position your wood scrap securely and drill the plug cutter into it. Apply steady pressure, and keep the cutter straight as you push down. Ideally, cut down to about 3⁄4″ length if your screw hole is deep.
4. Extract the Plug: After cutting, gently pull the plug out of the cutter. You may need to tap it out with a light hammer or a small block of wood.
Here’s the thing: it might take a couple of tries to get the perfect plug. Don’t stress it. Each attempt teaches you a little more about the process.
Preparing the Plug for Insertion
Once you’ve cut your plug(s), the next step is preparing them for insertion. Start by trimming any excess wood if necessary. Using a chisel or flush-cut saw can help ensure your plug sits flush with the surface of the wood. Think about how you’d want your patch to look on your jeans—not too bulky, just perfect!
After that, lightly sand the plug with fine-grit sandpaper to remove any rough edges or splinters. You want a smooth finish, so it doesn’t snag or look uneven once it’s inserted.
Filling the Stripped Hole
Now that your plugs are ready, it’s time to fill in those stripped screw holes:
1. Apply Wood Glue: Generously apply wood glue to the plug and the hole. This gives you a solid bond between the wood pieces.
2. Insert the Plug: Push the plug into the hole with a little pressure. You may want to use a mallet to ensure it fits tightly and securely.
3. Wipe Away Excess Glue: As you insert the plug, some glue might seep out. Wipe away any excess before it dries to keep everything neat and tidy.
Let the glue dry according to the manufacturer’s instructions. While you wait, you could sip a cup of coffee and admire your handy work.
Finishing Touches
After the glue has dried, it’s time for the finishing touches. If the plug is slightly raised above the surface, you can carefully sand it down until it’s flush with the surrounding area. This step is similar to smoothing out a bumpy road—it ensures everything flows nicely together.
Once sanded, consider applying a finish that matches the rest of your project. Whether it’s paint, stain, or varnish, this will help the repair blend in. Honestly, a well-done plug repair can be nearly invisible if done properly.
Preventing Future Stripped Holes
Now that you’ve successfully filled those stripped holes, let’s chat about preventing future issues. Here are some tips:
– Avoid Over-tightening: This is a common cause of stripping. Use just enough force to secure the screw without forcing it.
– Choose the Right Screw: Make sure the screws fit the hole snugly. If they’re too small, consider using a larger screw or reinforcing the hole with a plug.
– Regular Maintenance: Check screws periodically, especially if the fixture is under stress, like a cabinet door.
With just a little attention, you can keep your projects safe from future wear and tear.
In conclusion, using a plug cutter to repair stripped screw holes is a straightforward process that can save you time and frustration. It’s like a quick fix for your tools, letting you restore what might seem like a lost cause. Whether you’re a DIY enthusiast or just tackling a small repair, these steps will help ensure your fixes are sturdy and long-lasting. So grab that plug cutter and get to work!
