Honestly, using a paint scraper isn’t rocket science; it’s more like using a knife to spread butter. You might be wondering how this handy tool works and what you need to know before you dive in. Imagine it as a small, flat tool that fits perfectly into tight spaces around hardware, door frames, and windows—ready to chip away that stubborn caulk or paint that’s held on for too long.
In this article, we’ll break down everything you need to know about using a paint scraper effectively. We’ll cover the types available, how to choose the right one, techniques for removal, and tips to make the process smoother. So grab your paint scraper, and let’s get started!
Choosing the Right Paint Scraper
Before you start scraping away, it’s crucial to pick the right paint scraper for the job. There are various types available, and each has its unique features. Plastic scrapers are great for softer surfaces and won’t damage the underlying material. On the other hand, metal scrapers are more robust and can tackle tougher jobs, like peeling paint or hardened caulk.
You’ll also find different blade widths; a narrow blade is perfect for tight spots like corners and edges, while a wider blade can cover larger areas quickly. A scraper like the Stanley 10-099 is popular among DIYers for its durability and versatility. Also, consider ergonomics—look for one with a comfortable grip to prevent strain during long scraping sessions.
Choosing the right paint scraper makes a difference. It’s like having the right shoes for hiking—you wouldn’t want to climb a mountain in flip-flops!
Preparing the Area
Before you get to work, it’s essential to prep the area. Start by removing any hardware, like handles or hinges, that may get in the way. This makes it easier to reach all the caulk or paint you need to remove. If you’re working on a wall, you might want to lay down a drop cloth or some newspaper to catch the debris.
Next, consider safety. Wear gloves to protect your hands and goggles to shield your eyes from any flying bits of paint or caulk. If you’re dealing with older paint, especially in homes built before 1978, be cautious as it may contain lead. In such cases, it’s better to consult with a professional.
Another important step is to ensure the surface is clean. Wipe down the area with a damp cloth to remove dust or grime. This small act can save you from making a bigger mess and allows for better control while scraping.
Techniques for Effective Scraping
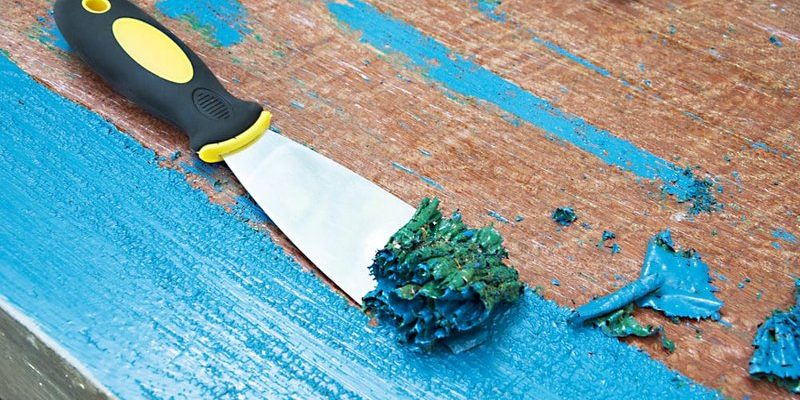
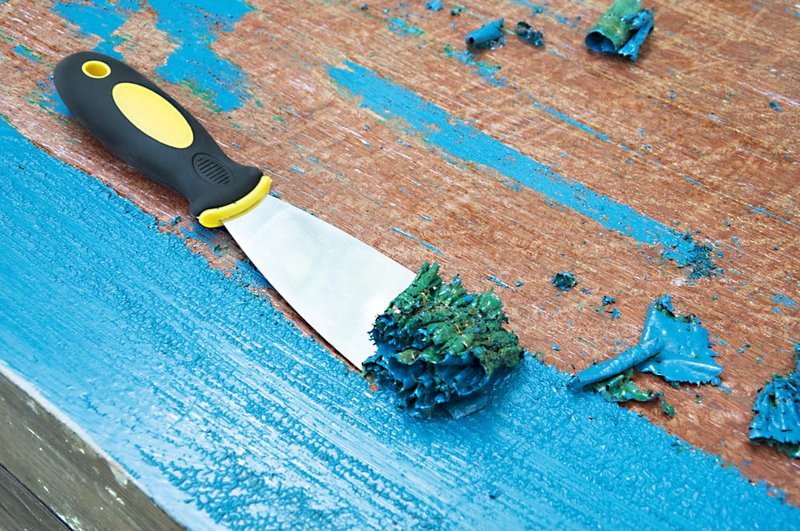
Now that you have the right tools and the area is prepped, it’s time to get down to business. When using your paint scraper, hold it at a slight angle to the surface. This helps the blade dig into the paint or caulk without gouging the surface underneath.
Start from the edge of the caulk or paint and push the scraper forward. You might need to apply some pressure, but don’t force it. If you encounter resistance, it’s okay to switch to a different angle or use a thinner edge of the blade. Think of scraping like spreading frosting on a cake—too much pressure, and you’ll make a mess!
Additionally, if you’re working with dried caulk, it can help to soften it first. A heat gun or a hairdryer can do the trick, making the job easier and less labor-intensive. Just be sure to keep the heat source moving to avoid damaging your surfaces.
Removing Old Caulk
When you’re tackling old caulk, the method is slightly different. Old caulk tends to be sticky and harder to remove. Start by cutting along the edges of the caulk with your paint scraper at a 45-degree angle to break the seal. This technique exposes more of the caulk and gives you a better grip.
Once the edges are cut, use the scraper to lift the caulk away from the surface. If the caulk is particularly stubborn, try using a utility knife to score it deeper, which can help in breaking it free. Take your time; rushing can lead to scratches on your surfaces.
Don’t forget about cleaning up afterward. Use a cloth or sponge to wipe away any residue left behind from the caulk. You want the surface to be clean and smooth for the next step, whether it’s applying new caulk or paint.
Removing Old Paint
Removing old paint follows a similar strategy, but patience is key here. Start by identifying the type of paint on the surface—latex paints are generally easier to remove than oil-based ones. Use your scraper to peel away the paint, starting from one edge and working your way across.
If the paint is really stuck, you might need to apply some heat, similar to when removing caulk. A heat gun can soften the paint, making it easier to scrape off. Just remember to keep the heat moving to prevent damage.
In cases where paint chips or flakes are particularly stubborn, using a chemical paint remover might be advisable. Follow the manufacturer’s instructions, but be cautious—work in well-ventilated areas and always wear protective gear.
Cleaning and Maintenance After Scraping
Once you’ve finished the hard work of scraping, don’t overlook the cleanup process. Use a vacuum or broom to clear away the debris you’ve created. This helps maintain a tidy workspace and prepares the area for whatever comes next—new caulk or a fresh coat of paint.
It’s also a good idea to wash your paint scraper after use. Clean the blades to remove any leftover caulk or paint. If you used a metal scraper, ensure it’s completely dry before storing it away to prevent rust. Keeping your tools in good condition means they’ll be ready for your next project.
Finally, inspect the area you worked on. Check for any spots you might have missed and give them another go. Taking that extra moment ensures the final product looks neat and professional.
Final Thoughts
Using a paint scraper to remove old caulk and paint can be incredibly rewarding. It’s a task that can feel daunting at first, but once you break it down into manageable steps, it becomes much easier. Remember to choose the right scraper, prep your area, and apply the right techniques.
With patience and persistence, you’ll soon have a clean surface, ready for whatever comes next—whether that’s new paint, fresh caulk, or simply a well-deserved pat on the back for a job well done. Next time you tackle a project, your paint scraper will be your best friend in giving your space a fresh new look!