Imagine it as a tiny sidekick for your power drill or screwdriver—a small, clever attachment that keeps your screw stuck right at the tip of your tool, even if gravity and bad angles are against you. If you’ve ever watched a Philips or Milwaukee magnetic bit holder in action, you know it almost feels like cheating. The screw just sits on the bit, ready to go, freeing up your hand and giving you much more control in spots where you’d otherwise need three arms and endless patience.
But here’s the thing—not everyone knows how to get the most out of their magnetic bit holder or when it shines brightest. If you’ve never used one before, or if you’ve had trouble with tricky screws slipping, don’t worry. Let’s break down exactly how magnetic bit holders work, why they’re so handy in tight spots, and how to use them like you’ve been doing it for years.
What Is a Magnetic Bit Holder and How Does It Work?
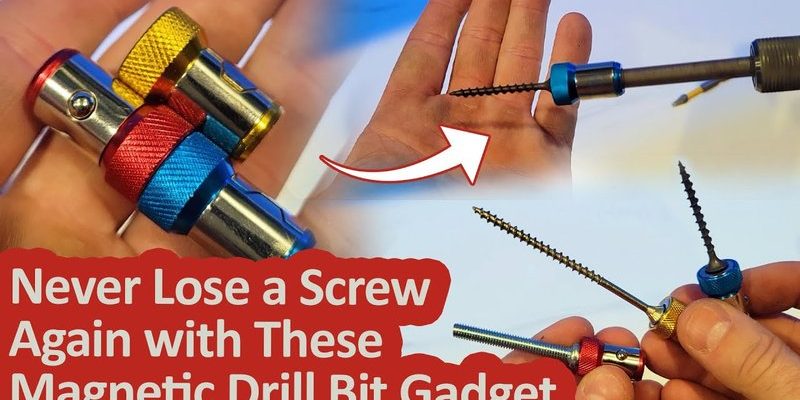
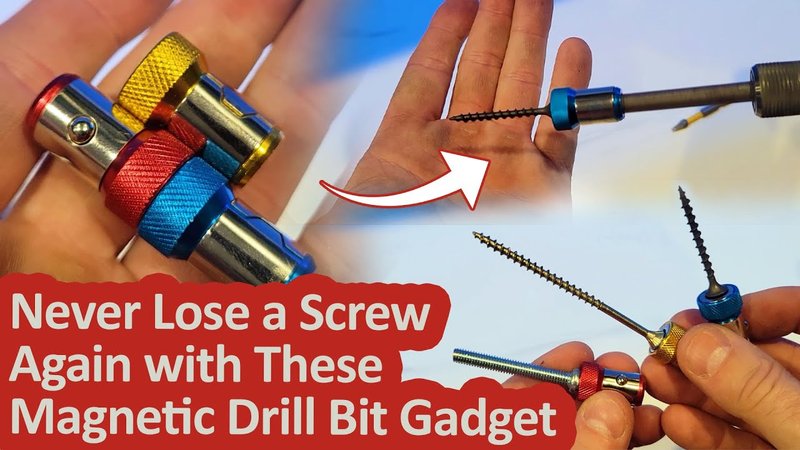
A magnetic bit holder is a small, tube-shaped adapter that fits into the chuck of your drill or screwdriver. The business end of the holder is fitted with a strong magnet. This magnet grabs onto your driver bit, and more importantly, holds the screw right at the tip. With the screw magnetically attached, you can guide it into awkward places—upside down, sideways, or around corners—without having to press your finger against it.
It might sound like a small thing, but when you’re installing shelves inside a narrow closet, mounting hardware under a kitchen cabinet, or wiring up an electrical box in a cramped attic, the difference is night and day. No more balancing screws on the end of your bit and hoping for the best. Instead, the screw stays exactly where you want it until you’ve started driving it in.
Most popular brands—like Milwaukee, DeWalt, or Philips—offer magnetic bit holders that are compatible with standard driver bits. Some even come with quick-release collars or slim profiles designed specifically for tight spaces. The best part? They don’t require any fancy setup or programming. Just snap it in, choose your bit, and you’re ready to go.
Why Use a Magnetic Bit Holder in Tight Spaces?
Trying to drive a screw in a cramped spot can turn into a circus act. There’s simply no room for your fingers to hold the screw steady, and if you drop it, good luck fishing it back out. Here’s where a magnetic bit holder really earns its keep. By holding the screw securely, it lets you start the threading process with just one hand on the tool.
Let me explain with a quick story: I once tried to install a bracket behind my TV stand—a nightmare of cables and narrow spaces. Every time I balanced the screw on my bit and tried to reach in, it fell off and disappeared behind the furniture (probably into another dimension). When I finally grabbed my magnetic bit holder, the job took five minutes. The screw just hung on, and I could focus on guiding the drill instead of playing hide-and-seek with hardware.
A magnetic bit holder also gives you a bit more reach. Standard holders add an extra couple of inches between your drill and the screw, so you can slip into places your tool wouldn’t otherwise fit. If you’re fixing kitchen cabinets, working in engine bays, or dealing with tight corners in furniture assembly, that little bit of extra distance can mean the difference between finishing today or next year.
Step-by-Step: How To Use a Magnetic Bit Holder for Screws
Here’s how to get your magnetic bit holder set up and working for you—no experience required.
- 1. Choose the right bit holder.
Pick a magnetic bit holder that matches your drill or screwdriver. Most are universal, but double-check the shank size (1⁄4-inch hex is most common). If you’re heading for a really tight spot, look for a slim or extended design. - 2. Insert the bit holder into your tool.
Slide the shank of the bit holder into your drill’s chuck. Tighten it just like you would normally, making sure it’s secure. - 3. Pop in your driver bit.
Push the driver bit (Philips, flathead, Torx, or whatever you need) into the magnetic holder. The magnet should click it in place. - 4. Attach your screw.
Hold the screw up to the tip of the bit. The magnet will pull the screw and keep it there, even if you tilt the tool down or sideways. Give it a little wiggle to make sure it’s firmly seated. - 5. Drive the screw in.
With the screw stuck on the bit, guide your drill or screwdriver into the tight spot. Squeeze the trigger or twist the handle slowly to start the screw. Once it’s started threading, you can increase speed and finish driving it in.
Don’t rush—especially in awkward spaces. The magnetic hold is strong, but it isn’t unbreakable. If you jam the screw in at an angle or go too fast out of the gate, it might pop off the bit.
Common Problems When Using a Magnetic Bit Holder
Honestly, magnetic bit holders are pretty simple to use. Still, there are a few hiccups you might run into. Frustrating? Sometimes. Unsurmountable? Not at all.
Problem 1: The screw keeps falling off.
Usually, this means your magnet is weak, or you’re using a screw made of non-magnetic metal (like stainless steel or brass). Most everyday screws are magnetic, but if yours isn’t, no bit holder in the world can change that. If the magnet seems weak, check for metal shavings or dust stuck on the magnet. Clean it off, and you’ll likely get a stronger hold.
Problem 2: Can’t reach into a super tight corner.
Even with a magnetic bit holder, your tool might be too bulky. In that case, try a slimmer bit holder, a screwdriver (instead of a drill), or even a flexible extension. There are bendy, coil-like adapters designed to snake around corners and deliver torque where you need it.
Problem 3: The bit pulls out with the screw.
If your bit isn’t secure in the holder, it might come out along with the screw. Make sure the bit clicks firmly into the magnetic holder. Some brands offer “locking” holders that mechanically grip the bit so it won’t slip out.
Problem 4: Stripping the screw head.
This often happens if you’re rushing or the bit doesn’t match the screw precisely. Always use the correct driver bit—don’t force a Philips into a Pozidriv, for example—and keep steady pressure as you drive the screw.
Magnetic Bit Holders vs. Other Screw-Holding Tools
You might be wondering, “Can’t I just use my regular drill or screwdriver for tight spots?” You could, but you’ll probably end up frustrated, especially if you’re dealing with gravity or awkward angles. Here’s how a magnetic bit holder stacks up against some common alternatives:
- No bit holder (just driver and screw): You need a third hand, especially above your head or behind objects. Good luck keeping everything aligned as you start the screw—most people drop it at least once.
- Manual screw-holding tools: There are some gadgets with spring jaws or prongs to grip a screw. These work, but they’re bulkier and rarely fit in tight places. Honestly, the magnetic bit holder is more flexible and less fiddly.
- Universal or brand-specific holders: Most magnetic bit holders work with any standard 1⁄4-inch driver bit, but it’s worth checking compatibility with your particular brand (like Milwaukee or DeWalt). Some universal holders have powerful magnets, others are more about quick-release features. Pick what suits your usual projects.
If you’re running into really extreme angles—like driving into a ceiling joist or behind plumbing—a flexible shaft adapter, sometimes called a “flex bit extension,” is a game-changer. These can bend like a snake and get you where nothing else can go, but the magnetic bit holder is still the everyday hero for most tight spots.
Tips for Getting the Most from Your Magnetic Bit Holder
Here’s a handful of simple tips that’ll make your magnetic bit holder even more useful—especially for those tricky spaces:
- Keep the magnet clean.
Metal shavings and dust build up over time and weaken the magnetic grip. Wipe the holder with a rag or blow it off with compressed air. - Use the right length.
For deep or tight spaces, longer bit holders give you extra reach. For delicate work, a shorter holder gives better control. - Pair with the right bit.
Make sure your driver bit is in good condition and the right size for your screw. Worn or rounded bits are more likely to slip and strip heads. - Start slow.
Set your drill to a low speed when starting the screw. Once it’s threaded a few turns, you can ramp up the power.
Pro Tip: If you’re really struggling with visibility, stick a headlamp on or use your phone’s flashlight to see what you’re doing. Good lighting makes threading screws in tight corners much easier.
When a Magnetic Bit Holder Won’t Work—And What To Try Instead
There are some situations where even the best magnetic bit holder can’t save you. If you’re working with screws that aren’t magnetic (like certain stainless steel or brass ones), the magnet has nothing to grab. In those cases, try these alternatives:
- Screw-holding tweezers: Tiny, spring-loaded tweezers make it possible to feed a screw into a tight spot and keep it steady while you start threading by hand.
- Painters’ tape or a dab of putty: Stick a small piece of tape or putty over the screw head to hold it temporarily on the end of your bit. It’s not elegant, but it works in a pinch.
- Flexible drill extensions: These let you drive screws around corners and into places even a bit holder can’t reach.
If you’re doing this kind of work a lot—like building furniture, working on cars, or doing electrical installs—it’s worth investing in a set of adapters and flexible extensions, along with your magnetic holders. The right tool makes all the difference.
How To Maintain Your Magnetic Bit Holder for Long-Term Use
Just like any tool, your magnetic bit holder will last longer and perform better with a little care. Here’s how to keep yours working smoothly:
- Clean off debris: Metal shavings and dust are attracted to the magnet. Wipe it down after every big project.
- Store properly: Don’t toss your bit holder loose in a toolbox full of random metal parts. Keep it in a bit organizer or a plastic case to avoid losing magnet strength or damaging the holder.
- Check the magnet: Magnets don’t “wear out” exactly, but if you drop the holder hard, it can weaken or break. If your magnet seems much weaker than it used to be, it’s time for a new holder.
- Replace worn bits: The holder is only as good as the bit it holds. If your bit is stripped or misshapen, swap it out for a fresh one.
A little regular care makes sure your magnetic bit holder is ready when you need it most—no more searching through your toolbox, only to find the magnet is packed with metal fuzz or the holder is bent from getting tossed around.
Final Thoughts: Making Screws in Tight Spots Easy
It’s easy to write off a magnetic bit holder as a “nice-to-have” gadget until you find yourself juggling screws in a cramped corner, cursing gravity and your own two hands. If you work with screws—even just occasionally—a magnetic bit holder gives you control, confidence, and a big dose of sanity in those impossible-to-reach places.
The next time you’re wrestling with a screw behind a cabinet, up in the rafters, or wedged against the wall, grab your favorite magnetic bit holder—like a dependable Milwaukee or DeWalt—and see for yourself how much easier your work gets. With a tiny bit of setup, a little patience, and the right technique, you’ll find tight spots just aren’t that intimidating anymore. And, honestly, isn’t it nice when the right tool makes the job feel easy?