Think of a hinge shim kit as the tiny toolkit that helps your door “sit up straight” again. When hinges get out of whack, shims are like those little inserts you put in your shoes—making up for small gaps and bringing everything back into balance. Brands like Hinge Mate, EZ-Shim, and others sell these handy kits, and honestly, they’re a lifesaver for anyone dealing with persistent door alignment issues.
Using a hinge shim kit isn’t rocket science, but it does help to know the steps—and a few insider tricks. Whether your door is sagging, rubbing, or letting in daylight, you can fix it with some patience and the right approach. Let’s walk through exactly how (and why) these shims work, what they look like, and how you can use them to make your exterior door close like new.
What Is a Hinge Shim Kit and Why Should You Use One?
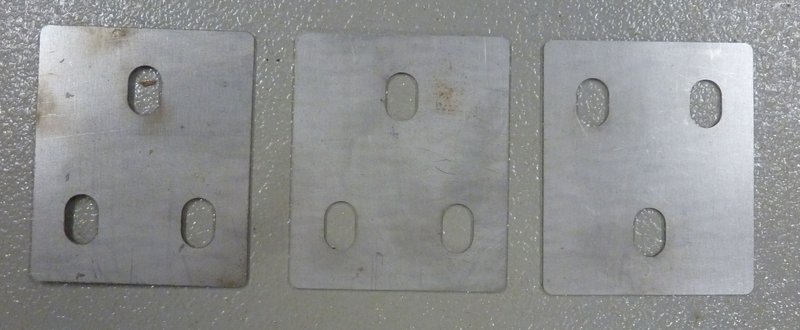
A hinge shim kit is a set of thin, sturdy pieces—usually made of plastic or metal—designed to go behind a door hinge and adjust the way your door sits inside the frame. It sounds simple, but it makes a huge difference. When your door is dragging at the bottom or leaving a gap at the top, chances are the hinges are just a bit out of alignment. A shim fills that space, nudging the door back into the right spot.
Here’s the thing: exterior doors need to seal tightly to keep out weather, bugs, and drafts. Even a tiny shift in the hinges can mess with the alignment, making the door hard to lock or open. By adding a shim behind the hinge, you’re basically “resetting” the position—without having to move the whole frame.
Most hinge shim kits, like EZ-Shim or Hinge Mate, are universal. They come with a few different thicknesses so you can mix and match until you get the fit just right. Each piece is shaped to fit perfectly behind the leaf of a standard hinge, and they’re usually notched so you can snap off sections for a custom fit.
Pro tip: Hinge shim kits aren’t just for pros—anyone with a screwdriver and a little patience can use them. They’re way faster (and cleaner) than trying to chisel out more wood or replace hardware.
How Do You Know Your Exterior Door Needs Realignment?
Maybe you’re not sure if you even need a hinge shim kit. Doors don’t always scream “I’m crooked!”—sometimes the symptoms are subtle, and sometimes they show up overnight. Here are the most common signs your exterior door is begging for realignment:
- The door sticks or drags along the bottom or side. You might see scratches on your floor or hear an annoying scraping sound.
- There’s a visible gap between the door and the frame, letting in air, light, or just looking plain uneven.
- The lock or deadbolt won’t line up with the strike plate, so you’re left jiggling the handle or forcing things to latch.
- The door swings open or closed on its own instead of staying where you put it—classic sign of a sagging hinge.
If this sounds familiar, you’re not alone. Changes in humidity, settling houses, or even just heavy use can mess with hinge alignment. Before you know it, you’re dealing with a door that feels like it’s working against you.
Honestly, ignoring these problems just makes them worse. Left alone, a misaligned door can warp further, ruin weatherstripping, and even damage the lock. A hinge shim kit is a quick, neat fix compared to expensive repairs down the road.
Gathering Your Tools: What You Need Before You Start
Let me explain—before you jump into shimming, it’s good to have everything on hand. You don’t need a fancy toolkit, but a few basic items will make the job easier and cleaner.
- Hinge shim kit (brands like EZ-Shim or Hinge Mate work for most doors)
- Phillips screwdriver (manual or powered, whichever you prefer)
- Utility knife (for trimming shims if necessary)
- Level (helpful for checking alignment, though not required for every adjustment)
- Marker or pencil (for marking position, if you want to be precise)
Once you’ve got your tools and shims, take a close look at your door. Check which hinge looks crooked or where the gap is thickest—this will tell you where to place the shim. Sometimes it’s the top hinge causing problems, sometimes the bottom, and sometimes both.
Insight: It’s always easier to fix a slightly misaligned door than one that’s been dragging and warping for months. The sooner you catch it, the simpler the shim job.
Step-by-Step: How To Use a Hinge Shim Kit for Exterior Door Alignment
Now for the main event. Using a hinge shim kit is straightforward, but it pays to go slow and double-check your progress. Here’s exactly what you need to do:
1. Identify the Problem Hinge
Start by opening and closing the door a few times. Watch closely to see where it sticks, or where you notice uneven gaps. Usually, if the door is sagging, the top hinge is the culprit; if it drags, check the bottom hinge.
2. Remove the Hinge Screws
With the door closed (but not latched), use your Phillips screwdriver to loosen and remove the screws from the hinge leaf that attaches to the door frame—not the door itself. Support the door gently so it doesn’t shift.
3. Insert the Shim
Slide the shim behind the hinge leaf, lining it up with the screw holes. Most shims have precut holes, but you may need to nudge it into place. If you’re using a brand like EZ-Shim, you can snap off sections for a thinner fit.
4. Reattach the Hinge
Hold the shim and hinge leaf together and screw them firmly back into the frame. Be careful not to overtighten, or you could crack the shim.
5. Test and Adjust
Open and close the door again. Check the swing, the gap, and how it latches. If things aren’t perfect, you can add a second shim or trim the first for a more custom fit.
Pro insight: Sometimes it takes a bit of trial and error. Don’t be afraid to move the shim between hinges if you’re not getting the result you want.
Common Problems When Using Hinge Shim Kits (And How To Fix Them)
Even with the best intentions, you might run into a snag or two. Here’s what tends to trip people up, and how to handle it:
- The door closes but still drags: You may need a thicker shim, or you might have put the shim on the wrong hinge. Try moving it up or down and test again.
- The screws won’t go in straight: Make sure the holes in the shim line up with the hinge holes—sometimes the shim slides out of place while you’re working.
- The door is now too tight or won’t close at all: You may have over-shimmed. Remove one layer, or trim the shim so it’s not too bulky.
- The door squeaks after adjustment: Lubricate the hinges with a touch of oil to keep everything moving smoothly.
If you’re still struggling, double-check that you have the right size shim for your hinge. Some older doors have odd-sized hinges; in those cases, you might need to trim a universal shim or try a different kit. Most of the time, though, a little patience and tweaking solves the problem.
Choosing the Right Hinge Shim Kit for Your Door
All hinge shim kits do one basic thing—but they come in different shapes, thicknesses, and materials. Here’s how to pick the right one:
- Material: Plastic shims like EZ-Shim are super easy to trim and fit, while steel shims last forever and handle heavy doors.
- Thickness: Most kits come with 1/32″, 1/16″, or 1/8″ shims. Thicker shims fix bigger issues but can look bulky if overused.
- Precut or universal: Some kits are notched to snap off at the right length, making it easier to fit odd-sized hinges.
- Brand: Honestly, for standard exterior doors, most major brands (like EZ-Shim or Hinge Mate) do the same job. If your door is extra heavy, steel shims might be worth the upgrade.
If you’re unsure, take your hinge measurements to the hardware store and ask staff for help. You don’t want to buy a kit only to realize it’s too short or so thick that your hinge won’t close flat.
Helpful tip: Buy two kits if you suspect more than one hinge needs shimming. It’s better to have extras than to stop mid-project.
Alternatives to Hinge Shimming (And When to Try Them)
You might be wondering, “Is there another way to fix a crooked door?” There are alternatives, but each has downsides:
- Re-mortising the hinge: This means carving out more wood from the frame. It’s time-consuming, messy, and hard to undo if you go too deep.
- Moving the strike plate: Works if the latch is way off, but doesn’t fix dragging or crooked doors.
- Planing the door: Shaving wood off the door edge with a plane or sander. It’s permanent and risky, especially for exterior doors with factory finishes.
- Replacing the door or frame: Only worth it for major warping or rot—otherwise, complete overkill for most alignment issues.
Honestly, for almost all “my door doesn’t close right” problems, a hinge shim kit is the fastest, safest, and most reversible fix. You can always take the shims out or add more if your house settles again.
Keeping Your Door Aligned: Tips for Long-Term Success
Once you’ve shimmed your hinges and your door is swinging smooth, you’ll want it to stay that way. Here’s how to make sure you don’t find yourself reaching for the kit again in six months:
- Check screws regularly: Hinges loosen over time. Every few months, go around with a screwdriver and make sure they’re snug—but not over-tightened.
- Watch for frame movement: Seasons change, wood swells and shrinks. If you notice a tiny gap starting, don’t wait—shim it early.
- Lubricate the hinges: A squeaky hinge isn’t just annoying—it can mean extra wear. A little oil now and then keeps things moving freely.
- Handle doors gently: Slamming or leaning on doors adds stress to hinges. Encourage family (and guests) to respect your realignment work!
If you ever do need to realign again, having a couple of leftover shims handy makes life easier. Doors rarely stay perfectly aligned forever, but regular tweaks keep them working smoothly and sealing out the elements.
Wrapping Up: Enjoy Your Smooth-Swinging, Secure Exterior Door
Realigning an exterior door with a hinge shim kit isn’t just for career handypeople or YouTube DIY stars. With a little care and the right tools, anyone can make a door close cleanly, lock securely, and keep out the weather. Kits like the EZ-Shim or Hinge Mate are cheap insurance against frustration and expensive repairs.
Remember, most exterior door problems boil down to tiny shifts in hinge position. By learning how to use a hinge shim kit, you give yourself an easy, reversible way to keep everything in line—and save yourself a lot of slamming, jiggling, and sighing. Next time your door starts acting up, you’ll know exactly what to do—no need to call for backup.