This tool is especially useful for anyone doing DIY home repairs or professionals looking to save time on door installations. Whether you’re working on a simple interior door or a more complex entryway, knowing how to use this tool effectively can simplify the entire process.
What Is a Hinge Pin Removal Tool?
At its core, a hinge pin removal tool is designed to help you remove the pin that connects the two leaves of a hinge. These pins can be stubborn and sometimes rusted in place, which makes them difficult to pull out with just your hands. Think of the hinge pin as a stubborn cork stuck in a wine bottle; you might need a special tool to extract it without causing chaos.
Typically, this tool features a sharp tip that you can insert into the hinge pin, along with a lever arm that lets you push or pull the pin out. This makes it particularly useful when you’re dealing with heavy doors or when the pin is stuck. By using this tool, you can replace or repair hinges with minimal hassle.
Choosing the Right Hinge Pin Removal Tool
When it comes to hinge pin removal tools, there are a few varieties to consider. You’ll find manual tools and some that offer a bit more power, like pneumatic options. But for most home projects, a simple hand tool will do just fine. Here’s what to look for when choosing yours:
- Material: Aim for tools made from durable materials like steel. They’ll last longer and withstand the pressure needed to remove stubborn pins.
- Ease of use: Some tools have ergonomic handles for comfort. After all, if you’re removing several pins, your hands will thank you!
- Versatility: Look for tools that can work with various hinge sizes. This will come in handy if you have multiple doors to deal with.
You might be wondering which tool is right for your specific doors. If you’ve got a standard-sized door, a basic manual hinge pin removal tool can usually get the job done. However, for more complex projects, you may want to consider investing in a more sophisticated option.
How to Use a Hinge Pin Removal Tool
Using a hinge pin removal tool might seem straightforward, but it helps to follow a few clear steps for success. Here’s how to do it effectively:
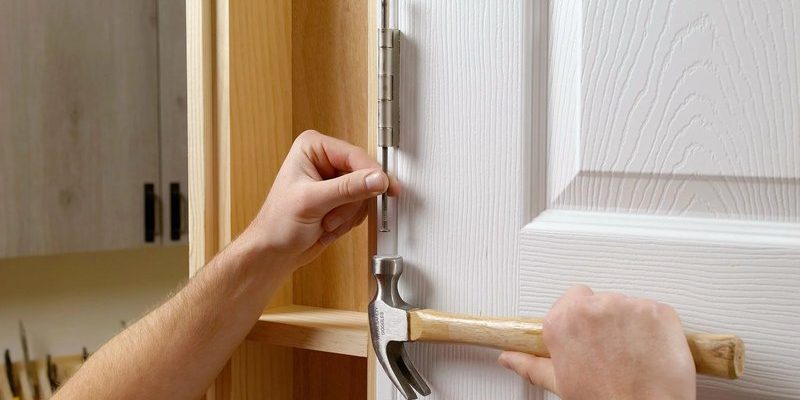
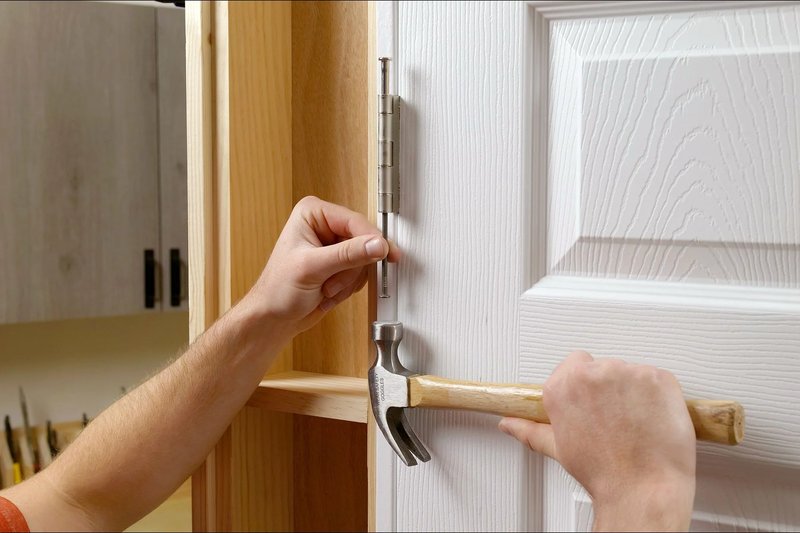
1. Position the Tool: Start by removing any obstruction around the hinge area. Place the tool’s sharp tip against the center of the hinge pin.
2. Apply Pressure: Gently push down on the handle. You should see the tip sink into the pin, which grips it firmly. If it feels stuck, don’t force it too hard; instead, try wiggling the tool slightly.
3. Remove the Pin: Once you’ve gained enough leverage, pull up on the handle to lift the pin out. Sometimes, a little side-to-side motion helps if it’s really stuck.
4. Repeat if Necessary: If you’re dealing with multiple hinges, move to the next one, and repeat the process. Having a systematic approach keeps everything organized.
Remember, patience is key! If you encounter resistance, try a bit of lubricant like WD-40 to help loosen the pin.
Common Problems and Solutions
Even with the best tools, things can sometimes go awry. Here are a few common issues you might face while using a hinge pin removal tool—and how to tackle them:
– Stuck Pins: If the pin won’t budge, it might be rusted or corroded. In this case, apply some penetrating oil and let it sit for about 15 minutes. This often helps free the pin up for removal.
– Tool Slippage: Ensure you’re applying enough pressure on the handle and that the tool is securely positioned on the pin. If it slips, reposition it and try again.
– Pin Deformation: Sometimes, the pin can get deformed while being pulled out. If this happens, it’s best to replace it rather than try to reuse a damaged pin.
By anticipating these issues, you can tackle them more effectively when they arise.
Maintaining Your Hinge Pin Removal Tool
Taking good care of your hinge pin removal tool will ensure it lasts for years. Here are some quick tips for maintenance:
– Clean After Use: Wipe down the tool after each use to remove any dirt or grease. This helps prevent rust buildup.
– Lubricate Moving Parts: If your tool has any moving parts, give them a small squirt of lubricant occasionally to keep them functioning smoothly.
– Store Properly: Keep your tool in a dry place, ideally in a toolbox or on a pegboard where it won’t get damaged.
Regular maintenance doesn’t take much time but can make a significant difference in how long your tool lasts.
Alternatives to Hinge Pin Removal Tools
While hinge pin removal tools are great, you might find yourself in situations where alternatives could work just as well. Here are a few options:
– Flathead Screwdriver: Sometimes a flathead screwdriver can be used to pry the pin out if it’s not too stubborn. Just be cautious not to damage the door or hinge.
– Pliers: If the pin is slightly exposed, you can sometimes grip it with pliers and pull it out directly. This works best for smaller pins but can be tricky with larger ones.
– Punch Tool: A punch tool can help drive the pin out if it’s particularly stuck. However, this is more of a last resort, as it requires more force.
While these alternatives can work, they might not provide the same ease or effectiveness as a specialized hinge pin removal tool.
Using a hinge pin removal tool doesn’t have to be a daunting task. With the right technique and a bit of patience, you can easily tackle stubborn hinge pins and get your doors back in shape. Always remember to choose a tool that fits your specific needs, practice good maintenance, and have a few troubleshooting tricks up your sleeve.
So next time you’re faced with that squeaky door or a stubborn hinge, you’ll be fully equipped and ready to jump into action. Happy fixing!