Using a hinge mortise jig isn’t just for experts—anyone can master it with a bit of guidance. Imagine having a tool that not only saves you time but also enhances the overall look and function of your project. With brands like Kreg and Porter-Cable leading the way, these jigs provide an accessible entry point for beginners. So, let’s dive into the world of hinge mortise jigs and get you set up for success!
What is a Hinge Mortise Jig?
A hinge mortise jig is a tool that helps you cut precise recesses, or mortises, in a door or frame to securely fit hinges. Picture trying to fit a square peg into a round hole—frustrating, right? A jig ensures that the mortise is the right size and in the correct position, allowing your hinge to sit flush with the surface.
Most jigs are adjustable, meaning you can customize them to fit different hinge sizes. This versatility is a game-changer, especially if you’re working on multiple projects. Whether you’re installing door hinges, cabinet hinges, or other types, a mortise jig will help you achieve clean, professional results without the guesswork.
Choosing the Right Hinge Mortise Jig
When selecting a hinge mortise jig, consider your specific needs. There are a few options available, ranging from simple manual jigs to more advanced models that incorporate power tools.
- Manual Jigs: These are typically smaller, less expensive, and easy to use. They require you to use a router or chisel manually.
- Power Jigs: These often save time and provide more accurate cuts. They can be a bit pricier but are great for larger projects.
- Adjustability: Look for jigs that can accommodate different hinge sizes. This feature can save you from needing multiple tools.
Consider brands like Kreg or Porter-Cable, which have a reputation for quality. Think about what type of work you’ll be doing—if you’re a hobbyist, a manual jig might be enough. For professional projects, investing in a power jig could be worthwhile.
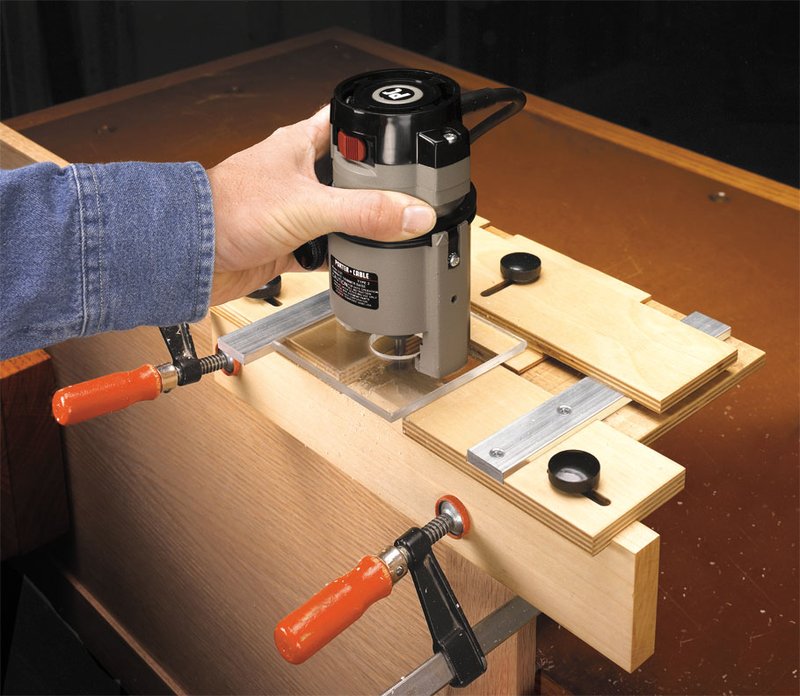
Setting Up Your Hinge Mortise Jig
Setting up your hinge mortise jig might seem daunting at first, but it’s simpler than it sounds. Most jigs come with clear instructions, so be sure to read them carefully.
1. Gather Tools and Materials: You’ll usually need a router, clamps, and the jig itself.
2. Position the Jig: Place it on the door or frame where the hinge will be installed.
3. Secure the Jig: Use clamps to hold the jig in place. This step is crucial; a wobbly jig means inaccurate cuts.
Make sure everything is aligned. If the jig is off, your hinge won’t sit correctly, and that could lead to further issues down the line.
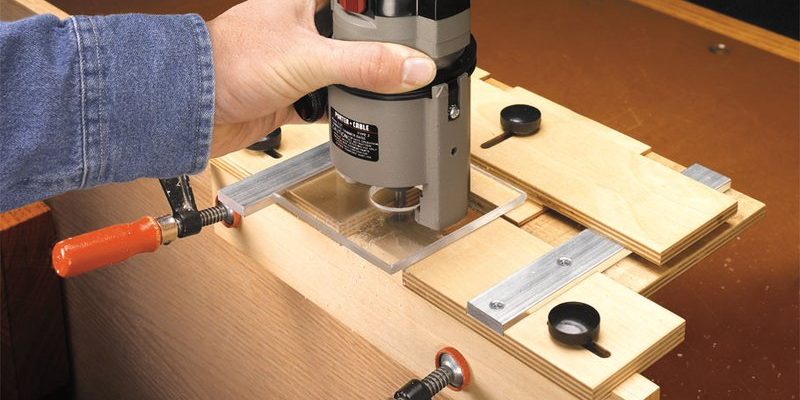
How to Cut the Mortise with a Hinge Mortise Jig
Now that your jig is set up, it’s time to cut the mortise. This part can be a bit nerve-wracking, especially if it’s your first time. But don’t stress; with the right approach, you’ll get the hang of it!
1. Adjust the Depth: Most jigs allow you to set the depth of the cut. Make sure it matches the thickness of the hinge.
2. Start the Router: If you’re using a router, start it at a low speed to get a feel for the material.
3. Make the Cut: Carefully guide the router along the jig’s edges. Let it cut steadily without forcing it.
Once you’ve completed the cut, check the fit with your hinge. It should slide in smoothly without any gaps. If it’s too tight, you can always take a little more off, but it’s better to start conservative.
Common Problems and Troubleshooting
Even with a hinge mortise jig, things don’t always go as planned. Here are a few common issues and how to solve them:
– Misalignment: If your hinge doesn’t sit flush, it might be due to misalignment. Double-check the jig’s position before cutting.
– Improper Depth: If you notice the hinge sticking out, you may not have set the depth correctly. Adjust the jig and recut if necessary.
– Chipped or Splintered Edges: This often happens if the router bit is dull or you’re rushing the cut. Take your time and ensure you’re using a sharp bit.
You might be wondering if it’s normal to mess up a few cuts at first. Absolutely! Like any skill, it takes practice to get it right. Don’t be discouraged—every mistake is an opportunity to learn.
Maintaining Your Hinge Mortise Jig
Taking care of your hinge mortise jig can extend its life and keep your cuts precise. Here are some maintenance tips:
– Clean After Use: Sawdust and debris can accumulate, affecting performance. Wipe down the jig after each project.
– Check for Wear: Regularly inspect the jig for any signs of wear or damage. This includes the router bits; dull bits can ruin a good cut.
– Store Properly: Keep your jig in a dry, safe place where it won’t get bumped or damaged. Consider investing in a carrying case if you take it on the go.
By taking these simple steps, you’ll ensure that your jig is always ready for action when you are.
Final Thoughts on Using a Hinge Mortise Jig
Using a hinge mortise jig might feel intimidating at first, but with the right approach, it can become one of your favorite tools. Remember, the key is to take your time, follow the steps carefully, and practice.
With brands like Kreg or Porter-Cable, you can find a jig that fits your style and skill level. Soon enough, you’ll be installing hinges with confidence, transforming your woodworking projects from ordinary to extraordinary.
So, grab your jig and get to work—you’re one step closer to mastering hinge installation!