
A feeler gauge might sound like a fancy mechanic’s tool, but it’s surprisingly simple—and incredibly useful for checking door seals at home. Think of it as a stack of extra-thin metal blades (kind of like measuring spoons for your car or house) that help you check the exact size of any gap. If you want to make sure your Pella or Jeld-Wen door seal is actually sealing, grabbing a cheap feeler gauge from your local hardware store is the first step.
What Is a Feeler Gauge and Why Use It on Door Seals?
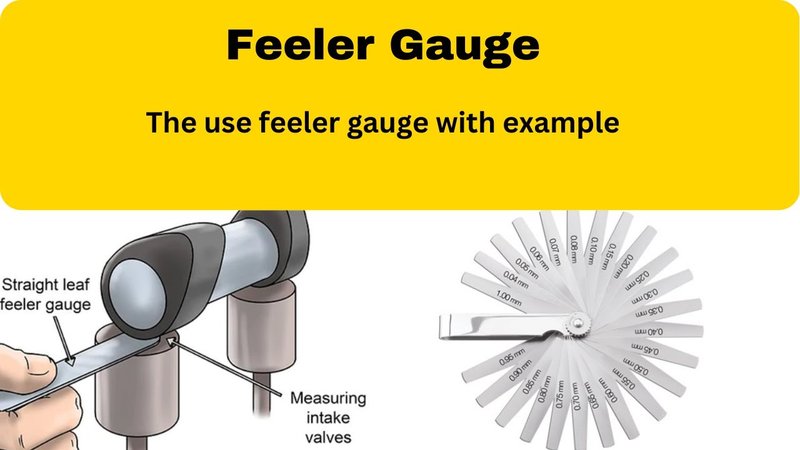
A feeler gauge is pretty straightforward once you get your hands on one. It’s basically a set of slender metal strips, each a precise thickness—think from as thin as a sheet of paper up to something like a sturdy credit card. You use them to measure anything with a tiny gap: engines, gears, and yes, even your exterior door seals. Each blade is labeled, so you know exactly what size you’re working with—anything from .001″ up to .040″ or more.
Here’s why it matters for door seals: Over time, the rubber or foam seals around your entry door can flatten, shift, or even crack. When that happens, they don’t keep air—or water—out the way they should. By using a feeler gauge, you can test the tightness of the seal at multiple points, not just trust your eyes. This is especially helpful if you’ve tried syncing your heating to the season but still get cold drafts, or if you notice dust or bugs sneaking in under the door.
Honestly, you might be surprised at how much energy (and comfort) those tiny gaps can cost you. A properly tested and adjusted door seal doesn’t just save money—it makes your home feel snug and quiet, no matter what’s going on outside.
How Does a Feeler Gauge Work for Exterior Doors?
If you’ve never used a feeler gauge before, don’t worry—it’s not as complicated as it sounds. Each blade in the set is a different thickness, clearly marked. When you slide a blade into the gap between the door and the frame (where the seal touches), you’re checking how big that gap really is.
Here’s how it plays out in practice:
- Pick a blade that feels close to the size of the gap you can see or feel.
- Gently slide it into the space. If it fits with just a little resistance, you’ve found your gap size.
- If it slides right through with no pressure, try a thicker blade. If it won’t go in at all, try a thinner one.
The goal is to find the blade that fits with slight resistance. That tells you how tight (or loose) your door seal really is. For most exterior doors, you want a snug fit—something in the range of .010″ to .030″ is typical, depending on the brand and the type of weatherstrip used.
You might be wondering: why not just eyeball it? Well, here’s the thing—a gap that looks tiny might be big enough for major energy loss. A feeler gauge takes the guesswork out of troubleshooting, letting you pair the right fix (like adjusting the strike plate or replacing the rubber gasket) to each section of your door.
Step-by-Step: Using a Feeler Gauge to Test Your Door’s Seal
First things first: grab your feeler gauge set and make sure your exterior door (let’s say your Andersen or Masonite) is clean. Even a little dirt or debris can throw off your test. Here’s the basic routine:
- Step 1: Close the door firmly. You want it latched completely, with no “almost closed” gaps.
- Step 2: Choose your starting point. I usually begin at the top corner and work down one side, then across the bottom and up the other side.
- Step 3: Slide a blade between the door and the seal. Try the thinnest blade first, and work your way up until you find one that fits with slight resistance.
- Step 4: Record the size. Note the tightest blade that fits for each area you check. If you spot a trouble spot, pay extra attention—it could be a sign the seal is worn out or not seated properly.
- Step 5: Test multiple spots. Door frames aren’t always perfectly straight, so check near the top, middle, and bottom of each edge. You might discover the gap changes along the way.
Let me explain: Sometimes, you’ll find the gap is tiny at the top, but much wider at the bottom (or vice versa). If you’re seeing more than .030″ at any spot, it’s time to consider a new seal or an adjustment. With a record of your measurements, you’ll know exactly where and how to fix things, rather than just guessing or doing a full reset of the seal.
Common Problems and What the Results Mean
It’s easy to think that your door seal is working just because you don’t see daylight. But air, water, and even sound can wiggle through much smaller spaces. Here are a few things your feeler gauge might reveal:
- Consistent tightness (all under .020″): Congrats! Your seal is in great shape.
- Loose spots (gaps over .030″): These spots let in drafts, dust, or even bugs. A wider gap often means the seal is worn, missing, or compressed.
- Inconsistent readings: If you get a tight fit at one end and a loose fit at the other, your door might be warped, or the frame could have shifted over time.
- Stiff or jammed feeler blades: If the gauge won’t slide in at all, the seal might be too thick or the door could be binding—sometimes a sign something needs a little re-alignment or lubrication.
If the issue is minor, you might be able to fix it by resetting the weatherstripping or gently adjusting the door hinges. Sometimes, though, you’ll need to swap out the seal for a universal model or a new brand-specific version.
Using a feeler gauge gives you a real answer—not just a guess—about how well your exterior door keeps the outside, well, outside.
When to Replace or Adjust Your Door Seal
So, what do you do if your feeler gauge finds gaps bigger than you’d like? It depends on what you see and feel.
- If the seal is flattened, cracked, or peeling away—it’s time for a new one. Universal door seals (like M-D Building Products) usually fit most doors, but you can get brand-specific ones for a perfect match.
- If the gap is only at one spot, try adjusting the door by tightening or loosening the hinge screws. Sometimes, a small re-alignment is all it takes.
- If the door frame itself is out of square (for example, a big gap at the top but not at the bottom), you might need a more involved repair—possibly with a pro.
You might be wondering about DIY tricks, like stuffing foam tape or caulk into a wide gap. Sometimes, those work as a quick fix, but honestly, nothing beats a true replacement if the seal is shot. Just make sure you’re pairing the new seal with a precise measurement from your feeler gauge for best results.
Alternatives to Using a Feeler Gauge (and Why They Fall Short)
Some folks try to test their door seals by sticking a piece of paper in the gap and pulling it out. If the paper slides out easily, they guess the seal is loose. But here’s the thing: paper thickness isn’t very exact, and it’s hard to tell the difference between a .010″ and a .030″ gap by feel alone.
Other alternatives include credit cards, tape, or even coins, but each of these “tools” has its own thickness—and you won’t get the detailed info a real feeler gauge provides. Plus, with a proper feeler gauge, you can check a range of sizes, not just a single one. It’s like comparing a single wrench to a full set—you want the right size for the job.
If you’re troubleshooting a recurring draft near your Kwikset or Emtek door, or you’re tired of resetting your thermostat every winter, using a feeler gauge is the surest way to spot invisible leaks and pair the right fix to each problem area.
Tips for Getting the Most Accurate Results
You won’t get good readings if you rush or skip steps. To get the most out of your feeler gauge when testing door seals, try these tips:
- Work on a calm day. Strong wind can push the door and exaggerate the gap, so test when things are calm.
- Clean the seal and door edge. Dirt, paint drips, or old caulk can add thickness and throw off your gauge.
- Test at room temperature. Some seals get harder in the cold, so if possible, check your door when it’s not freezing or boiling hot.
- Document your results. Jot down the gap sizes for different spots, so you can track changes after repairs or adjustments.
I like to keep a little notepad or phone memo with my readings, especially if I’m troubleshooting recurring issues. That way, if I ever need to sync or reset the weatherstripping down the road, I know where the trouble spots usually show up.
Bringing It All Together: Getting a Perfect Seal
In the end, using a feeler gauge to test exterior door seals is all about taking control of your home’s comfort—and your energy bills. With a little patience and a few careful measurements, you’ll know exactly where your door seal needs help. No more guessing, no more wasted effort swapping out good seals for no reason. Whether you’re working with an old wooden entryway or a brand-new steel door, this tool gives you real answers.
So next time you’re standing by your door and feel that suspicious breeze, don’t just shrug it off. Grab your feeler gauge, check those trouble spots, and give yourself the peace of mind that comes with a truly tight, well-sealed entryway. Your comfort—and your wallet—will thank you.