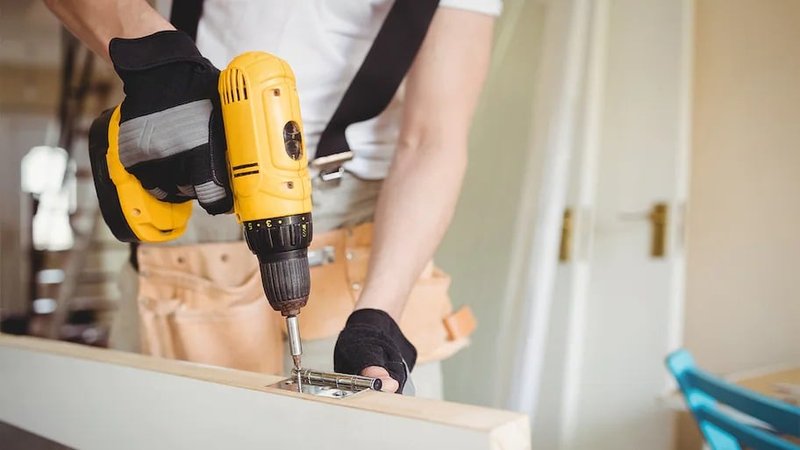
In this guide, we’re going to break down everything you need to know about using a drill for door hardware installation. We’ll explore the tools you need, the steps to follow, and some tips to make the whole process smoother. If you’re working with a specific brand or type of drill, like a DeWalt or a Black+Decker, don’t worry; the basic principles will apply to most electric drills. So grab your drill, and let’s dive in!
Gathering Your Tools and Materials
Before you start, let’s make sure you have everything you need. Having the right tools at hand can save you time and frustration later. Here’s a quick list of what you’ll require:
- Electric Drill: This is your main tool for creating holes.
- Drill Bits: Make sure they match the size of your screws, usually around 1/8″ for doorknob hardware.
- Screwdriver: You might need this to finish attaching the hardware.
- Measuring Tape: Accurate measurements are key to proper installation.
- Pencil: For marking where you’ll drill.
- Level: To ensure everything is straight.
Honestly, having these items ready will make your job much easier. It’s always a good idea to double-check your drill bits. Using the right size bit helps prevent damaging your door or the hardware.
Preparing the Door for Installation
Now that you have your tools, it’s time to prepare your door. This step is crucial, especially if you’re working with a brand-new door. First, you’ll want to measure where the hardware will go. Typically, the doorknob should be around 36 inches from the floor, but this can vary based on personal preference or design choices.
Using your measuring tape, mark the spots clearly with your pencil. For a standard doorknob installation, you’ll have two holes: one for the doorknob and one for the deadbolt, if applicable. Make sure your markings are level; nobody likes a crooked doorknob!
Here’s the thing: if you’re replacing old hardware, you might not need to measure again. Just align the new hardware with the existing holes, which can save you time.
Selecting the Right Drill Bit
Choosing the correct drill bit is vital for a successful installation. When it comes to door hardware, you typically need a spade bit or a hole saw for larger holes, and a twist bit for pilot holes.
Spade bits are flatter and good for drilling through wood, which most doors are made from. Hole saws can create larger round holes and might be needed for deadbolt installations. If you’re unsure which to use, refer to the packaging of your hardware; it usually lists the needed drill bit sizes.
When you’ve selected your bit, attach it securely to your drill. You want to ensure it doesn’t wobble while drilling, as that can lead to uneven holes.
Drilling the Holes for Your Hardware
With everything prepped, it’s time to drill! Start by holding the drill steady over your marked spot, ensuring it’s perpendicular to the surface. Gently squeeze the trigger to begin drilling; it’s best to start slow and pick up speed as you go.
If you’re using a spade bit or a hole saw, you might feel some resistance as it cuts through the wood. That’s normal! Just keep a firm grip, and let the drill do the work. It’s helpful to periodically lift the bit out to clear any wood shavings.
Once you’ve drilled through, you can clean up the area and check that the holes are the right size. If everything looks good, you’re ready for the next step!
Installing the Hardware
Now that your holes are drilled, it’s time to install the hardware. Start with the doorknob, as it’s usually the simpler of the two. Place the doorknob’s mechanism through the hole you drilled, and then secure it on the other side with the screws provided.
Make sure you don’t over-tighten the screws; you want it snug but not so tight that it cracks the door. If you’re installing a deadbolt, follow the same process, aligning it with the corresponding hole and securing it in place.
It’s a good idea to test the hardware before completely finishing up. Open and close the door to make sure everything operates smoothly.
Testing and Final Adjustments
Once the hardware is installed, it’s time for a quick test run. Open and close the door several times to check that everything feels right. If the doorknob is sticking or the deadbolt isn’t lining up perfectly, you might need to make some minor adjustments.
Take a moment to look closely at how the hardware aligns with the strike plate (that’s the metal piece on the door frame). If the deadbolt isn’t catching properly, you may need to reposition the plate slightly. Adjustments can often be made by loosening the screws, shifting the hardware, and re-tightening.
Here’s the thing: this step is crucial. A well-functioning doorknob and deadbolt enhance your home’s security and ensure ease of use.
Best Practices for Safe and Smooth Drilling
As you’ve probably noticed, using a drill properly requires focus and attention to detail. Here are some best practices to keep in mind for safe, effective drilling:
- Wear Safety Glasses: Protect your eyes from flying debris.
- Check for Electrical Wires: Use a stud finder to ensure you’re not drilling into any hidden wiring.
- Keep Hands Clear: Make sure your hands and fingers are away from the drill bit while it’s in motion.
- Work Slowly: Don’t rush. Take your time to ensure accuracy.
Following these tips isn’t just about being careful; it’s about making your door hardware installation as smooth and seamless as possible.
Wrapping Up Your Installation
Congratulations! You’ve successfully installed your door hardware using a drill. With a little patience and practice, you’ve turned a potentially tricky job into a manageable task.
In addition to having the right tools and following the steps carefully, remember that every drill and piece of hardware might have its quirks. Don’t be afraid to consult your specific hardware instructions if needed.
Ultimately, knowing how to use a drill properly not only empowers you to tackle door hardware installation but opens up a world of DIY opportunities. So go ahead, take pride in your work, and enjoy your newly functioning door hardware!
