Now, if you’re wondering what exactly a door bore kit entails, it’s really just a collection of tools designed to make drilling accurate holes in solid wood, hollow-core doors, or even metal doors. Brands like Kreg and Ryobi have popular options that come with everything you need. So, grab a cup of coffee, sit back, and let’s break down how to use a door bore kit effectively for your new door hardware installation.
What is a Door Bore Kit?
Before diving into the actual installation process, let’s clarify what a door bore kit is. Essentially, it includes specialized drill bits and guides that help you create holes in doors. These holes are typically for doorknobs, deadbolts, and hinges. A good kit will often contain a hole saw, a spade bit, and guide bushings, which are essential for different types of door hardware.
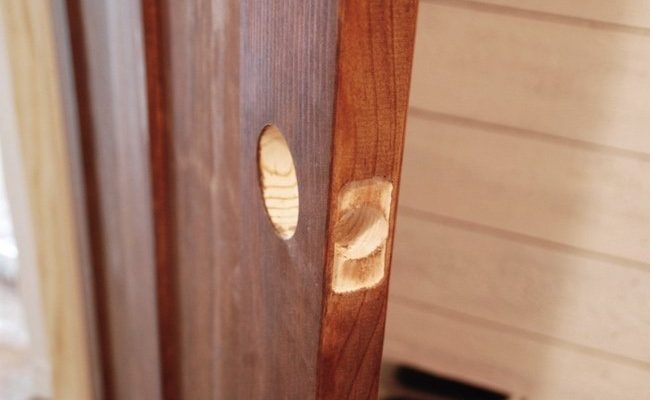
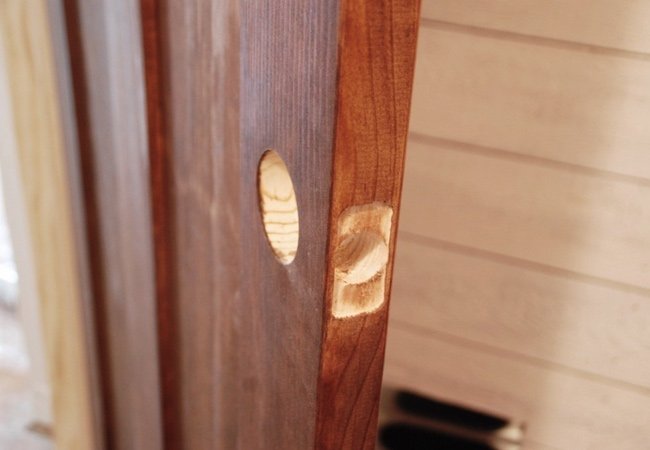
The hole saw is crucial, as it cuts out the circular hole necessary for the doorknob. The spade bit is usually employed for drilling holes for the latch and other hardware components. And those guide bushings? They help you maintain accuracy, ensuring that your holes are aligned perfectly, so your hardware operates smoothly.
Why Use a Door Bore Kit?
You might be asking, “Why can’t I just use a regular drill?” Well, here’s the thing: using a door bore kit makes your life a lot easier. Regular drill bits can be too thin, leading to jagged holes and hardware that doesn’t fit snugly. Imagine trying to fit a square peg in a round hole—it just won’t work!
Moreover, door bore kits save you time. When you have the right tools, you’re less likely to make mistakes that require patching up. You’ll find that the hardware fits better, operates smoothly, and ultimately, your door looks more professional. A door bore kit is an investment in quality and precision for your home improvement projects.
Gathering Your Tools and Materials
Before getting started, it’s essential to gather all the necessary tools. Besides your door bore kit, you’ll need:
- A power drill or drill press
- A measuring tape
- A level for alignment
- Pencil for marking
- Chisel for any adjustments
- Screwdriver for hardware installation
Once you have everything ready, you’ll find the process becomes much smoother. It’s like preparing to bake a cake; you don’t want to start mixing ingredients without having all your tools on the counter first. Make sure you clean up the workspace too—clutter can lead to mistakes and accidents.
How to Measure and Mark Your Door
Now that you’re equipped and ready to go, measuring and marking the door is your first step. This is crucial because improper measurements can lead to misaligned hardware, and nobody wants a door that won’t close properly.
1. Measure the Height: Typically, doorknobs are around 36 inches from the floor. This measurement might change based on personal preference or design standards.
2. Mark the Center: Use your measuring tape to find the center of the door’s width. Mark this point lightly with your pencil.
3. Determine the Placement: For a typical door, the doorknob will be above the latch. Make sure to note where the top of the latch will go—an additional measurement here is crucial for a seamless fit.
4. Double-Check: Before you start drilling, it’s a good idea to double-check your measurements. Rounding up a little here can lead to big problems later.
Using the Door Bore Kit
With your door marked, it’s time to dive into using the door bore kit. Here’s a step-by-step process to follow:
1. Attach the Hole Saw: Begin by attaching the hole saw to your drill. Ensure it’s tight and secure.
2. Drill the First Hole: Position the hole saw over your marked spot. Start to drill slowly, applying even pressure. This is where the guide bushings come into play—they help keep the drill steady.
3. Drill Through: As you drill, keep a firm grip on the drill. Once you feel it break through the other side, stop. This is the hole for your doorknob.
4. Switch to the Spade Bit: Next, replace the hole saw with a spade bit for drilling the latch hole. This smaller hole is essential for the latch mechanism.
5. Clean Up: After drilling, use a chisel to clean any rough edges if necessary. This ensures the hardware fits properly.
Installing the Hardware
Once your holes are drilled, you’re set to install the new hardware. Here’s how to do it smoothly:
1. Place the Latch: Start by inserting the latch into its designated hole. Ensure it aligns correctly and closes snugly.
2. Screw in Place: Use your screwdriver to secure the latch. Tighten it, but don’t overdo it—too much pressure can strip the screws.
3. Install the Doorknob: Next, insert the doorknob through the hole you drilled. Attach it according to the manufacturer’s instructions; this usually involves screwing it into place.
4. Final Adjustments: Check that everything operates smoothly. Open and close the door a few times to ensure the latch engages properly.
Final Thoughts and Tips
Installing new door hardware with a door bore kit might sound complex, but it’s all about following the steps calmly. Remember, take your time, measure twice, and drill once. If you run into problems, don’t hesitate to refer back to the instructions that came with your kit; they can be lifesavers.
Honestly, using a door bore kit can save you time and frustration while allowing you to achieve a polished finish on your door hardware. Who doesn’t love the satisfaction of a job well done? With practice, you’ll become more confident, and soon those door hardware installations will feel like second nature. Happy drilling!