A digital caliper is like having a mini engineer in your workshop. It uses electronic sensors to provide quick, exact readings of length, depth, and even internal dimensions. Brands like Mitutoyo and Neiko make great digital calipers, known for their reliability and precision. But as with any tool, it’s essential to understand how to use it properly to get the best results. Let’s dive into how to use a digital caliper, step by step.
Getting Familiar with Your Digital Caliper
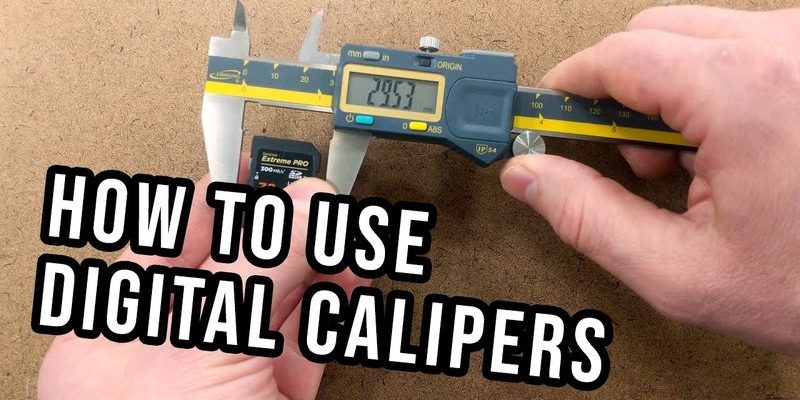
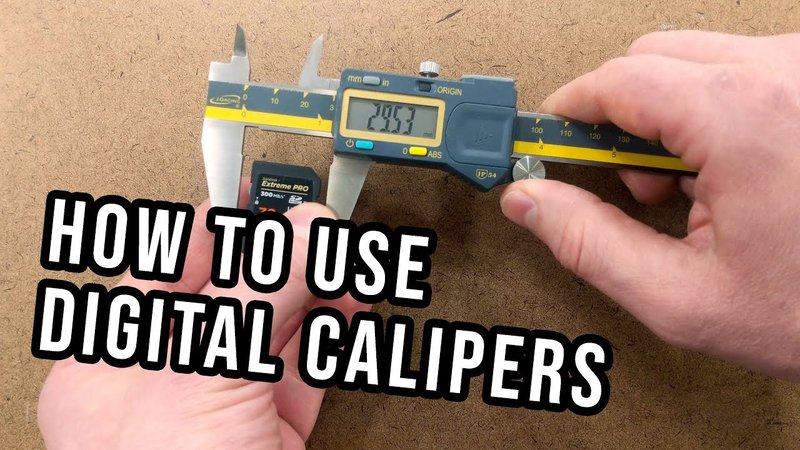
Before jumping into measurements, let’s take a moment to understand the parts of a digital caliper. Most models have a main scale, a sliding jaw, and a display screen. The main scale is usually in millimeters and inches, while the sliding jaw is what you’ll move to take your measurement. The display will show your readings digitally, making it easy to read and less prone to error than traditional calipers.
Next, you might notice a small button or two on your caliper. One common button is the *zero* or *reset* button, which lets you set the caliper to zero at any point. This feature is handy if you’re measuring something from a specific point, like the inner dimensions of a pipe. Familiarizing yourself with these components is crucial before diving into actual measurements.
Lastly, check the battery. Many digital calipers run on batteries that can be easily replaced, but it’s a good idea to keep an extra battery handy. A dead battery during an important project can be a real buzzkill, so make sure your tool is ready to go when you are.
How to Measure External Dimensions
To measure the external dimensions of an object, like the width of a piece of wood, start by turning on your digital caliper. Then, slide the caliper’s jaws around the object you want to measure. Gently close the jaws until they touch the surfaces of the object, ensuring you have a snug fit without squeezing too hard.
Now, take a look at the display. It should show you the measurement. If you pressed the zero button earlier, you’ll see the measurement displayed directly. If not, just remember to account for the starting point when calculating your size—think of it as the difference between a slice of cake with icing and one without!
Here’s a quick checklist for measuring external dimensions:
- Turn on the caliper and ensure it’s set to zero.
- Open the jaws and place them around the object.
- Close the jaws until they touch the object securely.
- Read the measurement from the display.
Measuring Internal Dimensions Made Easy
Measuring internal dimensions, like the inside width of a tube, is just as simple. Start by using the smaller jaws of the caliper, often called the *internal jaws*. Open the internal jaws inside the object, allowing them to touch the walls evenly.
Once again, make sure you have a snug fit. The caliper should not be forced into the object, as this can cause incorrect readings. Once you’re happy with how it feels, check the display to see your measurement. If you pressed the *zero* button before starting, your display will show exactly what you need without any extra calculations.
For internal measurements, remember this:
- Switch to the internal jaws.
- Open the jaws and insert them into the object.
- Close until they touch the walls clearly.
- Check the reading on the display.
Measuring Depth Like a Pro
Depth measurements can be particularly tricky, but a digital caliper makes it easy. Use the depth gauge, which is a small rod that extends from the bottom of one of the caliper jaws. To measure the depth of a hole or groove, simply place the caliper on the top surface and extend the depth gauge straight down into the hole.
It’s essential to keep the caliper perpendicular to the surface for the most accurate reading. Once the gauge touches the bottom of the hole, look at the display. It’s just that easy! If you need to make adjustments, don’t hesitate to retract the rod and try again.
When measuring depth, keep in mind:
- Use the depth gauge attached to your caliper.
- Position the caliper firmly on the surface.
- Extend the gauge into the hole until it reaches the bottom.
- Read the depth value directly on the display.
Tips for Maintaining Accuracy
You might be wondering how to ensure your readings are as accurate as possible. One of the best things you can do is keep your caliper clean. Dust and debris can impact measurements, so make it a habit to wipe down the jaws with a soft cloth after each use.
Another tip is to regularly calibrate your caliper. This means checking it against a known standard measurement to ensure it’s still giving you precise readings. You can do this by measuring a standard item, like a calibration block, and comparing the results. If it’s off, you might need to recalibrate your specific model or consult the manual.
Finally, avoid extremes in temperature and humidity when using your caliper. Rapid changes can cause the metal to expand or contract, leading to incorrect measurements. Store your caliper in a protective case to shield it from elements that could affect its accuracy.
Troubleshooting Common Issues
Sometimes, even the best tools can run into problems. If your digital caliper isn’t displaying readings, start by checking the battery. A dead battery is usually the culprit. Replace the battery and see if that resolves the problem.
If the display is flickering or showing inconsistent numbers, the caliper might need cleaning. Dust can disrupt the electronic sensors. A gentle wipe with a soft, dry cloth should do the trick.
Should you still face issues, refer to the user manual for troubleshooting tips. It’s also a good idea to reach out to the manufacturer for advice or support—they understand their products better than anyone else.
In summary, remember these troubleshooting basics:
- Check and replace the battery if readings are missing.
- Clean the caliper to prevent display issues.
- Consult the user manual or manufacturer for persistent problems.
Using a digital caliper might seem challenging at first, but with practice, you’ll find it becomes second nature. This little tool can open up a world of precision in your projects, whether you’re measuring parts for home repairs or crafting intricate designs. By understanding how to take external, internal, and depth measurements, along with maintaining accuracy and troubleshooting common issues, you’re well on your way to becoming a pro.
So, grab your caliper and start measuring! Remember, the more you use it, the better you’ll get. Over time, you’ll gain confidence and skill, making accuracy a natural part of your workflow. Happy measuring!