A dial indicator works by measuring the distance between two points with impressive accuracy. When paired with the right skills, it allows you to adjust your door knob’s position for optimal function. Brands like Mitutoyo or Starrett offer reliable dial indicators that make this process smoother. As you follow along, I’ll break down how to effectively use a dial indicator for aligning your door knob, turning a once-daunting task into a manageable project you can tackle confidently.
Understanding the Dial Indicator
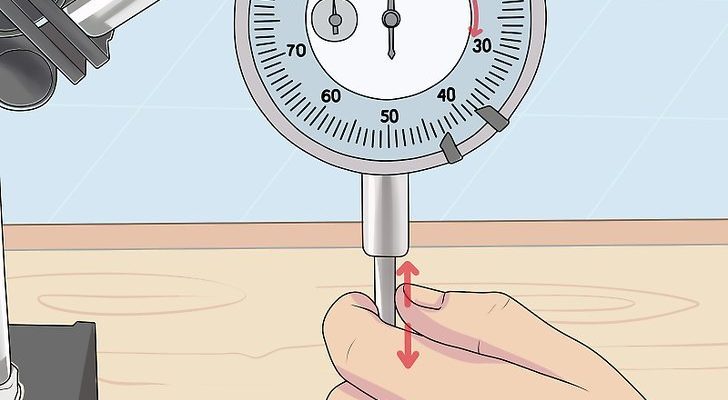
Before diving into the nitty-gritty of alignment, let’s get familiar with the dial indicator itself. This tool consists of a needle that moves on a calibrated scale. When the needle touches a surface, it indicates how far that surface is from a reference point. Picture it like a tiny measuring stick with a mind of its own. Depending on what you’re measuring, you can achieve precision down to thousandths of an inch—impressive, right?
Most dial indicators have a plunger that extends and retracts. As you press the plunger against the surface of your door or the latch, it communicates the measurement to the dial. Honestly, it’s pretty cool how a simple mechanical device can give you the insight needed for precise adjustments. You might be wondering about calibration; good news! Most quality indicators come pre-calibrated, so you’re ready to roll.
Gathering Your Tools
To get started, make sure you have everything ready before jumping into the process. Here’s a list of what you’ll need:
- A dial indicator
- A support stand (if necessary)
- A wrench or screwdriver for adjustments
- A notepad or your phone for notes
Having these tools on hand will ensure a smoother experience. Honestly, there’s nothing worse than realizing you’re missing something crucial halfway through your task. If your dial indicator doesn’t come with a support stand, you can often make do using a sturdy tabletop or clamp to hold it steady. A little creativity can go a long way!
Setting Up Your Dial Indicator
Now that you have your tools, let’s set up your dial indicator. Start by determining the best position for measuring the door knob alignment. Ideally, you want the indicator to touch the door surface near the latch or strike plate.
1. Position the Indicator: If you’re using a support stand, attach the dial indicator to it. Make sure it is vertical and steady; you don’t want it wobbling around while you measure.
2. Adjust the Height: Bring the plunger of the dial indicator down so it’s just touching the door surface. You might need to twist the stand to get the right height.
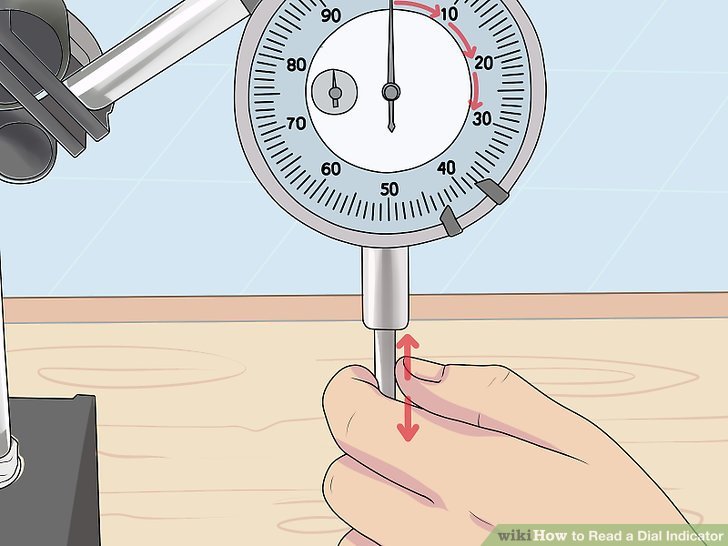
3. Zero the Indicator: This step is crucial. Rotate the dial until the needle reads zero. This sets your reference point for measuring any deviations later.
Once you’ve got it set up, take a moment to admire your work—it’s like creating a mini engineering marvel right in your hallway!
Measuring the Door Knob Alignment
With everything ready to go, it’s time to measure how aligned your door knob is. Here’s how to do it:
1. Check the Backset: The backset is the distance from the edge of the door to the center of the knob. Use the dial indicator to measure this. If it’s off, you’ll need to adjust the knob’s position.
2. Gauge the Height: Next, measure the height of the door knob. Ideally, it should be within a standard range (usually about 34 to 48 inches from the ground). Use the indicator to find any discrepancies.
3. Assess the Latch Position: Finally, test how well the latch aligns with the strike plate. Move the indicator to see if there’s a gap or misalignment. This is where that precision comes in handy.
Take notes during this process. Jot down any measurements that seem off so you can make the necessary adjustments. It’s like creating your alignment blueprint!
Adjusting the Door Knob
Now, let’s get into the adjustments. Depending on what your measurements reveal, you may need to reposition the door knob or the latch. Here’s a quick guide on what to do:
1. Loosen the Knob: Use a screwdriver or wrench to gently loosen the screws holding the door knob in place. Don’t remove them completely—just enough to allow for adjustment.
2. Shift the Knob: Carefully reposition the knob based on your earlier measurements. If it needs to go up, down, or sideways, make those minor tweaks.
3. Tighten the Screws: Once you’ve got it aligned, re-tighten the screws securely. Be cautious not to overtighten, as that could damage the door.
4. Recheck Alignment: After making adjustments, use your dial indicator once more to ensure everything is now aligned. It’s a bit like double-checking your work in school; it really pays off!
Common Issues and Troubleshooting
Sometimes, even with your best efforts, you might encounter issues. Let’s cover a few common problems you could face while using a dial indicator for door knob alignment:
– Inconsistent Measurements: If you’re not getting consistent readings, make sure the dial indicator is firmly positioned. Any wobbling can throw off your measurements.
– Knob Sticking: If your door knob is still sticking after alignment, check the latch. It might need to be repositioned or replaced to work smoothly.
– Readings Not Changing: If the dial doesn’t move when you press the plunger, there might be a fault with the indicator. Try resetting or replacing batteries if it’s digital.
Don’t get discouraged by these challenges. They’re all part of the learning process! The more you work with the dial indicator, the more comfortable you’ll become.
Tips for Success
Using a dial indicator for door knob alignment doesn’t have to be intimidating. Here are some pro tips to ensure success:
– Take Your Time: It’s tempting to rush through a project, but precision takes patience.
– Refer to Manufacturer Guidelines: If your door knob came with an instruction manual, don’t hesitate to look it over. It often includes helpful specifics tailored to your product.
– Practice Makes Perfect: If you have another door knob to work on, practice makes for a great opportunity to refine your skills before tackling the main event.
As you build your confidence, you’ll find that aligning door knobs is just one of many tasks you can accomplish with your dial indicator.
In conclusion, mastering the art of using a dial indicator for precise door knob alignment may seem daunting at first, but it really boils down to understanding your tools and taking careful measurements. By following these steps, you’ll not only ensure your door knob functions flawlessly but also gain a valuable skill for future projects. Give it a shot—your doors will thank you!