Imagine you’re sitting at your kitchen table, sipping coffee as you delve into this project. Maybe you’ve noticed that your bi-fold door is sticking or wobbling—definitely not the smooth operation you expect. This guide is aimed at anyone looking to fix their bi-fold doors, whether it’s a brand you’ve been using for years or a newer model that’s giving you grief. So let’s dive in and explore how to tackle this issue!
Identifying the Problem
Before you can fix anything, you need to understand what’s wrong. Think of troubleshooting like solving a mystery. Is your nefarious bi-fold door sticking, or is it making a grinding noise? Common indicators include uneven gaps between the panels or difficulty in sliding.
Start by observing the door in action. Open and close it a few times while paying attention to how it moves. Is it smooth, or does it feel like you’re wrestling with an uncooperative child? Additionally, look for visible signs of wear or damage to the bottom pivot bracket. It’s like inspecting a car’s engine. If you see rust, cracks, or deformation, you’ve likely found your culprit.
Next, check the alignment of the bi-fold door. Sometimes, a small misalignment can cause big problems. If one side seems lower than the other, this could be an adjustment issue rather than a mechanical failure. Grab a level if you have one—this will help you visualize whether everything is lined up as it should be.
Gathering Tools and Materials
Now that you’re armed with some knowledge about the problem, it’s time to gather your tools. The right supplies are essential for any DIY project. You’ll need a few basic tools that you probably already have at home:
- Flathead screwdriver
- Phillips screwdriver
- Level
- Measuring tape
- Lubricant like WD-40
- Replacement pivot bracket (if necessary)
Taking a moment to gather these items will save you countless trips back to the toolbox. It’s like preparing for a camping trip—having everything you need on hand makes your adventure much smoother.
If you spot wear on the existing bracket, it’s smart to consider replacing it altogether. Check your local hardware store or online marketplaces to find a replacement bottom pivot bracket that suits your bi-fold door brand.
Adjusting the Pivot Bracket
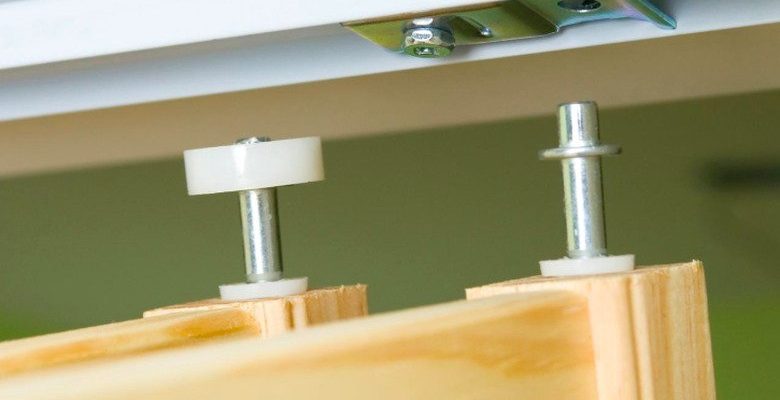
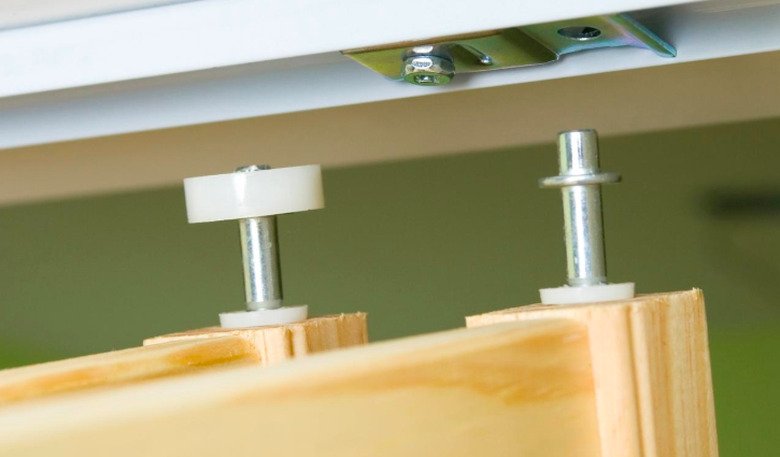
Once you have everything ready, it’s time for adjustments. This part might feel a bit daunting, but it’s pretty straightforward, like following a recipe. First, locate the bottom pivot bracket—it’s usually near the floor where the door meets the frame.
Using your screwdriver, loosen the screws on the bracket slightly. You want them to be loose enough to make adjustments but not so loose that they fall out. Then, raise or lower the door by adjusting the pivot mechanism. You may have to experiment a bit to get the height just right.
After adjusting, tighten the screws back up while holding the door in place. Make sure to double-check the alignment with your level. If everything looks good, give your door a test slide to see if the adjustment worked. If it’s moving smoothly, you’ve just solved a problem!
Cleaning and Lubricating the Mechanism
Sometimes, the issue isn’t just about the alignment or the bracket itself. Dust and grime can build up over time, causing friction and resistance. Think of it like a bike chain that needs oiling now and then.
Start by cleaning the track and the bottom pivot with a damp cloth to remove any debris. Once it’s clean, apply a small amount of lubricant to the bracket and the track. This will encourage smooth movement. Just don’t overdo it—too much lubricant can attract more dirt and cause a sticky mess.
After lubrication, slide the door back and forth a few times to work the lubricant into the mechanism. It should feel much smoother now, like a freshly oiled machine! If the door is still not gliding well, you may need to revisit the pivot bracket or check for additional issues.
Replacing the Bottom Pivot Bracket
If all else fails and the bottom pivot bracket still isn’t cooperating, it might be time to face the reality of a replacement. This isn’t as scary as it sounds—think of it like swapping out a bad battery in a remote.
Begin by removing the screws holding the bracket in place. Once you’ve got it off, compare it with the new one to make sure they match. If they do, installation is a reverse of removal. Simply line up your new bracket and secure it using the screws you took out.
After installation, follow the adjustment steps from earlier. This is your chance to make everything just right! If you’re feeling uncertain, many manufacturers provide installation guides that can be helpful.
Final Tips and Considerations
You might be wondering how to prevent future issues with your bi-fold door. Well, regular maintenance goes a long way. Make it a habit to clean and lubricate the mechanism every few months. Think of it as a mini spa day for your door!
Additionally, be cautious about heavy objects near your bi-fold doors. Placing too much weight on them can lead to wear and misalignment over time. If you have kids or pets, this is especially important.
Finally, remember that bi-fold doors have components that can wear out over time. Keeping an eye out for any unusual noises or sticking will help you catch problems early, saving you from bigger headaches later.
In conclusion, troubleshooting a bi-fold door bottom pivot bracket isn’t a Herculean task; it’s more like piecing together a puzzle. With some observation, the right tools, and a bit of elbow grease, you can keep your doors operating smoothly for years to come. So grab that coffee, dive into the process, and before you know it, you’ll be an expert on bi-fold door maintenance!