Here’s the thing: touching up a damaged kick plate finish isn’t rocket science. Whether you’ve got a brass, stainless steel, or painted kick plate (Schlage, Baldwin, or even a universal brand from the hardware store), a little TLC goes a long way. The right approach can make your entryway look fresh again, without needing to call in a pro or replace the whole plate.
What Is a Kick Plate and Why Does the Finish Matter?
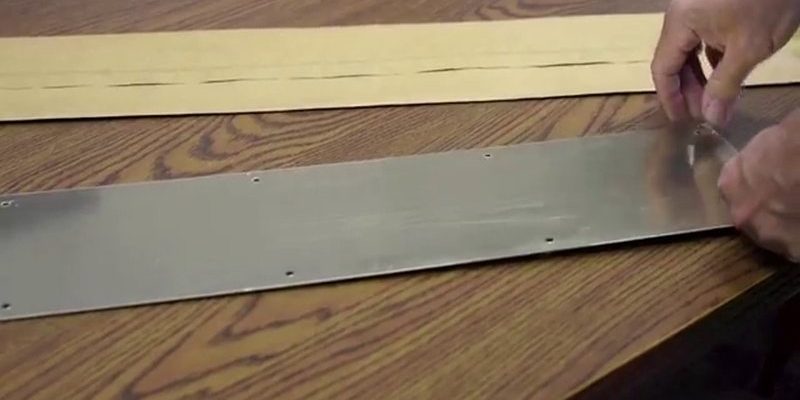
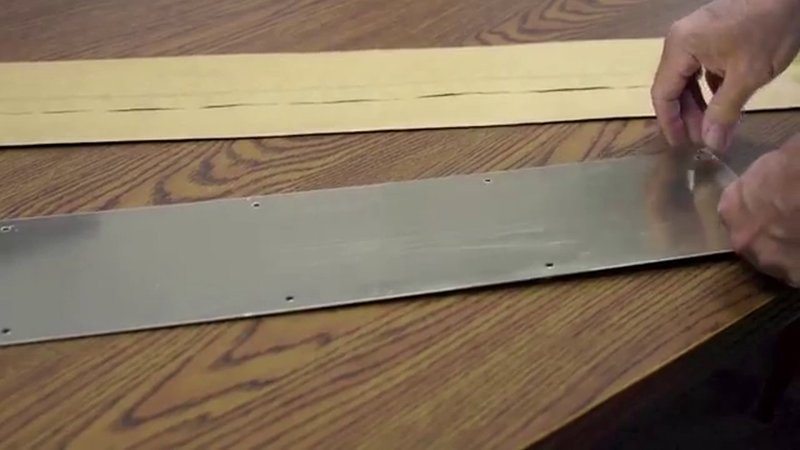
A kick plate is that metal or plastic sheet attached to the bottom of a door. It’s not just decorative—it’s a form of armor. Think of it as the shin guard for your entryway, taking hits from daily traffic so your actual door doesn’t get battered. Over time, though, all those kicks and bumps can take their toll, leaving scratches, dents, or faded spots.
You might be wondering, “Why bother fixing the finish at all?” Here’s why: a kick plate in rough shape makes your whole door look tired. And if you leave damage unchecked—especially with metal plates—scratches can turn into rust spots or further flaking. In some cases, the finish protects the kick plate from moisture and corrosion. So, fixing it up isn’t just about looks. It’s also about adding years to the life of your hardware.
Some brands, like Schlage or Baldwin, use high-quality finishes that resist damage for longer, but eventually, even these start to show age. Fortunately, whether your kick plate is a simple universal type or a premium brand, the touch-up process is pretty similar. All you need is a bit of patience, the right supplies, and a step-by-step approach.
Common Types of Kick Plate Finishes and Their Troubles
Kick plates come in all sorts of materials and finishes—each with its own quirks when it comes to damage and repair. The most common are brass, stainless steel, aluminum, and painted metal. Let me explain what you’re dealing with:
- Brass kick plates often have a lacquer coating to prevent tarnish. Once this coating gets scratched, the brass underneath can oxidize, leaving dark spots or streaks.
- Stainless steel kick plates are tough and resist rust, but they’re not immune to scratches or fingerprints. Deep gouges can be tricky, but surface scuffs usually buff out.
- Aluminum kick plates are lightweight and don’t rust, but the finish can dull down fast, especially if it’s anodized or painted. Flaking paint or cloudy areas are common complaints.
- Painted kick plates can chip and peel, especially on older or generic universal plates. If the plate isn’t properly primed, paint might not stick well in the first place.
Each finish has its own “code,” so to speak, for how to handle touch-ups. The main issues? Scratches, tarnish, paint chips, and sometimes shallow dents. Understanding what you’re working with helps you pick the right cleaning and repair method—which honestly saves a lot of headaches down the road.
What You’ll Need for Touching Up a Kick Plate
Before you dive in, it’s smart to gather your supplies. The exact list depends on the type of kick plate and damage, but here are the basics most folks will need:
- Soft cloths or microfiber towels for cleaning and polishing
- Gentle cleanser (dish soap and water work for most, but specific cleaners for brass or stainless steel can help)
- Fine-grit sandpaper (400–600 grit) for smoothing rough spots
- Matching touch-up paint or lacquer (for painted plates)
- Metal polish (for brass or stainless steel)
- Painter’s tape to protect the door edges
- Small paintbrush or foam applicator
If your kick plate is deeply dented or the finish is beyond repair, you might consider replacing it outright. But for most scratches and chips, these tools will do the trick. It’s almost like syncing up the right tools before you start troubleshooting a stubborn remote—if you skip this setup, you’ll end up making more work for yourself.
How To Prep Your Kick Plate for a Touch-Up
You can’t just slap on some paint or polish and call it a day—prep work is key. Here’s how to do it, step by step:
- Remove or Secure the Kick Plate: If possible, take the kick plate off the door (usually a few screws). If it’s not coming off, use painter’s tape to protect the areas around it.
- Clean Thoroughly: Dirt, grime, or old polish will mess with your finish. Use warm water and mild soap, or a specialty cleaner if your plate is brass or stainless steel. Dry completely with a soft cloth.
- Inspect for Deeper Issues: Look for pitted rust, deep scratches, or dents. Surface stains and scuffs are easy to fix. For deeper problems, you might need to reset expectations—or plan on a deeper repair.
Honestly, skipping prep is like trying to pair a remote without putting in fresh batteries first. It just doesn’t work. Take your time, and make sure the kick plate is spotless before you start any touch-up.
Pro tip: If you want a super-smooth finish, lightly sand scratches or chipped areas with fine-grit sandpaper. Wipe off all dust before moving on.
Touching Up Scratches and Scuffs on Metal Kick Plates
If your stainless steel or brass kick plate just has scuffs or minor scratches, you’re in luck—these are usually easy to fix. Here’s what to do:
- Buff with Metal Polish: Apply a small amount of metal polish to a clean, soft cloth. Gently rub in the direction of the existing grain. This “syncs” the repair with the natural pattern of the metal and minimizes new scratches.
- Smooth Deeper Scratches: For deeper marks, use 600-grit sandpaper. Go slowly, and only sand in the direction of the grain. Be careful not to overdo it or you risk dulling the finish.
- Re-polish the Area: After sanding, use metal polish again to restore shine. Wipe away excess and buff until you see a consistent luster.
- Seal with Clear Lacquer (Optional): If the scratch broke the lacquer coating (especially on brass), use a small brush to reapply a clear lacquer. This “resets” the protection and keeps tarnish at bay.
The key here is patience. Don’t try to rush or use harsh abrasives; it’s a bit like troubleshooting a remote—aggressive moves can do more harm than good. Steady, gentle work will produce the best results.
Fixing Chips and Peeling Paint on Kick Plates
Painted kick plates are a little different. If you have peeling paint or chips, the process is more like touching up a wall than buffing metal. Here’s how to handle it:
- Sand the Damaged Area: Use fine-grit sandpaper to feather the chipped edges, so the new paint blends smoothly.
- Prime If Needed: If the damage is down to bare metal, apply a thin coat of metal primer before painting. This step helps the touch-up stick and prevents rust.
- Apply Matching Paint: Use a small brush or foam applicator. Don’t glob it on—several light coats sync better with the original finish. Let each coat dry before applying the next.
- Finish with Clear Coat: For extra durability, a clear sealer or lacquer can help protect the repair and keep everything looking uniform.
Honestly, this part takes a steady hand and a bit of patience. If the paint color is hard to match, bring a chip to your local hardware store—many can mix up a close match, whether you’ve got a Schlage, Baldwin, or generic plate.
Real-life tip: If you don’t have the exact paint, you can sometimes use a universal touch-up pen designed for metal surfaces—just check if it’s compatible with your plate.
Polishing and Protecting Your Kick Plate After Repair
After you’ve touched up your kick plate, it’s all about locking in that fresh look. Here’s how to make your work last:
- Buff the Plate: Once the finish is dry, buff it with a soft, dry cloth. This adds shine and helps even out any brush marks or fingerprints.
- Apply a Protective Coating: Especially for brass or stainless steel, a clear lacquer spray can protect against future scuffs and sync with the original finish. Make sure to cover the area evenly.
- Reinstall Carefully: If you removed the plate, reattach it gently. Overtightening screws can crack or distort the plate, which nobody wants after all that work.
- Regular Maintenance: Clean with a mild detergent and water every so often. Avoid harsh chemicals that can strip the finish.
Honestly, a little regular upkeep goes a long way. Just like troubleshooting a remote before it’s completely dead, taking care of your kick plate regularly keeps bigger problems from popping up later.
When To Replace Instead of Touch Up
Sometimes, no matter how careful you are, the kick plate is just too far gone. Deep dents, severe rust, or peeling finish across most of the plate are signs it might be time for a replacement. Here’s how you’ll know:
- Widespread Corrosion: If the plate is rusting everywhere or has pitted areas, touch-ups won’t last long. New plates aren’t too pricey and can save you a headache down the road.
- Large Dents: Shallow dings can sometimes be tapped back, but big dents look bad even after paint or polish.
- Constant Retouching: If you find yourself redoing touch-ups every few months, it’s probably time to pair your door with a fresh kick plate.
Choosing a new plate is straightforward. Universal plates fit most doors, but if you want to match the original brand (like Schlage or Baldwin), check the code or model number for an exact fit. Swapping out a plate is as simple as unscrewing the old one and syncing up the new.
Final Thoughts on Restoring a Kick Plate Finish
Touching up a damaged kick plate finish might sound daunting, but when you break it down, it’s really just a series of simple steps. A clean plate, some gentle sanding, a little polish or paint, and a protective finish—it’s almost as satisfying as troubleshooting a remote and finally seeing that “reset successful” light.
Not only does this process give your entry a facelift, but it also helps your kick plate last longer, keeping your home looking sharp day after day. If the plate’s too far gone, swapping it out is just as doable.
In the end, caring for something as humble as a kick plate is about details—and those details add up to a home that always looks cared for and welcoming. So go ahead: give your kick plate the touch-up it deserves, and enjoy the fresh, polished look every time you walk through the door.