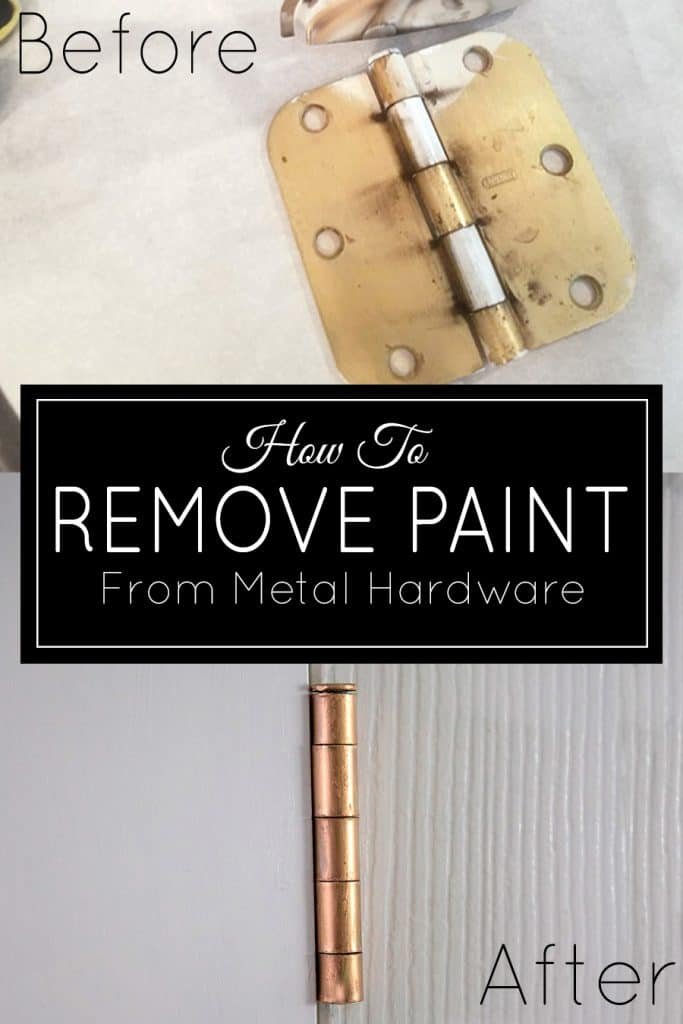
Imagine peeling an onion, layer by layer. Stripping paint works similarly, revealing the solid metal beneath the paint. It can seem daunting, but with the right tools and techniques, you’ll find it’s actually a manageable task. So grab a cup of coffee, and let’s dive into how to strip paint from old cast iron door hinges.
Why Strip Paint from Cast Iron Door Hinges?
You might be wondering why you should go through the trouble of stripping paint from your hinges in the first place. Well, for starters, old paint can make your fixtures look shabby and could even affect their performance. When hinges are covered with flaking paint, they can become difficult to operate smoothly, leading to jams or squeaks.
Additionally, removing the paint allows you to properly inspect the hinges for rust or damage. Cast iron is durable, but it can corrode if it’s been poorly maintained. Once the paint is stripped away, you can clean the metal and apply a protective finish that will help prevent rust in the future. Think of it as giving your door hinges a spa day!
Tools You’ll Need
Before you start stripping the paint, gather some essential tools. Having everything at hand will make the process smoother and more efficient. Here’s a list of what you’ll need:
- Paint stripper: Look for a good-quality, non-toxic paint stripper to minimize fumes and health risks.
- Scraper: A putty knife or a dedicated paint scraper will help you remove the loosened paint.
- Wire brush: This is perfect for scrubbing away stubborn remnants of paint and rust.
- Sandpaper: Use medium to fine-grit sandpaper for smoothing the surface once the paint is removed.
- Protective gear: Gloves, goggles, and a mask will keep you safe from chemicals and dust.
Gathering these tools will set you up for success. It’s always better to be prepared than to run back and forth in the middle of the project!
Preparing Your Workspace
Setting up a suitable workspace is crucial before diving into the paint stripping process. Find a well-ventilated area, preferably outside or in a garage, to minimize exposure to fumes. If you have to work indoors, open windows and use fans to improve airflow.
Lay down a drop cloth or old newspapers to catch any drips and debris. You don’t want to end up with a mess on your floor. Take a moment to secure the hinges — if they’re still attached to a door, consider removing them. This will prevent any damage to your door while you work.
Finally, make sure to have a trash bag handy for disposing of the paint chips and any other debris. Cleaning up as you go helps keep the project organized and makes the final clean-up less daunting.
Applying the Paint Stripper
Now it’s time to get to the fun part! Applying the paint stripper is straightforward, but here’s the catch: always follow the manufacturer’s instructions. Each paint stripper can have different application methods and drying times.
Here’s a step-by-step approach:
1. Apply the paint stripper: Using a brush, apply a generous coat of stripper over the paint. Make sure to cover it fully for even results.
2. Wait: Allow the stripper to sit for the recommended time—this could range from 15 minutes to a few hours. The paint will begin to bubble or lift away from the metal!
3. Scrape the paint: Once the paint has lifted, use your scraper to gently remove it. Be careful not to gouge the metal surface underneath.
This part can feel a bit like being a detective uncovering the hidden story of your hinges, as you reveal the raw cast iron!
Removing Remaining Paint and Rust
After scraping away the bulk of the paint, you might still notice some stubborn spots or rust. Don’t worry; this is normal!
Here’s what to do next:
– Wire brush: Use a wire brush to scrub off any remaining paint and rust. This will help restore the surface and ensure it’s ready for any protective coating later.
– Sand the hinges: After using the brush, sand down the surface to smooth out any rough edges left behind. Start with medium-grit sandpaper, then work your way to finer grit for a polished finish.
Working through these steps can feel satisfying as you see the hinges transform from old and worn to revitalized and ready for their next chapter.
Cleaning and Finishing Touches
Once all the paint has been stripped away, it’s time for a good clean. Rinse the hinges with water to remove any leftover paint stripper and debris. Make sure to dry them thoroughly to prevent rust from forming.
After cleaning, it’s a good practice to apply a rust-inhibiting primer or a clear coat designed for metal. This protective layer will keep your hinges looking good for years to come.
When applying these products, use a brush to ensure an even coat. You might also want to consider a spray-on option for hard-to-reach spots, depending on the hinge’s design.
Reinstalling Your Hinges
Once everything is clean and dry, it’s time to reinstall the hinges or put them back on your door. If you removed them, align them carefully and ensure any screws are tight but not over-tightened—this can cause damage to the old metal.
Here’s how to reinstall:
1. Align the hinges: Position the hinges where they belong on the door and the frame.
2. Insert screws: Carefully insert and tighten the screws. If you’re dealing with old screws, consider using new ones to avoid stripping the holes.
3. Check functionality: Finally, open and close the door a few times to make sure the hinges operate smoothly.
Seeing your door swing effortlessly can give you a sense of pride. You’ve just brought back the functionality and aesthetics of your cast iron hinges!
Maintaining Your Cast Iron Hinges
After all that hard work, you might be curious about how to maintain your newly stripped and finished hinges. Here are some tips to keep them looking great:
– Regular Cleaning: Wipe down the hinges with a damp cloth regularly to prevent dust buildup.
– Reapply Protective Coatings: Depending on your environment, consider reapplying a protective coating every couple of years.
– Lubrication: A little oil can go a long way. Apply lubricant to keep them moving smoothly and prevent rust.
By taking these simple maintenance steps, you can ensure that your old cast iron door hinges remain in excellent shape and continue to enhance your home’s charm.
In conclusion, stripping paint from cast iron door hinges may seem intimidating at first, but with the right tools and a step-by-step approach, it can be a rewarding DIY project. Not only will you improve the look of your hinges, but you’ll also prolong their life and functionality. So gather your supplies, take your time, and enjoy the transformation!
