The good news? Replacing the weatherstripping around an exterior door frame is one of those repairs that sounds more complicated than it actually is. You don’t need fancy tools or pro-level skills. Most of the time, a few basic supplies and a free afternoon will do the trick. Whether you’ve got the original foam tape, a door with a metal channel, or the classic rubber fin style, the steps are similar. Honestly, if you can peel off a sticker or cut a piece of bread, you’ve got what it takes.
In this guide, I’ll walk you through how to swap out that tired weatherstripping for something fresh and effective. We’ll talk about the tools, spot signs it’s time for a replacement, and break down each step so you never feel lost—or left in the cold.
Why Good Weatherstripping Matters for Your Exterior Door
Here’s the thing: weatherstripping does way more than stop you from feeling a draft when you step inside. It’s the unsung hero of your home’s comfort, energy savings, and even security. When those little rubber or foam strips start to crack, flatten, or peel away, your home becomes a bit less efficient and a lot less comfortable. You might notice your HVAC system running longer, your toes feeling colder, or—if you’re unlucky—a little trail of ants exploring the kitchen.
But it’s not just about comfort or utility costs. Faulty weatherstripping can also let in rainwater during storms or let dust and pollen sneak into your house. That drives up cleaning time and could even impact allergies. So yeah, a good seal matters more than most people realize.
Think about the door frame as part of a puzzle. Every gap or crack is a missing piece, and weatherstripping is how you fill those spaces for a snug fit. A strong, well-installed barrier around your exterior door frame is a small investment with big returns.
Signs Your Door’s Weatherstripping Needs to Be Replaced
You might be wondering, “How do I even know when the weatherstripping is shot?” Great question. Like most things around the house, it rarely fails all at once. But here are some red flags to watch for:
- Visible cracks, splits, or gaps in the rubber or foam
- Weatherstripping that peels, falls out, or feels brittle to the touch
- Noticeable light coming in around the closed door, especially at night
- Drafts, whistling, or cold spots near the door frame
- Sticky or hard-to-close doors (sometimes old, warped weatherstripping can make a door tough to latch)
Sometimes, the problems are more subtle. Maybe your utility bill is inching up, or you hear more street noise than usual. Bottom line: If the seal looks worn, feels flaky, or just isn’t working like it used to, it’s probably time for a fresh strip.
If you’re on the fence, try the paper test: Close the door on a slip of paper. If you can pull it out with barely any resistance, your weatherstripping isn’t doing its job.
Choosing the Right Type of Weatherstripping for Your Door
Not all weatherstripping is the same. Before you run to the hardware store (or click “add to cart”), you need to know what you’re looking for. Most exterior doors use one of a few main types:
- Foam tape: Easy to install, just peel and stick. Great for simple repairs but can compress over time.
- V-strip (tension seal): Looks like a folded strip, usually metal or plastic. Good for sealing along the sides and works in tight spaces.
- Rubber or vinyl gaskets: Fit into a slot or channel in the door frame. Long-lasting and offer a firm, tight seal.
- Door sweeps: Attach to the bottom of the door to block gaps near the threshold.
Honestly, the best way to match your replacement is to check what’s already installed. Pull off a piece and bring it to the store for comparison. While universal kits can work in a pinch, a direct match usually seals better and lasts longer. Some brands offer “push-in” weatherstripping that just snaps into place, while others might need a little adhesive or extra trimming.
If you’re stuck between two types, consider durability and how much traffic your door sees. High-traffic exterior doors do best with more rugged rubber or vinyl styles. For back doors or less-used entrances, foam is a fine (and cheap) option.
Gathering the Tools and Supplies You’ll Need
Let me explain—this isn’t one of those DIY jobs where you need a mountain of tools. You’ll need only the basics, most of which you probably already have. Here’s a solid starter list:
- Replacement weatherstripping (double-check the length and style)
- Measuring tape (for sizing the new strip)
- Utility knife or sharp scissors (for clean cuts)
- Screwdriver (only if your old or new strip is screwed in place)
- Needle-nose pliers (helpful for removing stubborn old gaskets)
- Rubbing alcohol and rag (to clean the frame so new seals stick properly)
- Adhesive (if needed) (some weatherstripping is peel-and-stick—others need a dab of glue or caulk)
If you have a door sweep to replace, you might need a drill. But honestly, most weatherstripping swaps are tool-light and beginner-friendly. Double-check the instructions on your replacement strip—some brands have unique clips or channels. Always measure your door frame first, so you don’t end up short.
Removing Old Weatherstripping From Your Exterior Door Frame
Before you can install the new, you’ve got to get rid of the old stuff. Depending on what’s there, removal can be oddly satisfying—or a little stubborn. Here’s what usually works:
- Start at one end—usually the top or bottom corner. Gently pry up a corner using your fingers or the edge of a flat screwdriver.
- Peel away slowly. For foam or tape, pull gently. For rubber in a channel, you might need pliers to tug out the strip.
- Remove any adhesive residue using a rag and rubbing alcohol. Stubborn, sticky spots may need a plastic scraper, but avoid scratching the frame.
- Check for damage to the frame itself. If the wood is rotted or the metal is bent, you’ll need to repair that before installing new weatherstripping.
Don’t rush this step. Leftover bits of old, caked-up adhesive or torn rubber can mess with the seal on your new strip. If things get sticky (literally), take your time—your future draft-free self will thank you.
Step-By-Step: How To Replace Weatherstripping Around The Door Frame
Ready to get hands-on? Here’s how to replace weatherstripping around an exterior door frame, step by step:
- Measure the length of each side—top, both sides, and the bottom if needed. Cut your new weatherstripping to match, leaving a little extra in case.
- Test-fit the strip by placing it along the frame. Make sure it doesn’t bunch up at corners or block the door from closing properly.
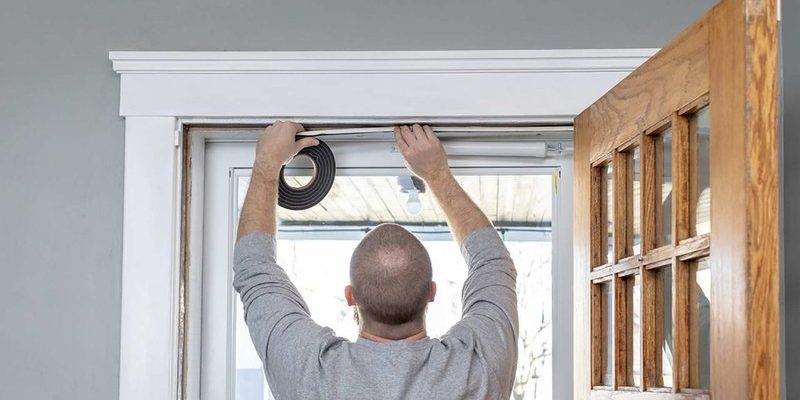
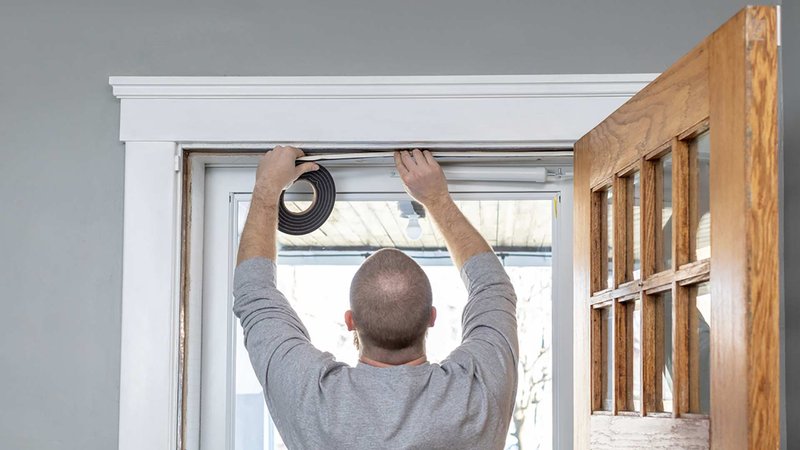
- Install the new weatherstripping:
- If it’s peel-and-stick, remove the backing and press it firmly into place.
- If it fits in a channel, push it in starting at one end and work your way around.
- For types that screw in, hold the strip steady and replace any fasteners as needed.
- Seal the corners. Pay extra attention to the top corners—those are common trouble spots for air leaks.
- Shut the door and check the fit. The door should close smoothly, and you shouldn’t see any gaps. If the door is hard to latch, the strip might be too thick; trim if needed.
Double-check your work by running your hand around the closed door. Feel for any breeze or listen for new noises. If you spot anything, adjust the strip or close up any missed spots with a dab of caulk.
Common Problems (and Fixes) When Replacing Door Weatherstripping
It’s rare for things to go perfectly the first time, especially if you’re new to DIY. Here are a few snags you might run into—and how to handle them:
- The door won’t close, or latches too tightly. This usually means the new strip is too thick or bunched up. Try trimming it a little, or gently compress the strip by closing the door a few times.
- The strip keeps falling off. Double-check that the frame is clean and dry. If you’re using peel-and-stick, add a little construction adhesive for stubborn spots.
- There’s still a draft. Look for gaps at the corners or the bottom. Sometimes the threshold (not the frame) is the culprit—a door sweep can help.
- Weatherstripping won’t fit into the channel. Make sure you’ve got the right type for your door. If in doubt, bring the old piece to the store or check for a universal fit replacement.
Trust me, even seasoned DIYers have to wrestle with fussy strips or weird door frames. The key is patience and a willingness to make small adjustments until the seal is just right.
Alternatives and Quick Fixes for Damaged Weatherstripping
Sometimes, the perfect replacement part just isn’t available, or you’re in a hurry (guests coming over, bad weather on the way). In a pinch, there are a few ways to patch things up until you can do a full replacement:
- Temporary foam tape: Cheap and flexible, works as a gap filler for a few weeks.
- Silicone caulk: Good for tiny cracks, especially in corners. Not as neat as a real strip, but keeps wind and water out.
- Weatherproof door draft stoppers: These sit on the floor and block leaks under the door while you wait for new weatherstripping.
Remember: Quick fixes won’t last forever, but they can buy you some time until you can match the right product or do a bigger repair.
If you have an older or historic door, look into specialty weatherstripping for a better fit without changing the door’s appearance—most big-box stores or local hardware shops can help you order the right type.
Finishing Up: Clean-Up and Testing Your New Weatherstripping
Once your new weatherstripping is in place and your door closes with a satisfying thud, you’re almost done. But don’t skip the last step! Take a few minutes to clean up any stray adhesive, check for small gaps, and give your handiwork a quick test.
- Open and close the door several times to make sure the strip isn’t shifting or bunching.
- Stand outside at night (or have someone shine a flashlight) to check for any visible light leaks—if you see any, press the strip tighter or add extra material.
- Clear up tools, bits of old weatherstripping, and packaging so nothing gets caught under your door or trips you later on.
- Make a quick note of the weatherstripping brand and type you used—storing this info saves a headache the next time you need to patch or replace a section.
With a snug new seal, your home will feel warmer, quieter, and just a bit more protected from the outside world. Plus, you’ll probably notice your heating or cooling system doesn’t have to work as hard—always nice for the wallet.
Replacing weatherstripping around an exterior door frame isn’t glamorous, but it’s one of those DIY wins that pays off every day. A little effort now keeps you comfortable, cuts those pesky drafts, and makes your home feel freshly cared for. And honestly, once you’ve done it once, it’s the kind of simple fix you’ll never hesitate to tackle again.