
A rubber gasket in a door bottom sweep is honestly a simple thing, but it does a big job. Whether you’ve got a universal sweep from Home Depot or a specific brand like Pemko, M-D Building Products, or Frost King, the good news is that you don’t need a professional to swap out the gasket. With a few common tools (and a little patience), you can replace the rubber in your door sweep in under an hour—even if you’ve never done it before. Let me walk you through how it works, what you’ll need, and the little tricks that’ll help you avoid mistakes along the way.
What Is a Door Bottom Sweep and What Does the Rubber Gasket Do?
Before you start unscrewing things, it’s helpful to know what you’re working with. A *door bottom sweep* is a strip that attaches to the bottom edge of your door, usually on the side that faces outside. It’s basically a barrier to stop air, water, and critters from sneaking indoors. The *rubber gasket* is the flexible strip along the bottom of that sweep—it compresses to fill the gap no matter how slightly uneven your floor might be.
Here’s the thing: not all door sweeps are created equal. Some come with brushes or vinyl fins, but rubber gaskets are especially popular for their durability and tight seal. Over time, though, even the best rubber can get brittle or squished, especially if your door sees a lot of action or faces direct sun and rain. When that happens, your home’s comfort and energy efficiency drop. You might even start to notice more noise creeping in.
Honestly, it’s easy to overlook this little part of your door setup—until it stops working. That’s when you feel drafts or see daylight under the door. Luckily, swapping out the gasket instead of the whole sweep saves money and avoids the hassle of reinstalling the full hardware. Whether you have a classic aluminum door bottom from Frost King or a commercial-grade Pemko, the rubber insert usually slides or snaps into place, which means repairing it is very DIY-friendly.
Signs Your Rubber Gasket Needs Replacing
You might be wondering, “How do I know if my gasket is really the problem?” Here are some dead giveaways:
- Visible cracks or tears: Run your finger along the gasket. If it feels rough, brittle, or you see splits, it’s done for.
- Persistent drafts: Even when your door is closed, you feel cold or hot air sneaking in along the floor.
- Daylight under the door: If you see even a razor-thin line of light, the seal is broken.
- Increased noise or dust: More street noise, dust, or even bugs are making their way inside.
I’ve found that most gaskets last between 2-5 years, depending on how often the door opens, the weather it faces, and the sweep’s material. If you’re constantly cleaning messes or adjusting your thermostat, check under the door first. Sometimes the fix is as simple as a new gasket.
If you’re unsure, close the door and check from both sides for light, air movement, or gaps. Don’t ignore small problems—tiny cracks always become big ones.
How to Choose the Right Replacement Rubber Gasket
Not all gaskets are interchangeable—even if they “look about right” in the package. The secret is to match both the length and the profile (the shape of the rubber when viewed from the end).
Step one: Remove the old gasket and bring it to the hardware store if possible. Brands like Pemko, M-D Building Products, and Frost King all make replacement rubber inserts for their sweeps, but some off-brand and universal options work, too. Look for:
- Material: EPDM or neoprene rubber holds up better than basic vinyl. Try to get the same type as your original if possible.
- Size: Measure the width of your door and the height/depth of the gap you want to seal. Gasket lengths are typically 36 or 48 inches, and thickness varies.
- Fit: Check whether the gasket slides, snaps, or presses into a slot. Universal gaskets often fit metal sweeps with a “kerf” (a channel groove), but some older sweeps use screws.
If you’re not sure, snap a photo of your door bottom sweep from the side and bring it along. Store staff have usually seen it all and can help match up the right part. Remember, it’s better to get a gasket that’s a hair too long (you can trim it) than one that’s too short.
Tools and Supplies You’ll Need for the Job
Here’s a quick rundown of what you’ll need to replace a rubber gasket in a door bottom sweep (universal and brand-specific):
- Replacement rubber gasket (matched to your sweep style and length)
- Screwdriver (usually Phillips head, but sometimes flat blade)
- Utility knife or scissors (for trimming the new gasket if needed)
- Measuring tape
- WD-40 or silicone spray (optional, for sticky old gaskets)
- Small hammer or mallet (sometimes helpful for tight fits)
You shouldn’t need any advanced gear or power tools. If you run into *rusted screws* or a sweep that won’t budge, a squirt of penetrating oil and a little patience will do the trick. Honestly, the longest part is usually finding the right replacement piece—the swap itself is pretty quick once you have the new gasket in hand.
Step-by-Step: How to Replace the Rubber Gasket in a Door Bottom Sweep
Let me walk you through the whole process, from start to finish—no guessing, no missing steps.
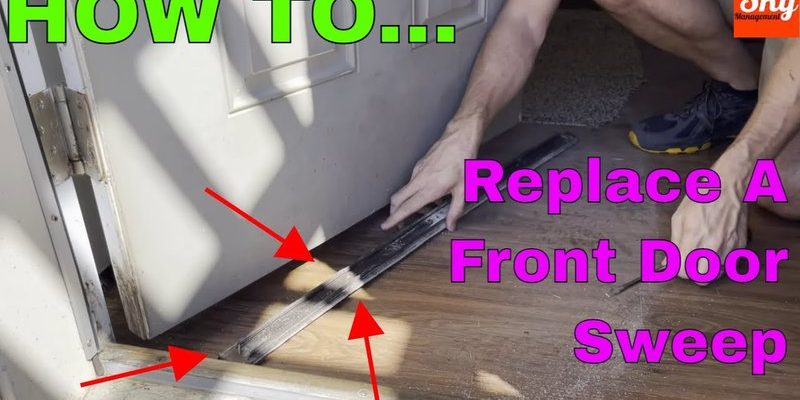
1. Open the Door and Remove the Sweep
Start by swinging the door open so you can work comfortably. Most door bottom sweeps are attached with two to four screws along the bottom edge. Use your screwdriver to remove these screws, putting them aside where you won’t lose them.
If the sweep feels stuck, wiggle it gently. For sweeps that slide on (like metal ones with a track), you might need to tap it with a mallet from one side to loosen it. Take your time—forcing it can bend the sweep or scratch your door.
2. Slide or Pull Out the Old Rubber Gasket
Once the sweep is off, look closely at how the gasket’s installed. Some gaskets “slide” out from one end; others are pressed or snapped into a groove. For extra-stubborn gaskets, a spray of WD-40 along the track helps them slide free. Pull the old gasket out completely—don’t be surprised if it crumbles or stretches. That’s normal after years of wear.
Take a moment to clean out the groove. Dust, dirt, and even old adhesive can build up here, so scrape out anything left behind.
3. Measure, Trim, and Fit the New Gasket
Line up your new gasket against the old one to check the length. Use a utility knife or sharp scissors to trim the gasket so it matches the width of your door. If you’re working with a universal gasket, you might need to trim the depth/height too (just follow the included guide lines).
Slide or snap the new rubber gasket into the groove, making sure it fits snugly all along the sweep. Some people find it easier to spray a little soapy water on the rubber to help it slide in. Make sure there are no bunches or gaps—the goal is an even, tight fit the whole way across.
4. Reattach the Sweep and Test the Seal
Line up the sweep with the bottom edge of your door. If you marked your screw holes, it goes back on in the exact same place. Hold the sweep tight while you screw it back in—if it’s even a little off, you’ll notice the door dragging or the seal not sitting flush.
Once it’s on, close the door and check the alignment. The gasket should compress just enough to seal the gap, but not so much that the door’s hard to open or close. Take a step back and look for any daylight. If you see any, adjust the sweep or trim down any high spots on the gasket.
Honestly, once you get the hang of it, replacing a rubber gasket in a door bottom sweep is kind of satisfying. The door closes with a soft “thunk,” and the cold air, bugs, and outside mess stay where they belong.
Troubleshooting Common Problems with New Door Gaskets
You might run into a few speedbumps along the way—that’s normal. Here’s how to handle the most common issues:
- New gasket is too stiff: If the door is suddenly hard to close, the rubber might just need a few days to compress. You can also trim a tiny bit from the bottom edge if needed.
- Gasket won’t stay in place: Some sweeps get loose with age. A dab of silicone adhesive will help anchor the gasket in the groove.
- Leaking or uneven seal: Double-check that the sweep is lined up straight. If your floor is uneven, you might need a thicker rubber or a different sweep style to get a good seal.
- Screws won’t bite: If the holes are stripped, use slightly longer or fatter screws, or fill old holes with wooden toothpicks and wood glue before trying again.
Don’t get discouraged! Even professionals have to make adjustments sometimes. The goal is a tight, consistent seal that stands up to everyday wear and tear.
Comparing Universal vs. Brand-Specific Door Bottom Sweeps
Here’s a quick reality check: you don’t always need an exact replacement. *Universal door sweeps* and gaskets cover most standard doors, especially if you have a plain metal sweep with a channel slot. But if your home has a custom-sized door, or you’re working with premium brands like Pemko or M-D, it’s worth hunting down the correct brand-specific insert.
Universal replacements are usually cheaper and easier to find. They’re great for rental properties or quick fixes. But brand-specific gaskets tend to last longer and fit more precisely, which means better performance and fewer future adjustments. If your door gets a ton of use or faces tough weather, it pays to go with the original manufacturer’s part.
The bottom line? Both work—you just need to double-check sizing and fit. When in doubt, test-fit the gasket before cutting it down.
Why Replacing Your Door Bottom Gasket Matters
It might seem like just another “honey-do” chore, but staying on top of your door bottom sweep saves time, money, and frustration in the long run. Here’s why:
- Energy efficiency: A tight gasket keeps heated (or cooled) air inside where you want it. You’ll notice lower energy bills after swapping out a worn gasket.
- Comfort: Drafts and noise drop right away. Floors stay cleaner, too—less dust gets in from outside.
- Pest control: Bugs don’t need much space to sneak in. Even the tiniest gap can be an open door for ants, spiders, or worse. A fresh rubber insert closes the gap completely.
- Longevity: Protecting your door and floor from moisture means fewer repairs down the line. Water damage is no joke.
Replacing the rubber gasket in a door bottom sweep is honestly one of the easiest DIY fixes with the biggest payoff. It’s not glamorous, but the comfort and savings add up fast.
Wrapping Up: Take Pride In the Little Fixes
Swapping out a rubber gasket in a door bottom sweep doesn’t take fancy skills or special tools—just a bit of patience and the right part for your sweep. Whether you’re matching a Pemko, Frost King, or trying a universal gasket, attention to detail makes all the difference. You’ll feel the results every time you open the door and notice the quiet hush, the missing drafts, and the peace of mind that comes from a job well done.
So, if you catch yourself fixing a squeaky hinge or patching a little gap, remember: it’s these simple upgrades that keep your home comfortable, energy efficient, and looking sharp. And let’s be honest—knowing you can tackle these repairs yourself? That’s always worth it.