
Here’s the thing: swapping out a worn rubber gasket on an adjustable threshold isn’t rocket science. Brands like Pemko and M-D Building Products design these thresholds so homeowners can tackle the job themselves. If you’re a DIY beginner, don’t worry—no fancy tools or obscure codes required. All you need is a little patience, a screwdriver, and the right replacement part.
So, let’s walk through how to replace that tired gasket and get your door sealing like new again. Along the way, I’ll point out common pitfalls, troubleshooting tips, and how to avoid the mistakes I made the first time I tried this.
An adjustable threshold is that metal (often aluminum or brass) strip you see at the bottom of your exterior door. It’s called “adjustable” because you can raise or lower the center section using screws or cams, letting you get a perfect fit against the door’s sweep. This helps block drafts, dust, and bugs from sneaking in, and it gives your HVAC system a break in both summer and winter.
But honestly, the real hero of this setup is the rubber gasket. It’s the soft strip—usually made from vinyl, neoprene, or silicone—that runs along the top of the threshold. Its main job is to create a snug barrier between the threshold and the bottom of your door. When it’s in good shape, you never even notice it. When it’s worn out, you’ll feel it—literally.
You might be wondering why the gasket wears out so quickly compared to the metal threshold itself. Here’s why: every time you open or close the door, the gasket is squished and rubbed. Couple that with exposure to sun, rain, snow, or dirt, and eventually, it cracks, compresses, or tears. If you don’t replace it, that tiny gap can cost you extra money on your energy bill, let in pests, or even damage your floors over time.
So, how do you know it’s time to swap out your gasket instead of just adjusting the threshold? Let me explain what to look for. Sometimes, the signs are obvious; other times, you have to snoop around a bit.
- Visible cracks or rips: Check for chunks missing, splits, or sections that look chewed up.
- Permanent flattening: If the gasket is pressed so flat you barely see any “bounce” left, that’s a problem.
- Drafts or daylight: With the door closed, look from inside for any light peeking through at the bottom. Feel with your hand for a breeze.
- Water leaks: Notice water pooling inside after a storm? The gasket may not be sealing tightly anymore.
Here’s a trick: stick a piece of paper halfway under the closed door. If you can pull it out with almost no resistance, the gasket isn’t doing its job. Some folks try to fix this by cranking the threshold higher, but honestly, if the rubber is shot, adjusting it won’t help much. It’s time for a new gasket.
Before you start popping off screws, make sure you have the right replacement gasket. Trust me, you don’t want to pull everything apart and realize the new part doesn’t fit. Adjustable thresholds from brands like Pemko, M-D, and Frost King often use a specific style and size, so it pays to check carefully.
- Type of threshold: Look at your threshold for a model number, brand logo, or any part codes. Sometimes you’ll find these stamped near the edge or under a screw cap.
- Profile and width: Slide a flat screwdriver under the damaged gasket to get a look at the cross-section. There are bulb, teardrop, “T,” or “E” shapes, and each fits differently.
- Length: Measure the width of your door or the old gasket to be sure you get a piece that covers the whole opening.
Hardware stores carry universal gasket kits, but those don’t always seal as well or last as long as brand-specific ones. If you want a tight fit and fewer issues syncing the gasket with your threshold, spend the extra time to match it up. Snap a photo of your old gasket and threshold if you’re heading to the store, or compare what you find online.
Tools and Supplies Needed for a Smooth Gasket Replacement
Let’s make sure you have everything ready before you start. Most adjustable threshold gasket replacements are pretty straightforward and only need simple tools, but a few extras can make life easier.
- Replacement gasket: Get one that matches your threshold profile and length.
- Screwdriver: Usually a Phillips head; check your threshold screws to confirm.
- Utility knife or scissors: For trimming the new gasket to fit.
- Pliers: Sometimes the old gasket is stubborn and needs a tug.
- Vacuum or brush: To clean out dust and debris before installing the new gasket.
Some people like to throw in a pair of work gloves for comfort. And honestly, having a flashlight nearby helps you see what you’re doing, especially if your entryway isn’t super bright.
Before you start, prop the door open or have someone hold it so you’re not juggling everything with one hand. Trust me, you’ll thank yourself later.
Step-By-Step Guide: How To Replace a Worn Rubber Gasket On an Adjustable Threshold
Now for the main event: actually swapping out your gasket. The process is simple but can feel intimidating if you’ve never done it. Let’s break it down, with every step spelled out clearly.
1. Remove the Old Gasket
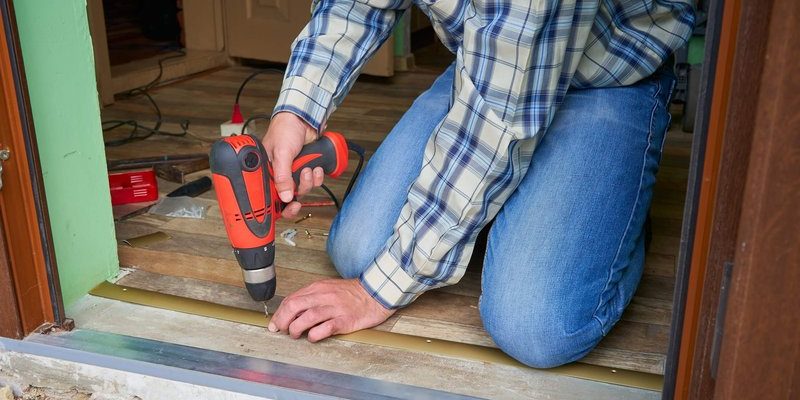
First, locate the screws or fasteners along your threshold. With most adjustable types—like those from Pemko or M-D—you’ll find a row of screws holding down the center plate. Using your screwdriver, loosen and remove these screws carefully. Set them aside so they don’t disappear into a crack in the floor.
Next, gently lift the threshold plate. You should see the worn gasket sitting in a groove underneath. Use pliers to pull out the old gasket. If it’s dried up and stuck, a flat screwdriver can help coax it out. Don’t force it; you don’t want to bend the metal.
2. Clean the Threshold Groove
This step is easy to skip but super important. Debris, dust, or leftover gasket pieces can stop the new seal from sitting flush. Use a vacuum, small brush, or even a damp cloth to clean out the groove where the gasket will sit. Let it dry before moving on.
3. Cut and Install the New Gasket
Take the new gasket and line it up with the threshold. If it’s longer than your door, use a utility knife or sharp scissors to trim it to the exact width. Push one end of the gasket into the groove, then work your way along, pressing it down firmly so it clicks or fits snug all the way across.
Some gaskets slide in from the end, while others press straight down. If your threshold has a “T” slot, make sure the tab fits deep enough that it won’t pull out.
4. Reassemble and Test the Seal
Lay the threshold plate back into position and replace the screws you removed earlier. Tighten them evenly, but don’t overtighten; you don’t want to strip the holes or warp the plate.
Lastly, close the door and check the seal. Look for daylight and feel for drafts at the bottom. If the door is tough to close, try adjusting the threshold screws up or down slightly to fine-tune the fit. The goal is a firm but not forced contact between the door sweep and the new gasket—think glove, not vise grip.
Take your time and double-check the fit as you go. A little patience here saves a lot of hassle later.
Common Problems and Troubleshooting When Installing a New Gasket
Even when you follow all the steps, you might hit a snag—trust me, it’s normal. Here are some typical issues beginners face, plus how to fix them.
- Gasket too loose or too tight: If it wiggles, you may have the wrong size or profile. Double-check you ordered the correct type for your adjustable threshold.
- Door won’t close smoothly: Sometimes the new gasket is thicker than the old one, making the door stick. Lower the adjustable threshold or trim the gasket a hair if possible.
- Still feeling a draft: Check your install—did the gasket seat fully into the groove? Run your hand along the length and look for any spots lifting up.
- Screws don’t thread in: If you lost sync with the original holes, realign the plate gently. Never force the screws; metal threads can strip easily.
If you find that the replacement gasket just isn’t pairing well with the threshold—maybe because the metal is bent or the groove is damaged—you might need to reset the entire threshold or upgrade to a new one. That’s rare, but good to keep in mind.
Maintaining Your Adjustable Threshold and Gasket for the Long Haul
Once you’ve replaced that rubber gasket, you want it to stay in top shape for as long as possible. The good news is that with a little upkeep, you won’t be doing this chore every year.
- Check the seal every season: Especially after big weather events, look and feel for drafts or wear.
- Keep the area clean: Sweep or vacuum around the threshold often so dirt doesn’t grind into the gasket.
- Readjust as the door settles: Houses shift, and doors settle—a quick tweak of the threshold screws keeps things synced up.
If you live in a spot that gets a lot of sun or snow, look for gaskets made from more durable materials like silicone, which stand up better to the elements. And if you ever spot water pooling inside or around the threshold, don’t wait—give the gasket a look right away.
When To Replace the Entire Adjustable Threshold Instead
Sometimes, no matter how many times you swap the gasket, drafts and leaks keep coming back. Here’s when you might need a whole new adjustable threshold:
- Corroded or dented metal: If the base or plate is rusted, bent, or pitted, it can’t hold a gasket properly anymore.
- Groove is broken or warped: If the channel that holds the gasket is torn up, even the best new gasket won’t pair tightly.
- Repeated troubleshooting fails: Multiple gasket replacements with no improvement mean it’s probably time for a reset with a new threshold kit.
Universal adjustable thresholds are widely available, but sticking with your original brand—like Pemko or M-D—makes matching and installing the gasket much easier down the road. Sometimes, replacing the threshold is the smarter move for a longer-lasting fix.
Wrapping Up: Get Your Door Sealing Like New
Replacing a worn rubber gasket on an adjustable threshold is one of those low-key DIY wins that really pays off. It’s not glamorous, but you’ll feel the difference every time you walk past your door—no draft, no leaks, just a solid, smooth seal. The process isn’t complicated, but getting the details right makes all the difference. Take the time to sync the right gasket with your threshold, follow the steps, and troubleshoot any issues before calling it done.
Honestly, once you’ve swapped a gasket once, you’ll wonder why you waited so long. So grab that screwdriver, cut your new gasket to size, and enjoy a cozier, more efficient home. If only all home fixes were this straightforward.