If you’re dealing with a Kwikset or Schlage door knob, don’t worry—this isn’t a complicated fix! Replacing that worn plastic sleeve can restore your knob to its former glory. In this guide, I’ll walk you through the steps to replace that sleeve, making the process as simple as pie.
Understanding the Door Knob Spindle
Before diving into the replacement, it’s helpful to understand the parts involved. The door knob spindle is a metal rod that runs through the door and connects both the inside and outside knobs. When you turn your knob, the spindle rotates, allowing the latch to retract. The plastic sleeve is designed to support this spindle.
If the sleeve is worn, it can lead to friction and resistance. This might make it hard to open or close the door smoothly. You might be wondering why this matters. Well, a properly functioning door knob isn’t just about convenience; it’s also about security. A loose knob can make it easier for someone to force the door open.
Gathering Your Tools
Before you get started, it’s smart to gather all the tools you’ll need. Here’s a quick list:
- A flathead screwdriver
- A Phillips screwdriver
- A replacement plastic sleeve (make sure it fits your door knob model)
- A towel or drop cloth for floor protection
Having everything handy saves you from running back and forth when you realize you forgot something. Plus, a clean workspace makes the task feel less daunting.
Removing the Door Knob
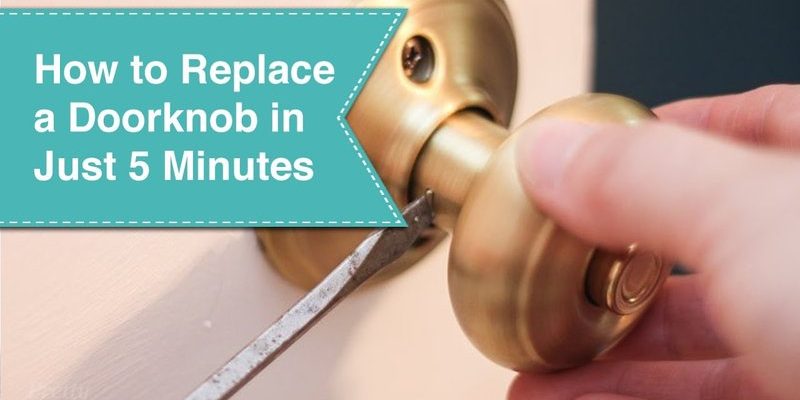
Now, let’s get into the nitty-gritty of taking off that door knob. Start by locating the screws on the door knob’s interior side. Most knobs will have two screws: one on the side and another directly beneath it. Here’s how to go about it:
1. Use the Phillips screwdriver to remove the screws.
2. Gently pull the door knob off the spindle. It should slide out easily, but if it feels stuck, wiggle it back and forth a little.
3. Once the knob is off, you’ll see the plastic sleeve on the spindle.
It’s a good idea to take a moment here to inspect the spindle and the other components. If the spindle looks worn or has any rust, it might be worth considering a full replacement rather than just the sleeve.
Removing the Worn Plastic Sleeve
Now that you have access to the sleeve, it’s time to remove it. This part might take a bit of finesse. Here’s how to handle it:
– Gently pull on the sleeve with your fingers. If it’s stuck, you can use the flathead screwdriver to pry it off carefully. Just be cautious not to damage the spindle in the process.
– If the sleeve is really stubborn, you can twist it slightly as you pull. This can help break any stubborn residue holding it in place.
Keep in mind that the sleeve may be dirty or grimy, so a quick wipe with a cloth can help keep things clean before you install the new one.
Installing the New Plastic Sleeve
Congratulations on making it this far! Now comes the satisfying part: installing the new plastic sleeve. Here’s a step-by-step for getting it just right:
1. Take your new plastic sleeve and align it with the spindle.
2. Slide it carefully onto the spindle until it fits snugly. You should feel it click into place.
3. Make sure the sleeve is positioned correctly so that it won’t obstruct the door knob when you put it back on.
After installing, give it a gentle wiggle to make sure it’s secure. This small adjustment can help ensure the knob functions smoothly when reassembled.
Reassembling the Door Knob
With the new sleeve in place, it’s time to put everything back together. This part is straightforward and just requires a little attention. Here’s how to do it:
1. Slide the door knob back onto the spindle.
2. Align it with the holes for the screws you removed earlier.
3. Insert the screws back into their holes and use the Philips screwdriver to tighten them securely.
It’s essential to ensure the screws are snug but not overly tight, as you might strip the screws or damage the knob. Once everything feels secure, give the knob a few test turns to make sure it operates smoothly.
Final Checks and Tips
Once you’ve replaced the plastic sleeve and reassembled the door knob, it’s a good idea to do a few final checks:
– Test the knob: Give it a few turns and ensure it opens and closes the door easily.
– Inspect for loose parts: Make sure everything feels secure as you turn the knob.
– Check the latch: If your knob is still not functioning well, the issue might lie with the latch itself.
If you encounter any persistent issues, don’t hesitate to consult a professional or look into a complete knob replacement.
Replacing a worn plastic sleeve on a door knob spindle is a simple but crucial task that can save you from larger headaches down the road. With a bit of patience and the right tools, anyone can tackle this project. You’ve taken an important step in maintaining your home’s security and ease of access.
By following these steps, you’ve ensured your door knob can operate smoothly once more. Remember, a small fix can often lead to a big difference in how your home feels. So, the next time you notice a wobbly knob, you’ll know exactly what to do! Happy fixing!