
Most of us don’t think twice about our door hinges until something goes wrong. Maybe your Stanley heavy duty hinge is starting to creak, or you’ve noticed rust and loose screws when you walk in. A bad hinge can make your door hang lopsided, drag against the floor, or even become hard to lock. Good news: you don’t need a pro. With a few common tools, some smart troubleshooting, and a little elbow grease, you can swap out those tired hinges and get your exterior door working as smoothly as the day it was hung.
Signs Your Exterior Door Hinge Is Worn Out
Before you start unscrewing anything, it’s important to figure out if a worn-out hinge is actually the root of your door problems. Exterior door hinges—especially heavy-duty models—are designed to last for years, but weather, weight, and simple wear can take their toll.
You might be wondering, “How do I know it’s really the hinge?” Here’s a trick: open and close the door slowly. If you hear creaking, feel resistance, or see the door scraping the threshold, there’s a good chance your hinge is on its last legs. Door hinge problems often show up as visible rust, bent metal, or screws that won’t stay tight. For Stanley or National Hardware hinges, you might even spot cracked or missing bushings where the hinge pin sits.
Ignoring a worn hinge won’t make it go away. Honestly, it just gets worse. The door might sag further, ruining weather seals or making it impossible to lock. Left too long, a bad hinge can warp your door frame itself, setting you up for more expensive fixes down the road. Catching it early saves hassle, money, and your knuckles from the next time you try to open the door and it won’t budge.
Tools and Materials You’ll Need
Let me explain—nothing kills momentum like realizing you’re missing a tool halfway through a job. For replacing a heavy duty exterior door hinge, you won’t need anything fancy, but you will want everything laid out before you start. Here’s what to grab:
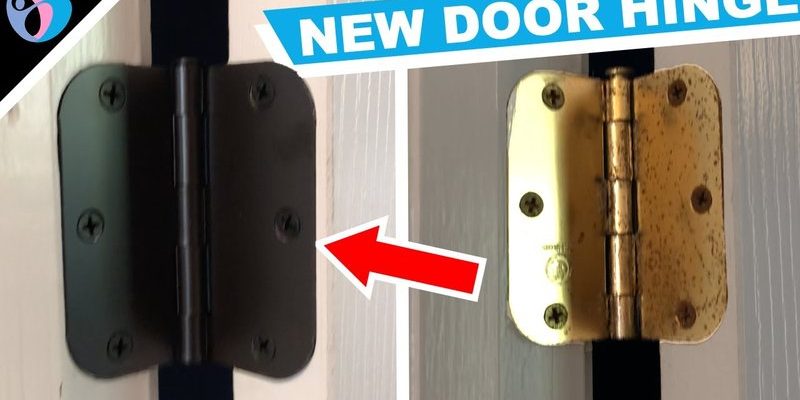
- New heavy-duty exterior door hinge (match your old one—size, shape, and holes matter!)
- Phillips and flathead screwdrivers or a drill with matching bits
- Wood putty (for old screw holes, if needed)
- Utility knife
- Hammer and small nail set (for stubborn hinge pins)
- Wooden shims or a sturdy wedge (to support the door while working)
- Level (optional, but great for checking your final work)
Here’s a tip: take the old hinge with you to the hardware store. No matter if you’re using a Stanley, National Hardware, or even a generic universal hinge, you want the new one to line up exactly. If the screw holes don’t match or the leaves are the wrong thickness, you’ll end up making more work for yourself.
How To Remove The Old Hinge Safely
A stuck or heavy exterior door can feel like it weighs a ton. Honestly, this part makes a lot of beginners nervous, but don’t worry—you aren’t going to drop the whole door (unless you take all the hinges off at once, which you absolutely shouldn’t do).
Start by propping the door with a wooden shim or wedge underneath. This stops it from dropping down or shifting sideways as you remove the screws. Focus on replacing one hinge at a time—this keeps the door upright and saves your knuckles. Unscrew the hinge from the door first, then from the frame. Keep those screws handy, just in case the new ones don’t fit or you need extras.
Here’s where things get a little tricky: if the hinge pin is rusted or won’t budge, use a hammer and nail set to gently tap it out from underneath. For really stubborn pins, a squirt of WD-40 and a little patience work wonders. Take your time. Rushing can strip old screws or damage the door frame—problems that are a pain to fix and can throw your whole project off track.
Installing The New Heavy Duty Hinge
So you’ve got the old hinge out and you’re staring at a fresh spot—now it’s time to fit the new one. Swap the new hinge into place, making sure the leaves sit flush with the door and frame. Double check that the holes line up exactly. If they don’t, you might need to fill the old holes with wood putty, let it dry, and pre-drill new pilot holes for the screws. This step is key for a tight, long-lasting fit.
Attach the hinge to the frame first, then to the door. Don’t fully tighten any of the screws until all of them are in place. This lets you adjust the hinge slightly if the fit isn’t perfect on the first try. For heavy exterior doors with Stanley or National Hardware hinges, installing the pin last helps keep everything together as you go. If the hinge pin has a top and bottom, make sure it’s facing the right way (the cap usually faces up).
Pro tip: Test the door by gently opening and closing it before tightening everything down. If it binds or rubs, a small adjustment now is much easier than redoing all your work later.
Troubleshooting: When The Door Still Doesn’t Close Right
Sometimes, even after swapping the hinge, your door might not sit perfectly. You might be wondering why it’s still dragging or refusing to line up with the latch. Here are a few quick fixes and what might be going on:
- Screws won’t bite: The old holes might be stripped out. Use wood putty or push a wooden matchstick into the hole, then drive the screw in for a tight fit.
- Door still sags: Check if the new hinge leaf thickness matches the old one. If not, adding a thin cardboard shim behind the hinge can level things out.
- The door doesn’t latch: Sometimes, just loosening the screws a bit and gently shifting the hinge can help. Tighten everything slowly, checking alignment as you go.
- Hinge squeaks or binds: A drop of lubricant on the hinge pin (WD-40 or silicone spray) usually solves it.
If you’re still fighting the fit, step back and check if the whole door is square in the frame. Old houses settle, and sometimes it’s more than just the hinge. In rare cases, you might need to adjust the position of the strike plate or reset the hinge mortise with a chisel.
Universal Hinges vs. Brand-Specific Hinges
Choosing between a universal hinge and a specific brand model (like Stanley or National Hardware) can feel confusing at first. Universal hinges claim to fit most doors, but here’s the truth: “universal” usually means “close, but not perfect.” If your door is heavy or exposed to weather, getting an exact match makes a big difference in long-term durability and smooth operation.
Brand-specific hinges are built to fit precise measurements and hole patterns. That means they’ll usually drop right in, saving you time and hassle. Universal hinges often require adjusting the mortise (the cutout in the door or frame), filling old holes, or even trimming the hinge leaf if it’s too thick. For heavy-duty exterior doors—especially those exposed to wind and rain—using a direct replacement from the original brand is almost always the safer bet.
Still, universal hinges can save the day if your original model is discontinued or you need a quick fix. Just be ready to do a little extra fitting and double-check that the hinge can handle the door’s weight.
Extra Tips For Heavy Duty Exterior Hinges
Heavy duty hinges aren’t just bigger—they handle a lot more stress, especially on main entry doors or doors with security locks. Here’s how to keep your replacement hinge working like new:
- Check for rust-resistant finishes. Look for stainless steel or brass-plated options, especially if your door faces the weather.
- Use all the screws provided. Honestly, skipping screw holes might seem quicker, but every screw bumps up strength and stops future sagging.
- Lubricate the hinge pin after installation. Even brand-new hinges appreciate a drop of oil to keep things quiet and smooth.
- Inspect all your hinges twice a year. Catching a loose or rusty hinge early saves much bigger headaches down the line.
If your door is extra heavy (think solid wood or reinforced security doors), consider upgrading to ball bearing hinges. They’re designed to handle repeated opening and closing without wearing out or squeaking, and they make a surprisingly big difference over time.
When a Pro Might Be Needed
Let’s be honest—most folks can tackle a basic hinge swap with a screwdriver and a steady hand. But sometimes, the job throws you a curveball: stripped screw holes that won’t grip, a door frame that’s warped, or an old hinge that’s been painted over dozens of times. If you’ve tried the basics and the door still isn’t working right, calling in a pro is nothing to be ashamed of.
A pro can reset the mortises, repair frame damage, or even recommend better hardware for climates with lots of rain or salt in the air. For historical homes or ornate doors, a specialist can help you find matching hardware so you keep the look and the function.
There’s no shame in outsourcing the job if you’re out of your depth—sometimes, peace of mind is worth the extra buck.
Wrapping Up: Enjoy That Smooth-Closing Door
Stepping back and closing the door for the first time after a hinge replacement is a small victory. That smooth, solid “click” as the latch catches and the way the door swings easily—it’s the sound of a job well done. Taking the time to replace your worn-out exterior door hinge, especially on a heavy-duty entry door, isn’t just about fixing a squeak. It’s about protecting your home, saving money on future repairs, and getting a little boost of DIY confidence.
Honestly, once you’ve seen how manageable this job is, you might just start noticing squeaky hinges all over the house. Trust your tools, take your time, and remember: almost every sticky, sagging, or scraping door can be made good as new with a fresh, heavy-duty hinge and a bit of patience.