Now, I know what you’re probably thinking: “Isn’t that something I should leave to a professional?” Well, sure, you could call a handyman, but why not roll up your sleeves and give it a shot yourself? Replacing a latch is a straightforward DIY project that can save you time and money. Plus, you’ll gain a sense of accomplishment; after all, who doesn’t love a little home improvement?
In this guide, we’ll walk through the step-by-step process to replace a standard tubular latch. We’ll discuss the tools you’ll need, how to measure and select the right latch, and the actual replacement steps. So let’s get started on this little adventure together!
What Is a Tubular Latch and Why Replace It?
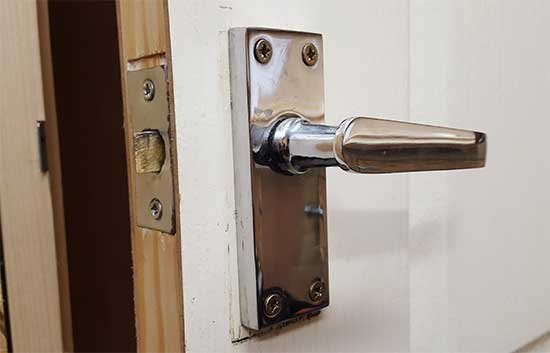
A standard tubular latch is a mechanism used in interior doors to keep them closed. If you think of it like the lock and key of your door, the latch helps secure your space while allowing easy access. Over time, these latches can wear out because of frequent use or age. It might not catch properly, which can be frustrating during those moments when you’re juggling groceries or other tasks.
You might notice your latch not catching correctly, or maybe the handle feels loose or wobbly. If you find yourself slamming the door just to get it to close, that’s a pretty good sign it’s time for a replacement. Also, a broken latch can compromise your home’s privacy and security—two things you probably want to keep intact.
Replacing a latch isn’t just about fixing a problem; it’s also an opportunity to upgrade. Maybe your old latch doesn’t match your new door handle, or it just doesn’t look good anymore. With so many options available, you can choose one that not only functions well but also enhances the overall look of your door.
Tools and Materials You’ll Need
Before diving into the replacement process, let’s make sure you’re armed with the right tools and materials. Here’s what you’ll typically need:
- New tubular latch (make sure it’s the right size)
- Screwdriver (a Phillips head is most common)
- A chisel (if adjustments are necessary in the door)
- Measuring tape
- Pencil
- Wood glue (optional, for extra support)
Having these items ready will streamline your process. If you’re unsure what type of latch to get, take your old one to the hardware store as a reference or check the manufacturer’s specifications. This way, you’ll ensure the new latch fits perfectly in the existing hole.
While shopping, consider the material and finish of the latch; you want it to harmonize with your door and decor. A brass finish can give a classic look, while a matte black latch may add a modern touch.
Removing the Old Tubular Latch
Now that you have your tools ready, let’s get to the fun part—removing the old latch. Here’s how you do it:
1. Open the door: Make sure it’s fully open to give yourself plenty of room to work.
2. Unscrew the handle and plate: Use your screwdriver to remove the screws on both sides of the door where the handle attaches. Set the handle aside gently.
3. Remove the latch mechanism: Once the handles are off, you’ll see the latch itself. Unscrew it from the door and pull it out gently.
You might want to take a few pictures during this process, especially if it’s your first time. It will help remind you how everything fits together when you install the new latch.
Installing the New Tubular Latch
Installing the new latch is the moment of truth! Here’s a step-by-step guide to get it in smoothly:
1. Insert the new latch: Slide the new latch into the hole where the old one was. Make sure it fits snugly, but not too tight.
2. Secure it in place: Using your screwdriver, attach the new latch to the door frame with the provided screws. Ensure it’s straight; you don’t want a crooked latch that sticks.
3. Reattach the handle: Now, attach the door handle back onto each side, inserting the screws securely.
You might have to adjust the latch a bit to get it just right, so don’t hesitate to make small tweaks. Sometimes, the latch might need to be aligned for a smooth operation.
Testing the New Latch
After you’ve installed the new latch, it’s time to put it to the test. Gently close your door several times. You want to ensure that it latches easily and securely. If the door doesn’t latch smoothly, examine the alignment of the latch and strike plate.
Here’s the thing: It should feel satisfying. When you turn the handle, the latch should retract smoothly, and you should hear that satisfying click when you close it. If all’s good, congratulations! You’ve just tackled a home repair like a pro.
Common Issues and Troubleshooting
Even after all your hard work, you might face a few hiccups. Here are some common issues to watch for:
– Latch Misalignment: If your latch doesn’t catch, it might be misaligned. You can fix this by adjusting the strike plate or repositioning the latch slightly.
– Handle Sticking: Sometimes, handles stick after installation. This can happen if the screws are too tight. Just loosen them a bit until the handle moves freely.
– Latch Not Retracting: If the latch doesn’t retract smoothly, check if it’s installed properly or if there’s debris in the mechanism. A quick cleaning can often help.
If you encounter persistent problems, it might be worth consulting the manufacturer’s instructions or seeking advice at your local hardware store. They often have knowledgeable staff who can lend a hand.
Final Touches and Maintenance Tips
Once everything is working perfectly, you might want to add some finishing touches. If you’ve replaced other door hardware, consider adding new hinges or a fresh coat of paint or stain to match. A well-maintained door can elevate your home’s overall look.
For future maintenance, consider these tips:
– Regular Checks: Periodically check your latches to ensure they operate smoothly; a little preventive care goes a long way.
– Lubrication: A bit of silicone spray on the latch mechanism can prevent sticking.
– Adjust if Necessary: If the latch starts acting up again, don’t hesitate to make adjustments as needed.
By following these steps, you’ll not only feel capable but also improve your home’s functionality.
As you can see, replacing a standard tubular latch on an interior door is a simple yet impactful task. With the right tools and a bit of patience, you’ve taken a step toward enhancing your home. Now, go ahead and flaunt your new skills—your door just got an upgrade!