Replacing this mechanism doesn’t require you to be a professional handyman. In fact, with a little bit of guidance, anyone can tackle this project. You might have a specific brand of knob in mind, like Schlage or Kwikset, but the process is similar across most varieties. Let’s dive in and simplify this task!
Understanding the Spring Latch Mechanism
Before we get into the nitty-gritty of the replacement, let’s take a moment to understand what a spring latch mechanism is. Think of it like a spring-loaded door guard. When you push the knob, the spring compresses, allowing the latch to retract into the door. Once the door is closed, the spring pushes the latch back out, locking the door in place. This simple mechanism is what keeps your door secure when you’re not around.
The spring latch is essential for both privacy and security. If it’s not working correctly, you might find your door swinging open at the worst times. Not to mention, a faulty latch can make it difficult to enter or exit a room, hindering your day-to-day activities. Basically, a working latch is crucial for smooth door operation.
Most commonly, you’ll find these mechanisms in interior doors throughout your home. So, whether it’s the bathroom, bedroom, or home office, learning how to replace it can save you money and hassle.
Tools You’ll Need
Before you begin the replacement process, gather the right tools. Having everything ready helps streamline the task. Here’s a quick checklist:
- Screwdriver: Depending on your knob, you’ll likely need either a flathead or Phillips head screwdriver.
- New spring latch mechanism: Make sure you choose one compatible with your door knob brand.
- Measuring tape: This is handy for ensuring that the new latch fits properly.
- Pliers: Sometimes, you’ll need them for removing stubborn screws or parts.
- Utility knife: For cutting through any old adhesive, if necessary.
With your tools gathered, you’re ready to dive into the actual replacement. It’s like preparing for battle—having everything at your fingertips can make the difference between victory and chaos!
Removing the Old Latch Mechanism
Now that you have your tools ready, it’s time to remove the existing latch mechanism. Here’s how to do it, step by step:
1. Unscrew the Door Knob: Start by locating screws on the knob itself. Use your screwdriver to carefully remove them. Keep the screws in a safe place since you’ll need them again soon.
2. Take Off the Knob: Once the screws are out, gently pull the knob off. Sometimes, knobs have clips; in that case, a little wiggle may be needed to free them.
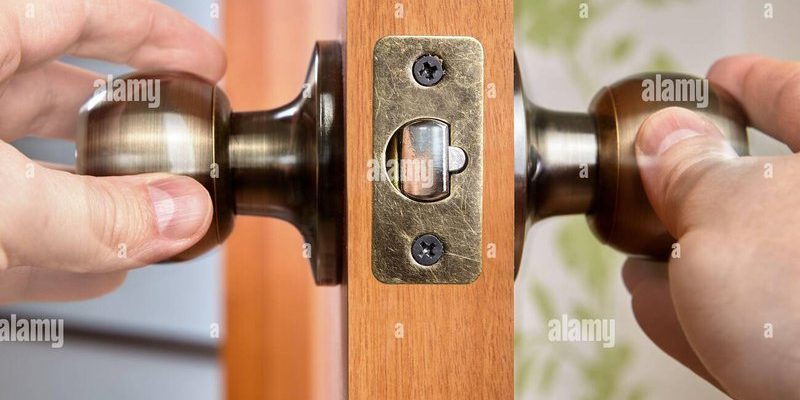
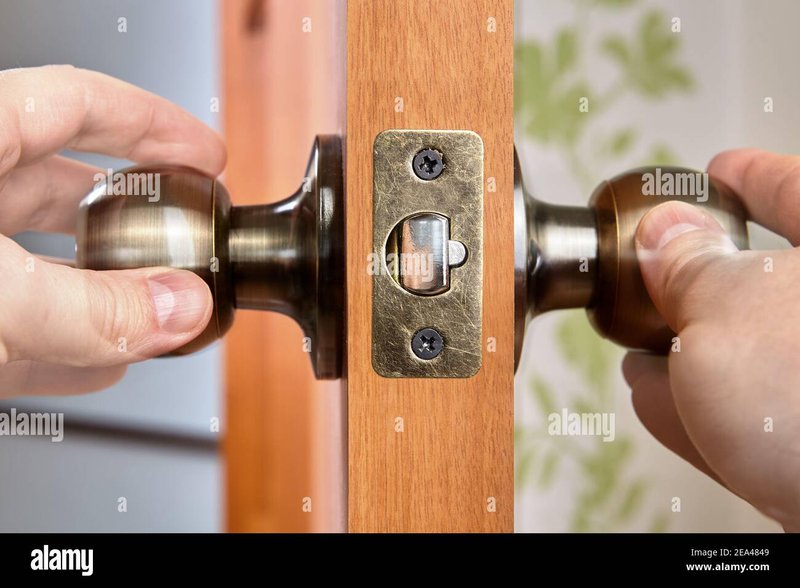
3. Access the Latch: With the knob removed, you should see the latch plate. Remove the screws holding the plate in place, and pull the spring latch out of the door.
Here’s the thing: be gentle throughout this process. Forcing anything can lead to further damage.
Choosing the Right Replacement Latch
When picking a new spring latch mechanism, consider a couple of factors:
– Compatibility: Ensure it’s designed to work with your specific knob brand. For example, a Schlage latch may not fit a Kwikset knob.
– Material Quality: Look for a sturdy, durable latch. Metal is usually preferred over plastic for longevity.
Different brands offer a range of options. It’s like selecting the right tool for a specific job—you want the best fit for your needs.
Installing the New Latch Mechanism
Once you’ve chosen the right latch, it’s time to install it. Follow these steps:
1. Insert the New Latch: Place the new spring latch into the door slot. Make sure it aligns perfectly with the hole.
2. Reattach the Latch Plate: Position the latch plate over the latch and secure it with screws. Tighten them enough that the plate doesn’t wobble, but don’t overdo it.
3. Reattach the Door Knob: Slide the door knob back onto the spindle of the latch. Secure it with the screws you removed earlier.
4. Test the Mechanism: Before closing the door, test the knob a couple of times. You want to ensure it smoothly engages and disengages the latch.
Installing the new mechanism is like threading a needle—it requires patience and precision, but the result is rewarding.
Testing and Troubleshooting Common Issues
Once everything is installed, it’s crucial to test the latch. Do this by turning the doorknob several times while the door is both open and closed. You might wonder, “What if it doesn’t work right?” Here are a few troubleshooting tips:
– Alignment Issues: If the latch doesn’t engage properly, your strike plate may be misaligned. Adjust it slightly up or down until you find the sweet spot.
– Sticking or Jamming: If the latch is sticking, check for debris in the latch and clean it out. Sometimes, a bit of lubricant helps.
– No Engagement at All: Ensure all screws are tight. Loose screws can lead to malfunction, causing the latch to fail entirely.
Testing may feel like the final exam after a long study session. Take your time, and make sure everything operates smoothly.
Final Thoughts on Your Door Knob Repair
Replacing a spring latch mechanism might seem like a small fix in the grand scheme of home repairs. But it can make a significant difference in your daily comfort and security. Just think about it: a properly functioning door allows you to go about your day without worrying about whether your rooms are secure.
If you follow these steps carefully, you’ll find that replacing the latch is much simpler than it sounds. Plus, there’s a nice sense of satisfaction that comes from DIY projects. You’ve tackled the repair, and now you can enjoy the peace of mind that comes with knowing your door is secure.
So grab those tools and give it a shot! You’ll soon be on your way to mastering this handy skill.