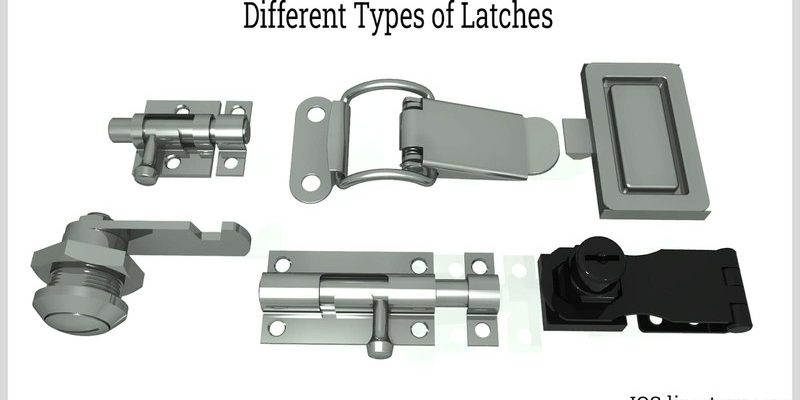
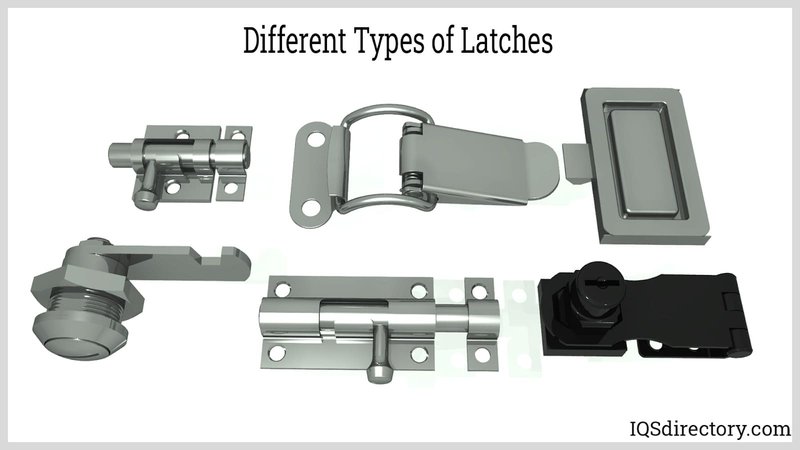
Most folks don’t realize just how much happens inside that small metal box when you twist a handle. The spring is what returns the latch bolt to its “out” position, so every time you close the door and hear that satisfying click, you’ve got it to thank. Today, I’m diving into how to replace a latch bolt spring on a Kwikset SmartKey lockset—a popular choice because it’s everywhere, from apartment doors to house entries. Whether yours froze up after years or broke on a recent attempt to rekey, I’ll walk you through the swap out, step by step. Don’t worry if you’re not a locksmith (I’m not either!); this is totally doable with some patience and a Flathead screwdriver.
Why Latch Bolt Springs Fail (And What That Means for Your Door)
Let’s start with the basics: what’s actually going wrong when your Kwikset SmartKey latch stops working? Inside the latch mechanism, a coiled metal spring keeps the latch bolt sticking out unless you turn the handle. Over time, this spring gets tired. Maybe it’s bent out of shape, rusted from humidity, or snapped clean in two—kind of like what happens to an old Slinky after being stretched too far.
When that spring isn’t doing its job, here’s what you’ll notice:
- Your door won’t latch closed automatically when you push it shut.
- You have to wiggle or pull the handle just to get the bolt to pop back out.
- Sometimes, the handle feels loose or “floppy”—like it’s not controlling anything.
Honestly, it’s one of those small annoyances that quickly becomes a big deal, especially if you’re using a SmartKey remote system that depends on everything syncing up. If the latch bolt doesn’t pop into place, your door won’t stay shut—and no amount of key code resetting or battery swapping will fix that one physical problem.
What You’ll Need to Replace a Kwikset SmartKey Latch Bolt Spring
Before you start any kind of repair, it helps to have your tools and parts ready. Here’s the thing: you don’t need a fancy toolkit—just a handful of everyday items and a replacement spring. Let me explain what to grab:
- Flathead screwdriver (for removing the faceplate and lock assembly)
- Phillips-head screwdriver (for the screws holding everything in place)
- Replacement Kwikset latch bolt spring (make sure it matches your model—SmartKey springs look like a tight double coil)
- Needlenose pliers (helpful for gripping small parts—the springs are slippery little things)
- Clean rag or towel (to keep the area tidy and catch any falling parts)
A word to the wise: if you’re not sure about the exact spring size, bring your old latch bolt to a hardware store or search for “Kwikset SmartKey latch spring” online. Universal kits are tempting, but the best result comes from using the right part for your specific remote or key system.
How to Remove the Kwikset SmartKey Latch Assembly
All right, time to get your hands dirty—figuratively, at least. Here’s how you’ll get the latch bolt out, piece by piece, without breaking anything. The goal is to expose that spring without scattering tiny pieces all over the floor (ask me how I know).
- Start by removing the doorknob or lever: There’s usually a set screw underneath or inside the handle. Use your Flathead or Phillips screwdriver—turn left to loosen, then slide the handle right off.
- Take off the faceplate: Unscrew the two screws holding the plate on the edge of the door. Carefully pry it off; you might need a little wiggle if it’s snug.
- Slide out the latch bolt assembly: With the faceplate gone, the whole latch mechanism should slide right out. Sometimes you need to push gently from the other side. Don’t force it—if it’s sticking, check for hidden screws or catches.
- Set all parts aside: Place each piece on your towel in the order you removed them. Trust me—reassembly goes much faster if you keep track!
If you’re using a remote or paired SmartKey lock, there’s no need to mess with any electronics or batteries just yet. The latch bolt is a purely mechanical part. You might be tempted to reset or sync the lock out of frustration, but fixing the spring is the solution here.
Opening the Latch to Access the Spring
Here’s the fun (and fiddly) part. The Kwikset SmartKey latch assembly is simple but tightly packed. You’re about to see how everything fits together—and honestly, it’s kind of satisfying.
- Check for visible tabs or clips: Most SmartKey latch assemblies have small metal tabs or plastic catches. Use the needlenose pliers or a small screwdriver to release these carefully.
- Gently pry open the housing: The latch will split open into two halves. Go slowly—there’s a bit of spring tension inside, and you don’t want a piece flying across the room.
- Look for the coil spring: Inside, you’ll see the broken or worn latch bolt spring. Sometimes it’s just dangling loose; other times, it’s stuck in the old position. Take note of how the spring is oriented before removing it.
You might be wondering: does it matter which way the new spring goes in? Absolutely. The coil must sit in the tiny notches inside the housing, and the straight ends should rest against the moving parts of the latch. If you’re unsure, snap a quick photo on your phone—future you will thank present you.
Replacing the Latch Bolt Spring—Step by Step
Now, here’s where precision matters. Don’t rush this part. If you install the spring backwards or miss the notches, your latch won’t function right. That means more troubleshooting, more frustration, and maybe an accidental lockout.
- Remove the old spring: Use pliers to pull out the damaged or broken spring. Be gentle—you don’t want to bend the latch parts.
- Insert the new spring: Line up the coiled section in the same spot as the old one, with the straight ends resting in the matching channels. You might need three hands, but go slow and steady.
- Double-check alignment: Before snapping everything shut, give the mechanism a gentle twist or push. The spring should compress and pop the latch bolt back out smoothly.
- Snap the housing closed: Press the two halves together until you hear a soft click or feel resistance. Make sure no parts are trapped or sticking out.
If the latch feels sticky or the bolt doesn’t extend all the way, open it back up and check your spring position. I’ve spent twenty minutes chasing down a loose end just because I missed the slot—honestly, it happens to the best of us.
Reassembling and Testing Your Kwikset SmartKey Lock
You’re almost there! With the new spring in place, it’s time to put everything back together and make sure the door latches like a brand new one. Here’s the sequence I follow:
- Slide the latch bolt assembly into the door: Make sure the curved side faces toward the striking plate on the frame.
- Attach the faceplate and screws: Line up the holes and tighten the screws. Don’t overtighten—you want it snug, not warped.
- Reinstall the handle or knob: Slide it back on and secure with the set screw.
- Test the latch action: With the door open, turn the handle and let go. The bolt should snap back out smoothly every time.
If you’re working with a SmartKey remote or code system, check that the key syncs and the remote reset works now that the latch is fixed. Sometimes a bad spring throws off the timing for electronic pairing, but once the mechanical part works, the rest often falls in line.
Common Problems and Troubleshooting Tips
You might be wondering what to do if things still aren’t quite right. Maybe the latch sticks, the handle feels weird, or the lock won’t pair with your remote. Here’s a quick troubleshooting rundown:
- Latch sticks or doesn’t pop out: Open the latch again—check if the spring is seated properly, or if there’s debris inside.
- Handle feels loose even after reassembly: Look for stripped or missing set screws, or check if the latch assembly is flush against the door edge.
- Remote or battery-powered lock won’t sync: With SmartKey systems, a mechanical fault can confuse the electronics. Double-check all connections and reset the lock system if needed.
- Door won’t close or latch easily: Make sure the strike plate on the door frame lines up with the bolt. Sometimes a new spring changes the tension, so a small adjustment solves the issue.
Don’t panic if things don’t work on the first try. Most latch and lock problems come down to small misalignments or missing steps—patience and a flashlight are your best friends here.
Are Universal Replacement Kits a Good Alternative?
Let me answer a question I get all the time: Should you use a universal spring kit, or stick with a genuine Kwikset replacement? Here’s the thing—universal kits are cheaper and easy to find, but they’re often a grab bag of sizes and strengths. For a high-use door, or a lock that pairs with your SmartKey remote, I always recommend using the official replacement.
- Universal kits sometimes fit loosely or put too much pressure on the latch mechanism—that means early wear or annoying “sticky” action.
- Brand-specific springs are designed to fit the notches and channels exactly, so your door works just like new and stays in sync with any remote features.
- If you can’t find the exact spring, take your old one to a locksmith or hardware store—they’ll often have a match hiding behind the counter.
The cost difference is usually just a few dollars, but the peace of mind is worth it, especially for entry doors or anything you use a remote to control.
Wrapping Up: A Spring Makes All the Difference
Replacing a Kwikset SmartKey latch bolt spring isn’t rocket science—but it does take a little patience and the right part. If you follow the steps, pay close attention to how things come apart (and go back together), you’ll have a door that snaps shut, locks securely, and plays nicely with your SmartKey remote or code system. The best part? You don’t need to mess with codes, re-sync remotes, or call in a professional unless something truly wild happens.
Honestly, the feeling of fixing it yourself—and saving the cost of a new lock—is pretty great. Plus, you’ll know exactly what to do next time that familiar “floppy handle” shows up. Happy fixing!