Maybe you’ve noticed an actual gap you can see light through, or maybe the last storm left a mysterious puddle near your doormat. Replacing a worn-out *exterior door bottom seal* is one of those household fixes that’s more approachable than it looks. Actually, it’s kind of like swapping out the weatherstripping on a car—you just need the right replacement, a few basic tools, and a little patience. Let me show you how to handle it step by step, so you can enjoy a snug, weatherproof entry (and, bonus, maybe even save a bit on energy bills).
Why Your Exterior Door Bottom Seal Matters
So, why bother with this little strip at all? In short, it’s the frontline defender against wind, water, bugs, and the outside world creeping in. *Exterior door bottom seals* are designed to press snugly against the threshold when the door is closed, blocking air leaks and moisture. Without a working seal, you might as well leave a window cracked all the time.
Here’s the thing: when that seal starts to fail, problems multiply. Cold air seeps in during winter, making your heater work overtime. In summer, your air conditioning escapes—basically throwing money out the door, literally. Worse, water leaks can damage flooring, or even attract bugs and mold.
Each brand—like Therma-Tru, Masonite, JELD-WEN, or Pella—uses slightly different styles and connection methods. Some are simple slides; others use a snap-in channel or a row of screws. That’s why picking the *correct replacement* for your specific brand really matters. If you use the wrong one, you might end up with a gap, a jammed door, or a seal that falls off after a week.
When you think about it, this isn’t just a minor annoyance. Neglecting a damaged bottom seal can mess with your home’s comfort, energy efficiency, and even security. Honestly, it’s one of those “small but mighty” upgrades you’ll wish you’d tackled sooner.
How To Identify The Right Replacement Seal For Your Door
You might be wondering, “How do I even know which seal to buy?” That’s a fair question. Not every seal fits every door, even within the same brand. Here’s what to look for:
- Brand and Model: Check the edge or inside the door for a label. Most major brands (Therma-Tru, Masonite, JELD-WEN) stamp or stick a label with a product code, model number, or at least their name.
- Seal Type and Attachment: Look at how the seal is held in place. Is it screwed on? Pushed into a slot? Or does it slide along a track under the door? Take photos before you remove it.
- Size and Shape: Measure the width and length of the existing seal. Also, look at the profile—does it have fins, a bulb, or a flat blade? Even small differences can matter.
If the label is missing or unreadable, remove the old seal and take it to a hardware store. Staff can often match it to a brand or universal replacement. Some seals are easy to identify by shape—like the famous JELD-WEN “U-shaped” sweep, or the flat, screw-on ones common on Masonite doors.
If you’re stuck, try searching your door brand and “replace exterior door bottom seal” online. You’ll find part diagrams, codes, and even troubleshooting guides for syncing the right seal to your door.
What Tools And Supplies Do You Need?
Let’s talk gear. You honestly don’t need a full toolbox, but having the right stuff handy saves headaches. Here’s what you’ll usually need for most *brand-specific exterior door bottom seal* replacements:
- Replacement door bottom seal (matched to your door’s brand and model)
- Screwdriver (usually Phillips, but sometimes flat-head for older doors)
- Measuring tape
- Utility knife (for trimming, if needed)
- Pliers (helps with stubborn old seals)
- Gloves (optional, but nice for handling gritty or sharp seals)
Some doors (especially older ones) may have a sweep that’s been painted over, so you might want a putty knife to gently pry it up. For doors with snap-in or slide-in seals, a little silicone spray can help the new seal slide into place without a struggle.
Pro tip: Have a flashlight on hand when you’re working indoors. Shadows love to hide dirt, screws, and leftover pieces of the old seal.
Step-By-Step Instructions: Removing the Old Bottom Seal
Now let’s get practical. Removing the old *door bottom seal* is usually straightforward, but there are a few tricks for doing it cleanly.
- Open the Door: Prop it open wide enough to work comfortably. If possible, remove the door from its hinges and lay it flat over two chairs or sawhorses. This makes things much easier, but it’s not strictly necessary.
- Inspect Attachment: Check for screws along the bottom edge. Remove them using your screwdriver. If you see no fasteners, see if the seal slides or snaps out by pulling gently on one end.
- Pry and Slide: Use your pliers or putty knife to work the edge loose. Go slow—you don’t want to gouge the door or threshold. If it’s stuck, try a bit of silicone spray to loosen grit or dried paint.
- Clean the Area: Once the old seal is out, clean any debris or adhesive from the bottom edge. A damp rag works, or a little rubbing alcohol for sticky residue.
This is the moment where you might see how much grime and dust the old seal trapped. It’s oddly satisfying! And cleaning makes sure your new seal fits tight, so don’t skip this step.
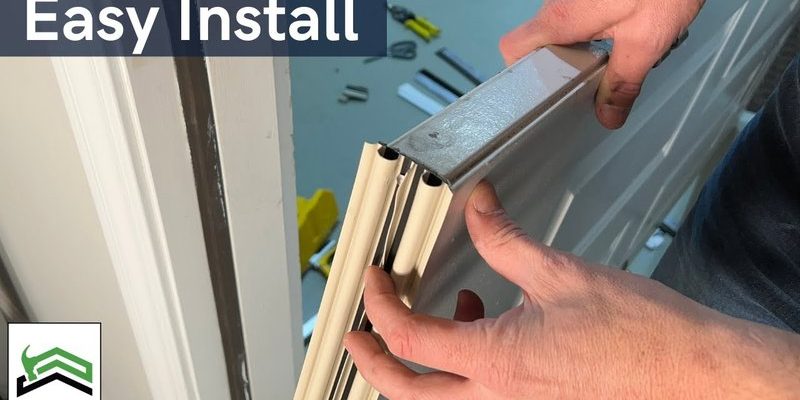
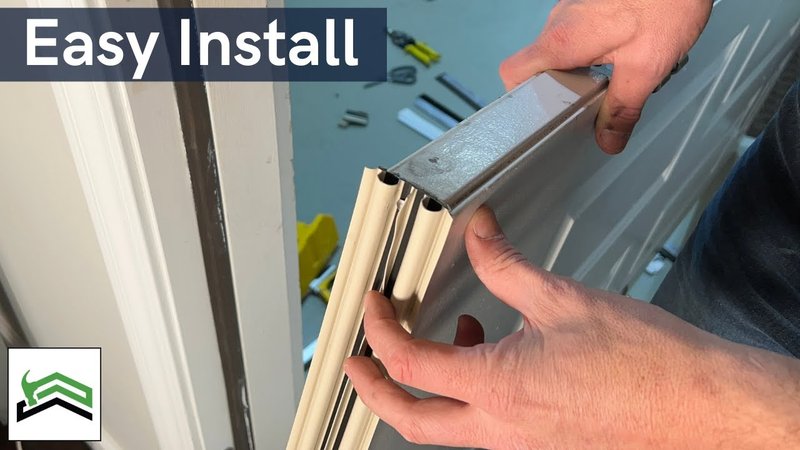
Installing the New Brand-Specific Door Bottom Seal
With the old seal gone and the area clean, you’re ready to install the new one. The exact process depends on the type, but here’s how it usually works:
- Test-Fit the New Seal: Hold it up to the bottom of the door and check length and alignment. Most brand-specific seals should fit flush without much trimming, but it’s always smart to double-check.
- Trim If Needed: If your replacement seal is a little too long, use a sharp utility knife to trim it. Cut slowly and evenly—better to take a little more time than slice off too much.
- Attach the Seal:
- For screw-on models: Line up the pre-drilled holes with those on your door bottom, then screw them in evenly.
- For slide-in or snap-in types: Start at one edge and slowly push or slide it into the track. Use silicone spray if it’s a tight fit, and tap gently with your palm if needed.
- Check for Snug Fit: Close the door gently. The seal should just “kiss” the threshold—firm, but not so tight that the door is hard to open or close. Adjust as needed and tighten any loose screws.
If you feel air, see daylight, or the seal drags, it might need repositioning—don’t be shy about taking a minute to tweak it. The ideal fit feels secure but doesn’t leave the door sticking or squeaking.
Troubleshooting Common Problems
Sometimes the seal swap doesn’t go 100% smoothly (that’s life, right?). Here are a few hiccups you might run into and what to do:
- Door sticks or drags: This usually means the seal is too thick, or misaligned. Try loosening the screws and shimmying the seal up slightly, or trim the rubber if possible.
- New seal won’t stay in: If a snap-in or slide-in seal pops out, double-check that you bought the correct part for your brand and model. Some universal seals *almost* fit, but not quite. Sometimes, a gentle tap with a rubber mallet helps seat it. Otherwise, you may need to reset and try again.
- Still feeling drafts: Check for gaps at the ends. Some brands (Therma-Tru, for example) use corner pads for a tighter seal. You can buy small foam blocks or sealant strips to close up stubborn leaks.
If you’ve tried everything and your door still doesn’t seal right, don’t beat yourself up. Sometimes the *threshold* or frame is warped, not the seal. In that case, a universal sweep might be your best workaround, or you may need a pro’s help.
Comparing Brand-Specific Seals vs Universal Options
You might be curious: “Could I just buy a universal bottom seal?” That’s a fair question, especially if your brand’s parts are hard to find or more expensive. Here’s how they compare:
- Brand-specific seals: These are designed to fit your door’s exact profile and attachment method. Installation is usually quicker, the fit is better, and there’s less guesswork. If your door is under warranty or looks high-end, stick with the brand part.
- Universal seals: These come in flat or U-shape designs that you cut to fit. They’re cheaper and easier to buy locally, but sometimes the fit isn’t perfect. You might end up with a small gap, or need to fuss with extra adhesive or screws.
In my experience, if your door is a common brand and you want a “set-and-forget” fix, it’s worth ordering the correct brand seal. For rental properties or back doors, a universal can be an easy (and forgiving) solution.
How Often Should You Replace an Exterior Door Bottom Seal?
You might be thinking, “How long will this new seal last?” For most homes, a good-quality *brand-specific exterior door bottom seal* will last 5 to 10 years. Climate, sun exposure, and heavy use all play a role. If your door faces harsh winters or strong sun, check it every spring and fall.
Look for signs like:
- Cracked, brittle, or flattened rubber
- Daylight peeking through under the door
- New drafts or water after rain
- Noisy squeaks from rubber against the threshold
Staying on top of this little fix saves you from much bigger headaches later—like repairing warped flooring or fighting off a bug invasion after a summer storm.
Final Thoughts: Enjoy A Draft-Free, Cozy Entryway
Taking a little time to replace your specific brand’s *exterior door bottom seal* might not seem glamorous, but it’s honestly one of those “feel-good” fixes. You’ll notice the difference right away every time you open the door: no more cold gusts, fewer bugs, and a quieter, cozier home. The right seal—especially one made for your exact door—just locks everything in place like it should.
And hey, once you’ve done it once, you’ll look at door maintenance with a whole new confidence. Next time you spot a draft or hear a rattle, you’ll know exactly what to do. So grab that screwdriver, find the right seal for your door, and say goodbye to those sneaky drafts for good.