Imagine that you’re at a coffee shop, talking to a friend who’s never tackled a DIY project like this before. Replacing a security pin hinge is kind of like changing a tire on your car. You may feel nervous at first, but with the right tools and instructions, you can do it yourself. So, let’s dive in and make this straightforward!
What Is a Security Pin Hinge?
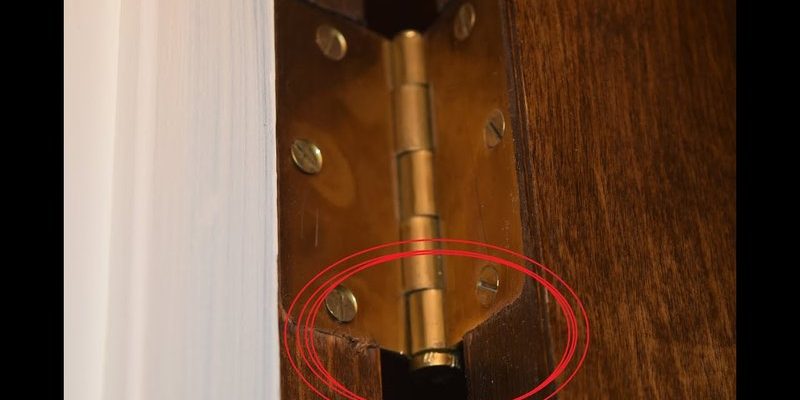
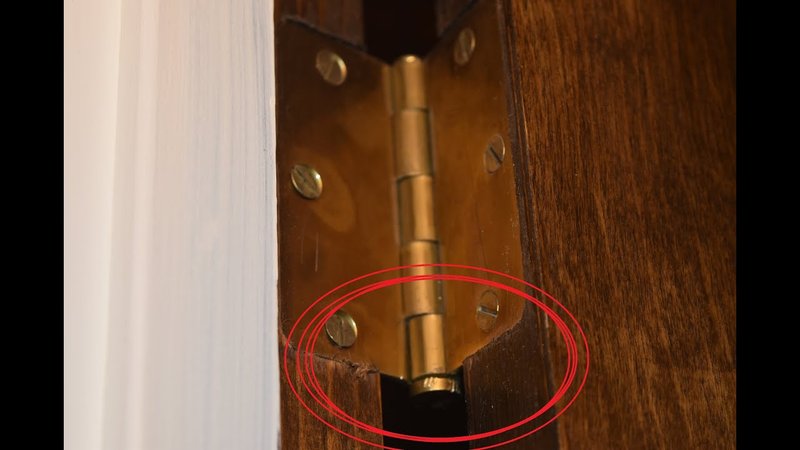
Before we dive into the replacement process, let’s talk about what a security pin hinge actually is. It’s a specialized type of hinge designed to provide extra security for doors, especially those that see a lot of traffic or are often accessed from the outside. The security pin is a little like a lock; it prevents the hinge from being easily removed, making it tougher for intruders to kick in or tamper with your door.
These hinges come with a pin that’s inserted through the hinge leaves. To replace it, you’ll be removing the old hinge and installing a new one. But don’t worry; this isn’t a job that requires a PhD in engineering. With a few common tools, you’ll be able to complete this task effectively.
Gathering Your Tools
Before you start, you’ll need a few items to make your job easier. Here’s a quick list of what you’ll need:
- Screwdriver: A flathead or Phillips screwdriver, depending on the screw type.
- Drill: If you need to make new holes or remove stubborn screws.
- Replacement Security Pin Hinge: Make sure to choose the right size for your door.
- Pencil: For marking any new screw positions.
- Measuring Tape: To ensure everything fits perfectly.
Having everything on hand will save you from running back and forth to the workshop, which can really cut into your time. Trust me, it’s much better to be prepared!
Removing the Old Hinge
Now that you have your tools ready, let’s get started with removing the old hinge. First, ensure your door is securely propped open or supported so it won’t fall when the hinge is removed. Here’s how to do it:
1. Locate the Screws: Find the screws on the old hinge. If they’re painted over, you might need to scrape the paint away to see them clearly.
2. Unscrew the Hinge: Use your screwdriver to carefully remove the screws. It’s a good idea to keep them in a small container, so they don’t roll away and get lost.
3. Remove the Hinge: Once the screws are out, gently pull the hinge away from the door and frame. If it’s stuck, give it a little wiggle or tap with a rubber mallet.
You might be wondering, “What if the screws are rusted or stripped?” In that case, a drill can help remove stubborn screws. Just be cautious not to damage the door while doing so.
Installing the New Security Pin Hinge
With the old hinge out of the way, it’s time to install the new one. This is the moment you’ve been working toward! Here’s how to make sure everything fits perfectly:
1. Position the New Hinge: Align the new hinge with the existing holes. If you’re changing the type or size of hinge, you may need to mark new screw points with a pencil.
2. Secure the Hinge: Start attaching the screws by hand to avoid cross-threading. Once they’re in place, use your screwdriver to tighten them securely, but not excessively—over-tightening can strip the wood or damage the hinge itself.
3. Test the Door: After everything is secured, gently close the door to see if it opens and shuts smoothly. If everything looks good, you’re in great shape!
Common Problems and Troubleshooting
Like any DIY project, things can go sideways occasionally. Here are some common issues you might run into:
– Misaligned Door: If your door doesn’t sit evenly after installing the new hinge, you may need to adjust the hinge placement or check if it’s level. A level tool can help with this.
– Squeaking Noises: If you hear squeaking, applying a little WD-40 or door hinge lubricant can quiet things down and ensure smoother operation.
– Loose Hinges: If the hinge feels loose after a few uses, you might need to tighten the screws again or replace them if they’re worn out.
It’s all part of the learning process; don’t get discouraged!
Maintaining Security Pin Hinges
Once you’ve replaced your security pin hinge, it’s wise to maintain it for long-lasting performance. Here are a few tips:
– Regular Inspections: Check your hinges every few months for any wear or loosening of screws.
– Lubrication: Give the hinges a light spray of lubricant occasionally to prevent rust and ensure smooth movement.
– Adjusting as Needed: If you notice any issues with the door alignment or function, address them quickly to avoid more significant problems down the line.
By keeping an eye on your hinges, you’ll ensure your interior entry door works well for years to come.
Replacing a security pin hinge on an interior entry door might seem like a big task, but with the right tools and steps, it’s totally achievable. Just remember to take your time, check for alignment, and keep your tools handy.
Now that you know how to do it, you can tackle this project with confidence. Not only will you save money by doing it yourself, but you’ll also gain a satisfying sense of accomplishment. So, roll up those sleeves, and give it a try!