
Honestly, mortise latches are like the unsung heroes hiding in your door. Unlike a basic deadbolt or latchbolt that’s easy to swap out, a mortise latch is tucked away and involves a lot more moving parts. If your house still has an old Baldwin, Schlage, or Emtek handleset, chances are you’ll be dealing with one of these more complicated setups. Let me walk you through the process, from recognizing what you’ve got to putting the last screw back in.
What Is a Mortise Latch—And Why Do Older Handlesets Use Them?
Before you even think about grabbing a screwdriver, it helps to know what you’re dealing with. A mortise latch is a locking mechanism that lives inside a rectangular pocket, or “mortise,” carved into the edge of your door. It’s a bit like a puzzle box hidden inside the wood. Most older homes and high-end brands—think Baldwin, Schlage, or vintage Yale—used mortise locks because they’re secure and durable.
You might be wondering, “Why not just use a regular cylinder lock?” Well, mortise locks allowed for more complex handle and key combinations, plus they stood up better to everyday wear. The downside? Swapping one out isn’t as simple as just removing two screws. There’s a whole “inside the door” operation happening, and every piece—latch, deadbolt, even the handle stem—can be tied together.
If your handleset feels oddly heavy, or if the latch mechanism runs the full thickness of the door, you’re probably looking at a mortise setup. This matters a lot, because the replacement process is very different than with the simpler tubular latches you see in modern doors. Understanding what you have saves you from buying the wrong parts or, worse, damaging the door trying to pry things out.
Signs Your Mortise Latch Needs Replacing
Let’s be honest: no one likes replacing old door hardware unless something’s really wrong. But how do you know the mortise latch is the culprit? Here are a few tell-tale signs:
- The handle is loose or floppy. You tighten the screws, but it keeps wiggling.
- The latch sticks or won’t spring back. Sometimes it barely retracts at all, leaving the door hard to close.
- Your key turns, but the door won’t unlock.
- You hear grinding or clicking inside the door.
If you’re experiencing one (or all) of these, the mortise latch is probably worn, rusted, or jammed. Over the years, dust, humidity, and metal fatigue can take a toll—even on well-made locks. Sometimes a bit of troubleshooting helps, like spraying lubricant in the keyway or checking for loose screws. But if those quick fixes don’t cut it, it’s time for a full replacement.
Honestly, don’t wait too long. A failing mortise latch can leave your house unsecure or, worse, stuck shut—never a fun surprise when you’re in a hurry. If you catch it early, the job goes much smoother.
What Tools and Replacement Parts Will You Need?
When you’re ready to dive in, having the right tools makes all the difference. You don’t need a full workshop, but a basic toolkit and some patience go a long way. Here’s what you’ll likely need:
- Screwdrivers (flathead and Phillips)
- Needle-nose pliers (for tight spots)
- Tape measure (for sizing your new mortise latch)
- Replacement mortise latch (matched to your existing hardware)
- Masking tape or a small tray (to keep screws and springs from vanishing)
The tricky part? Replacement mortise latches aren’t truly universal. That’s right—brand and size matter a lot here. If you have an old Baldwin or Schlage set, look for a direct replacement. Measure the case’s height, width, and backset (the distance from the door’s edge to the center of the handle). Keep any model numbers handy. For less common brands, you might have to order online or check with a locksmith.
Here’s the thing: don’t guess on sizes. Mortise latches are finicky, and even a few millimeters off can mean a lousy fit or a non-working lock. Take your time measuring before you buy.
How To Remove Your Old Mortise Latch
This is where things get real. Removing an old mortise latch isn’t rocket science, but you do need to work slowly and keep your parts organized. Here’s a step-by-step breakdown:
- Remove the handleset and faceplate. Look for screws on the interior side of the handle. Take them out and gently pull the handle and any trim pieces away from the door.
- Unscrew the mortise lock’s faceplate. This is the metal plate on the door edge (sometimes called the “escutcheon”). Take out all visible screws.
- Gently slide out the mortise lock body. It might be snug, especially if there’s decades of paint or gunk holding it in. Wiggle it back and forth—avoid forcing it or you could chip the wood.
- Disconnect any attached rods or stem pieces. Some older handlesets use rods to connect the handles through the lock body. Make note of how everything fits together, or snap a few phone photos before pulling things out.
Tip: As you work, set small screws and parts in a tray or plastic bag. It’s shockingly easy to lose a crucial spring or tiny fastener, especially on antique hardware.
When the mortise latch is free, give the pocket a quick check for dust or debris. If it’s full of grit, vacuum it out so the new latch will sit flush.
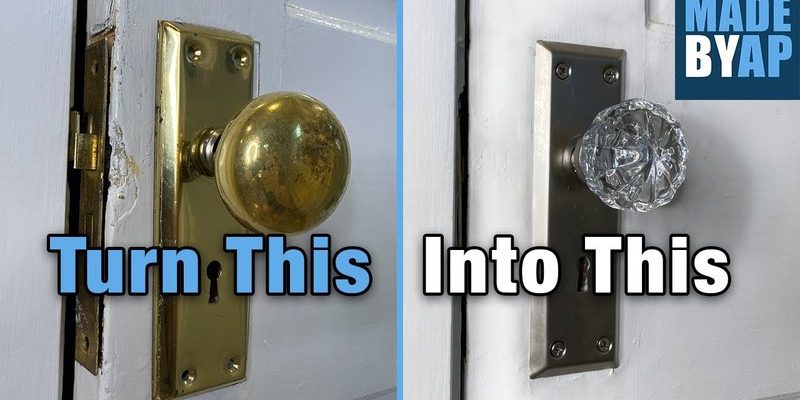
Choosing and Installing the Replacement Mortise Latch
Here’s where your measuring pays off. Mortise latches come in lots of shapes and sizes, and buying the wrong size is a classic (and annoying) beginner mistake. Check that your replacement matches the old one’s dimensions—especially the backset, overall length, and location of screw holes. If you’re unsure, bring your old lock body when shopping.
To install the new mortise latch:
- Slide the new latch into the mortise pocket. Double-check the orientation—the latch bolt should face the right direction (pointing toward the door jamb).
- Align the screw holes and faceplate. Fit everything snugly, then screw on the faceplate without overtightening. You want it flush, but not sunken into the wood.
- Reconnect the handles and any rods or stems. Refer back to your earlier photos if you’re unsure. Make sure everything is lined up and moves freely, without binding.
- Test the action. Don’t celebrate too soon—open and close the door a few times, and lock/unlock to be sure everything works smoothly.
Honestly, old doors are quirky. Sometimes you’ll need to adjust the strike plate or sand a bit of wood to get the latch moving freely. Don’t force it—take your time and make small adjustments.
Testing, Troubleshooting, and Final Touches
Now for the moment of truth: does everything line up? Here’s what to check before you call it done:
- The handle turns smoothly and springs back.
- The latch retracts fully when you turn the handle.
- The lock engages and disengages with the key, if you have a keyed model.
- The door shuts tightly and lines up with the strike plate.
If you hit a snag—say, the handle feels stiff or the latch won’t pop back—double-check that no parts are misaligned or pinched. Sometimes a tiny adjustment makes all the difference. Try removing and reinstalling the lock, tweaking the strike plate, or adding a dab of lubricant (specifically for locks, not WD-40, which can gum up over time).
You might be tempted to leave the interior trim off “just in case you need to fix it again.” Don’t—it’s best to finish reassembly once everything is working. You’ll thank yourself later for having a polished, finished look that actually functions.
Alternatives: When a Mortise Latch Replacement Isn’t Feasible
Let me be real: not every old mortise latch is a candidate for an easy swap. Sometimes the mortise pocket is damaged, the replacement parts are impossible to find, or the door itself is warped. In these cases, you have a few options:
- Retrofit with a tubular latch and modern handleset. This means filling and patching the old mortise and drilling new holes, but it can breathe new life into a vintage door.
- Have a locksmith rebuild or repair the original mortise latch. For rare or antique brands, experts can sometimes source parts or machine new bits, though it may cost more.
- Install a surface-mounted lock. If you need security fast and can’t wait for specialty parts, surface locks are a practical (if less elegant) solution.
Honestly, if your door is a true antique, keeping the original hardware (and getting it fixed professionally) might be worth it. But if you’re more focused on function, upgrading to something modern—maybe even a smart lock—pays off in reliability and convenience.
Final Thoughts: Enjoying a Smoother, Safer Door
Replacing a mortise latch in an older handleset is one of those jobs that feel super satisfying once it’s done. Sure, it takes a little patience, the right replacement part, and a bit of troubleshooting, but the end result is a door that opens, closes, and locks like new.
Whether you’re swapping out a tired Baldwin latch or reviving a vintage Schlage handleset, the key is working slowly, keeping your parts in order, and matching your replacement carefully. Even if things feel a bit fiddly at first, you’ll get through it—and your home will be that much more secure (and less annoying to get in and out of).
So go ahead—take the plunge. With the right approach, even an old mortise latch doesn’t stand a chance against your DIY skills.