Imagine you’re having coffee with a friend who’s just learned to replace their door frame. They share their excitement about fixing their home, and you realize it’s not just about aesthetics—it’s about safety and functionality too. The door frame is the unsung hero of your home, ensuring that your door hangs properly and keeps unwanted visitors out. In this guide, we’ll walk through the steps to replace a damaged door frame around the strike plate opening in a way that makes sense for anyone, even if you’re not exactly a handyman.
Understanding the Components of a Door Frame
Before you dive into the replacement process, it’s essential to get familiar with the parts of a door frame. A typical door frame comprises three main components: the head, the jamb, and the sill. The head is the part at the top, while the jambs are the vertical sides. The sill, which is less common in modern frames, is the bottom piece that sits on the floor.
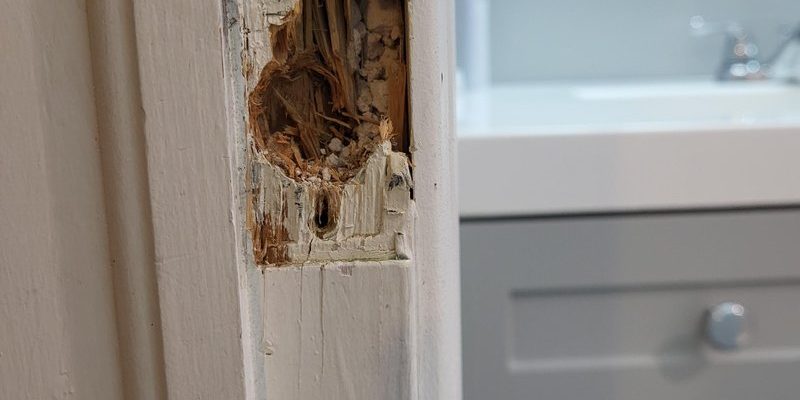
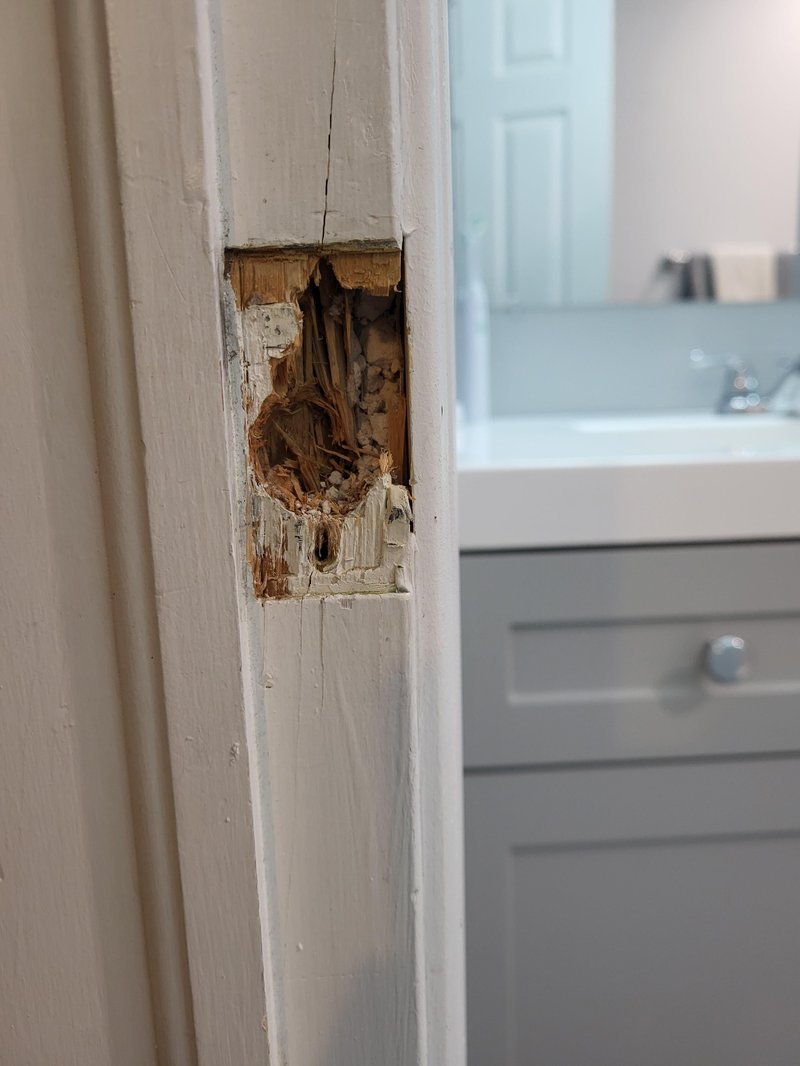
When we talk about the strike plate opening, we’re usually referring to the area where the lock engages with the frame. This is critical because a damaged strike plate can lead to security issues or even cause your door to malfunction. So, it’s worth knowing what you’re working with.
Here’s how they all fit together:
- Head: The upper horizontal part of the frame.
- Jamb: The vertical pieces that hold the door in place.
- Strike Plate: The metal plate that protects the area where the latch or deadbolt goes into the jamb.
Understanding these components helps you visualize exactly what you’ll need to replace and why.
Assessing the Damage
Before you can replace anything, take a good look at the damage. Is it a small area around the strike plate, or does it extend further along the jamb? You might be wondering how to determine if replacement is necessary or if a patch would suffice. Generally, if the damage is larger than a quarter-sized hole or if the wood feels soft or crumbles under pressure, it’s time for a complete replacement.
Start by checking for:
- Cracks: Look for visible cracks in the wood.
- Soft Spots: Press on the damaged area. If it feels spongy, that’s a bad sign.
- Distortion: Is the door not closing correctly? That often points to frame issues.
Once you’ve assessed the damage, it’s clear whether you’ll need to replace just the strike plate area or if an entire jamb needs to come out.
Gathering Your Tools and Materials
Now that you know what you’re dealing with, it’s time to gather your tools and materials. Here’s a handy list to help you out:
- Tools: Tape measure, level, chisel, reciprocating saw, hammer, screwdriver, and wood glue.
- Materials: New wood for the jamb, wood filler or caulk, screws, and a new strike plate, if necessary.
Having everything ready before you start makes the process smoother. It’s a bit like cooking—you wouldn’t start making a meal without checking if you have all the ingredients, right?
Removing the Damaged Section
With tools in hand, it’s time to remove the damaged wood. This part can be intimidating, but don’t worry; it’s pretty straightforward. First, use your screwdriver to remove the existing strike plate and any screws holding the damaged jamb in place.
Once that’s done, carefully use the reciprocating saw or chisel to cut away the damaged section. Try to make clean cuts because you want the new wood to fit snugly. If you need to remove a larger piece, cut carefully around the area so the new frame will sit flush against the wall.
Here’s a quick tip: Always wear safety goggles when working with power tools. Better safe than sorry!
Replacing the Frame around the Strike Plate Opening
Now comes the part you’ve been prepping for: replacing the frame. Measure the space where the old jamb was carefully. Then cut your new wood to match those dimensions. It’s often best to use a sturdy hardwood, as it’ll provide better durability.
Once you have your new piece cut, fit it into place. Use wood glue along the edges to secure it, and then nail or screw it in to hold everything tight. This is a great time to check with your level to make sure it’s straight.
Also, remember to install the new strike plate before finishing up. This ensures you have it lined up correctly with the new jamb.
Finishing Touches: Caulking and Painting
After securing everything, it’s time to make it look good! Apply some wood filler to any gaps between the new wood and the existing frame. Once it’s dry, you can sand it smooth for a clean finish.
Next, you might want to apply caulk between the frame and the wall. This step not only helps with aesthetics but also provides a little more insulation, which is a bonus.
Now, if you’re feeling ambitious, you can paint or stain the new section to match the rest of your door frame. This helps the repair blend in seamlessly.
Testing Your New Frame
Once everything is dry and painted, it’s time to test the door. Open and close it a few times to see how it functions. Make sure the door latches properly into the new strike plate. If everything feels good, congratulations! You’ve just replaced the damaged door frame around the strike plate opening.
If you notice any issues, take a moment to adjust the strike plate or make minor tweaks to the frame as needed.
Why Regular Maintenance Matters
Replacing a damaged door frame isn’t just about fixing an immediate problem; it’s also about preventative care. Regular checks can save you from a bigger headache down the road. Consider making it a habit to inspect your doors and frames every once in a while, looking out for cracks, gaps, or wear.
Honestly, keeping your doors in good shape enhances your home’s overall appearance and security. Plus, learning to fix these issues yourself boosts your confidence for future DIY projects.
In a nutshell, while replacing a damaged door frame around the strike plate opening might seem like a hefty task, it’s totally within reach with the right tools and a bit of patience. So, grab your gear and start making those repairs. Your door will thank you!