Imagine this: you’re ready to head out but the door won’t budge. The latch isn’t catching because the spring has snapped. Replacing that spring can save you money compared to calling a locksmith and also give you a great sense of accomplishment. Let’s walk through this step-by-step, turning that door repair into a DIY triumph over your home maintenance woes.
Understanding Your Door Latch Mechanism
To kick things off, let’s take a closer look at what a door latch mechanism actually does. The latch is a small piece of hardware that holds the door in place when it’s closed. It works by engaging with the strike plate on the door frame. When you turn the handle or knob, it retracts the latch, allowing the door to open. Think of it as the door’s way of saying “goodbye” when you want to leave, and “hello” when you return.
Now, what role does the spring play in all this? The spring is responsible for pushing the latch back into the locked position when you close the door. If this spring breaks, the latch might either fail to engage or get stuck in the open position. This can be frustrating, especially if you rely on that door for security or privacy.
Gathering Your Tools and Materials
Before diving into the replacement, you need to gather a few tools. Trust me, having everything at your fingertips will make the process smoother. Here’s what you’ll need:
- Screwdriver (a Phillips head works for most screws)
- Replacement spring (make sure it’s the right size for your latch type)
- Pliers for gripping and bending if necessary
- Flashlight to see inside the latch mechanism (optional, but helpful)
Make sure to check your specific door latch model because different brands, like Kwikset or Schlage, may require unique springs. You can usually find the right part at your local hardware store or online. Having everything prepared means you won’t have to pause mid-repair to search for tools or parts.
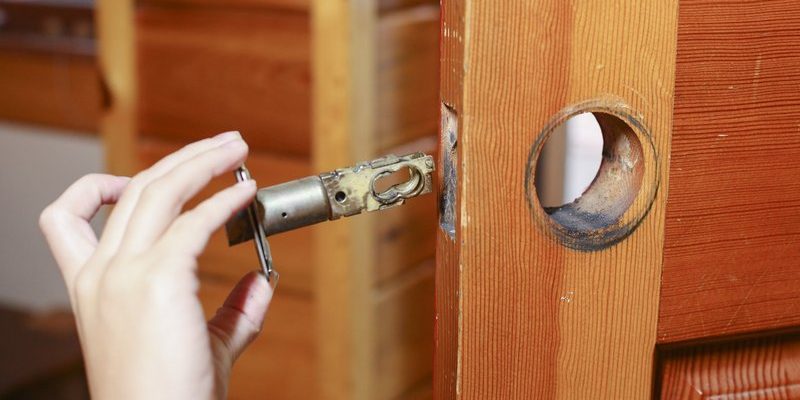
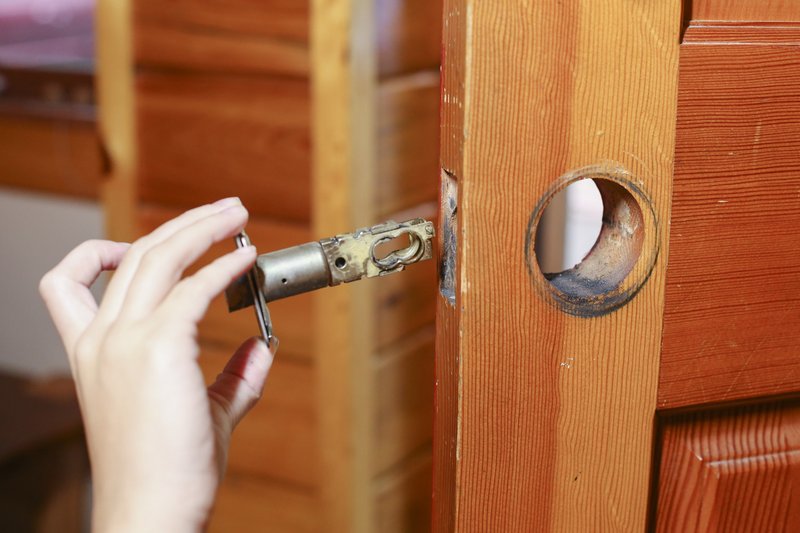
Removing the Broken Spring
Now that you’re armed with tools, it’s time to get your hands dirty. Start by removing the latch from the door. To do this:
1. Use your screwdriver to take out the screws holding the latch in place.
2. Once the screws are out, pull the latch out gently. Be careful; it might be a bit stubborn.
Once the latch is free, take a close look at the spring mechanism. You might see the broken spring—if it’s still partially intact, you’ll want to carefully remove it. Use your pliers if needed, but try to avoid damaging other parts of the latch.
Here’s the thing: it’s easy to get frustrated at this stage, but take a breath. If you need to, refer to the installation guide of your specific latch. This will give you a clearer idea of how everything fits together.
Installing the New Spring
Alright, here comes the fun part—installing the new spring! It can feel a bit tricky, but with patience, you’ll get it right.
1. First, take your replacement spring and visually compare it with the old one to ensure it’s the same size and type.
2. Next, slide the new spring into place. Depending on the latch brand, you might need to make sure it fits snugly into its designated slot.
3. Once it’s in position, push the latch mechanism back into the door.
It’s crucial to ensure the spring is positioned correctly; otherwise, it might not function properly. If it feels off, double-check your alignment against any instructions that came with the new spring.
Test the Latch Before Reassembly
Before you screw everything back together, it’s essential to test the latch. Here’s a quick way to check if the new spring is working:
1. Gently push the latch in and out. It should retract smoothly and spring back into the locked position.
2. If you notice it sticking or not retracting fully, you may need to adjust the spring or check its installation.
Testing it at this stage saves you time later. If it’s working fine, you can move on to reassembling the latch.
Reassembling the Latch
Now that you’ve confirmed everything is in working order, it’s time to put the latch back together. Follow these steps:
1. Align the latch with the door again and insert it where it should go.
2. Using your screwdriver, carefully reinsert the screws you removed earlier. Make sure they’re tight but don’t overdo it—you don’t want to strip the screws!
Once everything is secure, give the latch another test. Ensure it opens and closes smoothly. If all is well, congratulations—you’ve successfully replaced the broken spring on your door latch!
Common Issues and Troubleshooting
Sometimes, even after replacing the spring, things might not work out perfectly. If you find that the latch isn’t catching or is still sticking, consider these troubleshooting tips:
– Check Alignment: Ensure the latch is properly aligned with the strike plate. You might need to adjust the plate slightly.
– Revisit Installation: If the spring feels too loose or tight, take a moment to revisit your installation. Sometimes it helps to watch a video specific to your latch model.
– Lubrication: If the latch feels stiff even with the new spring, a little penetrating oil can smooth out its movement. Just don’t overdo it; a few drops should suffice.
Replacing a broken spring on a door latch isn’t just a lesson in home repair—it’s about restoring functionality and peace of mind. With a few tools, a replacement spring, and a clear step-by-step approach, you can bypass the locksmith and handle it all on your own.
You might feel a sense of pride standing there, knowing you fixed it yourself. So, next time you hear that clunking sound, don’t dread it. Instead, remember this guide and roll up your sleeves. You’ve got this!