Composite wood doors (brands like Masonite, Jeld-Wen, or Reliabilt) look and feel solid, but once a hinge starts coming loose, it can make you question their strength. Unlike solid wood, composite doors are made from pressed fibers or particleboard, which don’t always hold screws as well over time—especially if they’ve gotten damp, or if the door’s been banged around. The good news? With a few basic tools and some patience, you can tackle this repair yourself and save your door from the junk heap.
Why Hinges Pull Out Of Composite Wood Doors
First, let’s talk about why this happens in the first place. Composite wood is engineered using wood fibers, resin, and sometimes glue, pressed together to mimic solid wood. While it’s tough and cost-effective, it doesn’t have the same deep grain or holding power as solid lumber. Over time, the screws holding the hinge to the door can loosen up, especially if the door is heavy, gets slammed shut, or has been exposed to moisture.
Honestly, composite wood is a bit like a dense sponge. At first, it’s firm and solid. But if you keep pushing a screw in and out, or if water gets in, it can lose its grip. Then, every time you use the door, the screw hole wears out a little more. Before you know it, the hinge starts to pull away, and the door sags or even stops closing properly.
You might be wondering if this is just a problem with cheap doors or if it happens to everyone. The truth? It can happen with all brands, from budget to high-end, though it’s a little more common in high-traffic areas. Even the best composite doors need some care now and then—especially when it comes to hinge repairs.
Assessing The Damage Before You Start The Repair
Don’t grab your tools just yet! Start by opening the door wide and gently wiggling it up and down. Do you see the hinge moving, or is the whole hinge plate coming away from the door? If the screws spin without tightening, that’s a sign the wood has lost its grip and needs serious help.
Here’s the thing: Not all wobbly hinges need the same repair. Sometimes, one screw is stripped and the rest are solid. Other times, all three (or four) screws are coming out, or the holes themselves are so chewed up that nothing will hold. It’s important to figure out *exactly* how bad it is before diving in.
Take a close look at the screw holes. Are they round, or have they turned into wide ovals? Is there sawdust or soft, mushy wood around the holes? If you see cracks, crumbling, or feel the hinge move with just a light tug, you’ll need to fix not just the screws, but the wood behind them too.
Choosing The Best Method To Fix Pulled-Out Hinges
There’s more than one way to fix this problem, and your choice depends on the size of the damage and the tools you have. Here are the top options most homeowners use:
- Toothpick and glue method: Old-school but effective for small, stripped holes.
- Wood filler or epoxy: Works well when holes are too big for toothpicks or when you want a long-lasting fix.
- Drilling out and doweling: The most solid, professional way to restore a screw hole—especially for heavy doors.
- Hinge relocation: Moving the hinge up or down an inch to new, solid wood (a last resort if everything else fails).
Let me explain. The toothpick trick is great for small, slightly loose screws. You just pack in some toothpicks (or matchsticks) with wood glue, then re-drive the screw. But for bigger or totally destroyed holes, you’ll need something beefier, like a wood dowel or even a special repair kit. Try to match the fix to the problem; don’t just reach for the first thing you see in the toolbox.
Step-By-Step: Repairing With Toothpicks And Glue
If you caught the problem early and the screw hole isn’t massive, the toothpick method is simple and fast.
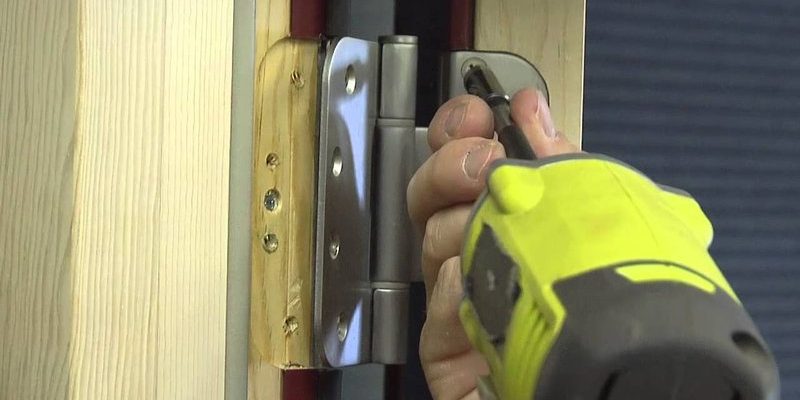
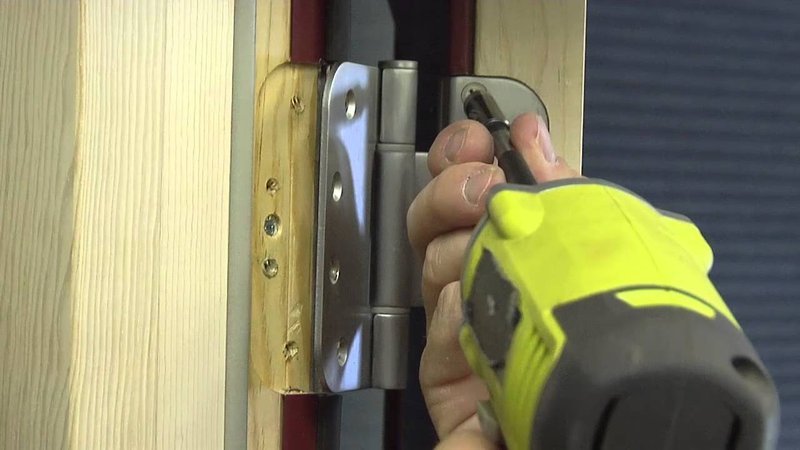
Step 1: Remove the hinge by unscrewing all the screws from the door side of the hinge.
Step 2: Fill the hole with wood glue, then jam in as many toothpicks as you can, breaking them off flush with the door surface.
Step 3: Let it dry for at least 30 minutes (longer is better if you have time).
Step 4: Reinstall the hinge by driving the screws back into the refilled hole.
Here’s the magic: the glue-soaked toothpicks bond with the composite wood and create a “new” area for the screw to bite into. It’s cheap, fast, and surprisingly sturdy—though not perfect for big, worn-out holes.
If you’ve only got one or two loose screws, this method can save the day and keep your composite wood door working like new.
Using Wood Filler Or Epoxy For Larger Holes
Sometimes, the screw holes are just too big for toothpicks. Or maybe you want a repair that’s truly solid and permanent. That’s where wood filler or epoxy steps in.
Step 1: Remove the hinge and clean out any loose debris or crumbled wood from the holes.
Step 2: Mix and pack the wood filler or two-part epoxy into each hole, making sure to fill it completely. Use a toothpick, chopstick, or small dowel to push the filler deep.
Step 3: Let it set according to the package directions. This can range from an hour (for fast-drying filler) to overnight for epoxy.
Step 4: Drill a small pilot hole (just smaller than your screw) in the center of the repair.
Step 5: Reinstall the hinge using the original or slightly longer screws.
Honestly, if you want a “set it and forget it” repair, epoxy is the gold standard. It’ll bond to the composite wood and hold screws even better than the original material. Just make sure everything is fully cured before hanging the door again.
Doweling Out And Re-Drilling For Heavy-Duty Repairs
If the hinge is carrying a lot of weight—maybe it’s a big exterior composite door, or an entryway that gets slammed a lot—you want a fix that lasts. The dowel method is a bit more involved but creates a repair that’s almost as strong as new.
Step 1: Remove the hinge and use a drill with a bit (usually 3/8″ or 1/2″) to enlarge the damaged screw hole all the way through the composite wood edge.
Step 2: Cut a piece of hardwood dowel to match the depth of your hole and apply wood glue all around it.
Step 3: Tap the dowel into the hole until it’s snug. Wipe off any excess glue.
Step 4: Let it dry for several hours (or overnight if possible).
Step 5: Trim the dowel flush with the door using a small saw or chisel, then sand smooth.
Step 6: Drill a new pilot hole in the center of the dowel and reinstall the hinge with the original screws (or new, slightly longer ones for extra strength).
Think of it like dental surgery for your door: you’re replacing the “root” so the “tooth” (the screw) can hold tight again.
When To Relocate The Hinge (And How To Do It)
Every so often, the area around the hinge is just too weak or the holes are so chewed up that no amount of filler or dowels will work. If that’s the case, you can move the entire hinge up or down by about an inch, giving the screws a totally fresh spot to grab.
Step 1: Trace around your hinge in the new spot on the door edge, using a pencil.
Step 2: Carefully chisel or rout out the mortise (the little inset where the hinge sits flush) in the new position.
Step 3: Drill new pilot holes for the screws and attach the hinge plate.
Step 4: Fill the old hinge mortise and holes with wood filler or a cut-to-fit scrap of composite wood if you want to keep things neat.
Here’s the thing: Relocating a hinge takes a bit of patience, and you’ll probably need to touch up the paint or finish. But for doors that get daily abuse, it can be the most reliable fix.
Extra Tips For Composite Wood Door Hinge Repairs
No matter which repair you choose, a few small tweaks can make a big difference in how long your fix lasts.
- Use slightly longer or thicker screws for more bite in the wood. Just make sure they don’t poke through the other side!
- Apply wood glue generously but not excessively. Too much spills and can make a mess.
- Check other hinges and screws on the door to catch small problems before they get worse. If one screw pulled out, others may be loose too.
- Don’t ignore moisture. If your composite door has swollen or softened due to water, fix the source of the leak or humidity before repairing the hinge.
If you’ve got a heavy-duty composite door, sometimes it’s worth swapping standard screws for specialty screws, or even upgrading to a commercial-grade hinge. That little upgrade can keep your door swinging smoothly for years.
Alternatives To Repair: When To Replace The Door
Let’s be real—not every composite door can be saved. If the whole edge is crumbling, the door is warped, or repairs just won’t stick, it might be time to think about a replacement. This is especially true for older doors, or those that have been damaged by water over and over again.
You might also be thinking about switching to a different type of door—maybe solid wood or fiberglass—if you’ve had recurring problems. While composite doors are budget-friendly and look good, solid wood can handle repairs like this more easily, and fiberglass doors are less likely to be affected by moisture.
Here’s a quick comparison:
| Composite Wood Door | Solid Wood Door | Fiberglass Door |
| Affordable, lightweight, easy to paint | Strong, repairable, classic look | Moisture-resistant, low-maintenance, durable |
| Prone to screw loosening, less moisture-resistant | More expensive, heavier | Less customizable if repainting |
If you do decide to replace, don’t feel bad—sometimes, the best troubleshooting is knowing when to start fresh.
Wrapping Up: Keeping Your Composite Wood Door In Great Shape
Repairing hinges that are pulling out of a composite wood door isn’t rocket science, but it does take a bit of patience and the right technique. Whether you go low-tech with toothpicks and glue, step up to wood filler or epoxy, or tackle a full dowel repair, you’ll give your door a second life—and save yourself the hassle of a total replacement.
Just remember: composite wood doors are strong, but they need a little extra TLC. Don’t wait until your door is half off its hinges to take action. Check your doors every few months, tighten screws, and keep an eye out for moisture. With these simple tricks and some know-how, your composite wood door will hang tough for years to come.