Fixing a rotten wood threshold probably sounds intimidating, especially if you’re picturing saws, pry bars, and splinters flying everywhere. But honestly, it doesn’t have to be a nightmare job. With a little patience and a clear plan, you can do a solid repair—even if you’ve never touched a DeWalt or Ryobi tool in your life. I promise, replacing or fixing that threshold is way more approachable than you think. Let’s walk through exactly how to do it, from the tools you’ll need to getting that sturdy, weather-tight fit your home deserves.
Spotting Rotten Wood on an Exterior Door Threshold
You might be wondering, “How bad does my threshold need to be before I bother fixing it?” Here’s the thing: even a small patch of rot can turn into a much bigger problem if you let it go. Start by pressing along the threshold with your finger or a screwdriver. If it feels soft, spongy, or flakes away, that’s rot. Sometimes you’ll notice discoloration—dark or gray blotches that don’t match the rest of the wood. A musty smell is another giveaway.
It’s not just about the surface, either. Water can pool at the corners or under the threshold where it meets the door jamb. Over time, this seeps in and starts breaking down the wood fibers from the inside out. You may even spot bugs—carpenter ants and termites love rotten wood. If your threshold sags, bends, or you feel a cold draft underneath the door, those are classic warnings too.
Once you spot rot, it’s best to act sooner rather than later. The longer you wait, the bigger the fix, and the more likely you’ll end up needing to replace not only the threshold but parts of your doorframe too. So, catching it early (even if the damage seems minor) saves you time, hassle, and money down the road.
Gathering Tools and Materials for the Repair
Let me explain what you’ll actually need before you dive in. You don’t need a woodshop’s worth of tools, but a few basics are essential. For most threshold repairs, gather these:
- Pry bar (for removing the old threshold)
- Hammer and nails or a screwdriver and wood screws
- Saw (a hand saw or circular saw works—you don’t need anything fancy)
- Tape measure and pencil
- Wood chisel (optional, but helpful for cleaning up edges)
- Replacement wood threshold (available at hardware stores—you’ll want to measure the old one first)
- Wood filler or epoxy (for minor repairs)
- Caulk (exterior-grade silicone or paintable latex for sealing gaps)
- Sandpaper
- Paint or wood sealer for finishing
Don’t forget your “remote” accessories, like a safety mask and gloves—rotten wood can be dusty and gross. And if you’re not sure what brand or type of threshold to buy, just take a piece of the old one to the hardware store and ask for help. Honestly, most home improvement stores (think Home Depot or Lowe’s) have friendly folks who can steer you in the right direction based on your door’s make and size.
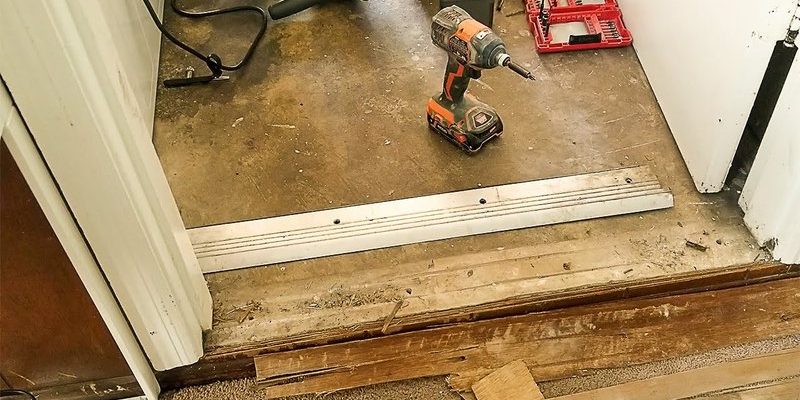
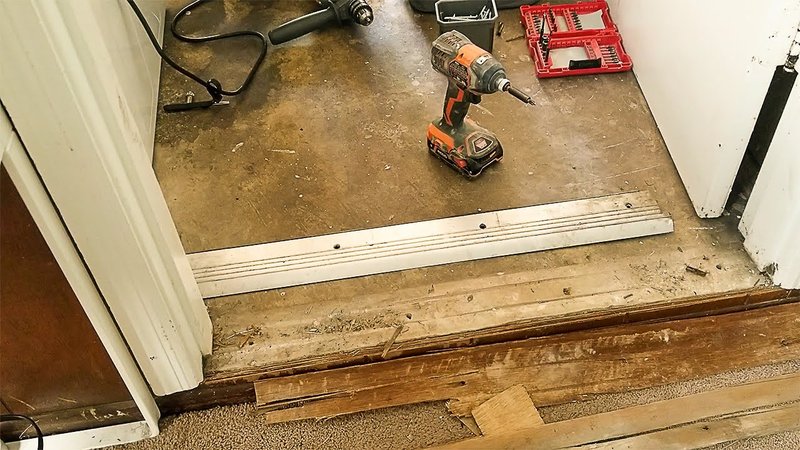
Removing the Rotten Threshold Safely
Now for the hands-on part. Removing a rotten threshold is where people get nervous, but it’s really about patience and a gentle touch. Start by opening your exterior door all the way; this gives you room to work. Check if your threshold is nailed or screwed into place. Some are tucked under the door jamb and might need a little extra finessing.
Wedge your pry bar under the edge and slowly work it up. Don’t rush—if you yank too hard, you might crack the door frame or the floor beneath. If the threshold is stubborn, cut it into a few smaller sections with a saw. Just make shallow cuts to avoid hitting anything structural underneath.
As you lift away the threshold, take a look underneath. If you see more rot, especially in the subfloor or door frame, you might need to expand the repair. For now, clear out any debris and vacuum up the dust—you want a fresh, clean base for installing the new threshold. This step can feel messy, but once you’ve got that rotten wood out, you’re already halfway to solving the problem.
Deciding Between Repair and Replacement
Here’s a common dilemma: do you patch up with filler, or go all-in and replace the whole threshold? If the rot is only at the edges or in a small section, you *can* use epoxy wood filler or a hardener to rebuild those spots. This approach is faster, cheaper, and works well if the rest of the threshold feels solid.
But let’s be real—if the rot covers more than a third of the threshold, or you’re seeing deep, spongy spots, replacement is the smarter move. Trying to “patch and pray” with a badly damaged threshold usually means you’ll be back at it in a year. Swapping in a new piece of wood gives you peace of mind and a much longer-lasting fix.
When shopping for a replacement, match the size and profile as closely as you can. Pre-made wood thresholds (often oak, mahogany, or composite) work great, but double-check the fit before finishing your repair. Worst case, you might need to trim the new threshold slightly to match your door’s opening.
For small repairs, using a high-quality wood epoxy can extend the life of your existing threshold by several years. But for widespread rot, full replacement is worth the extra effort.
Installing the New (or Repaired) Wood Threshold
Ready for the most satisfying part? Fitting a new threshold is like putting the last piece into a jigsaw puzzle. If you’re patching small areas, fill the rotten spots with wood epoxy, pressing it in and smoothing it out according to the package directions. Let it cure fully—typically several hours—before you continue.
For full replacement, carefully dry-fit the new threshold in place. Use your tape measure to check for gaps. If it’s too long, trim the edges with a saw. If it’s too wide, sand down the sides a little at a time. You want a snug, draft-free fit, but don’t force it; a slight gap can be filled with caulk.
Once it fits, secure it with screws or nails driven into the subfloor. Pre-drill holes to prevent splitting if you’re working with hardwood. If needed, use shims to lift the threshold level with the floor. For composite or adjustable thresholds, follow the manufacturer’s instructions for pairing the right fasteners and installation method.
Finish by running a bead of exterior caulk along both sides of the threshold and where it meets the door jamb. This step keeps water and bugs out—don’t skip it! Smooth the caulk with your finger for a neat seal, then step back and admire your handiwork.
Sealing, Painting, and Final Finishing Steps
Once the threshold is installed, sealing and finishing are what make your repair last. Here’s the thing: even the best wood can rot if it isn’t protected. Start by sanding the new threshold smooth, wiping away any dust.
If you’re staining, choose a durable exterior wood stain and brush it on in even coats. For painted thresholds, select a high-quality exterior paint that matches your door trim. Some people prefer clear wood sealers for a natural look—these work well, as long as they’re rated for outdoor use.
Let the finish dry completely, then check for any missed spots, especially at the edges and ends. It’s smart to touch up the caulk if needed to ensure a watertight seal. Reinstall any weatherstripping that was removed, and test your door to make sure it opens and closes smoothly. If you feel a draft or see light under the door, adjust the threshold or weatherstripping until you’ve got a snug fit.
You might be tempted to rush this part, but taking a little extra time with the finish means fewer headaches (and less rot) down the road.
Preventing Future Rot and Maintenance Tips
Repairing a rotten wood threshold might feel like a one-and-done chore, but a little maintenance goes a long way. Check the area every few months, especially after heavy rain. Look for water pooling, peeling paint, or new soft spots. If you spot anything early, a quick caulk or sealant touch-up is all it takes to stay ahead of rot.
Consider adding a door sweep or upgrading your weatherstripping for extra protection. These simple additions keep moisture and drafts outside, where they belong. If you live somewhere with harsh winters or wet seasons, you might want to re-seal or repaint each year.
Here’s another tip: keep leaves, dirt, and debris swept away from your doorstep. Organic matter holds moisture against your threshold and speeds up decay. A quick sweep now and then can add years to your hard work.
Lastly, if you ever see signs of rot returning, don’t ignore it. Early action means smaller, easier repairs and a healthier, happier home.
Knowing When to Call a Professional
Most homeowners can handle a basic wood threshold repair with a little patience and the right supplies. But sometimes, the job turns out to be bigger than you expected. If you discover major floor damage, extensive rot inside the door frame, or if the structure seems wobbly no matter what you do, it’s worth bringing in a pro.
A licensed contractor or carpenter can assess hidden issues, fix structural damage, and make sure everything meets local codes—especially if your home is older or you suspect termite damage. They may even spot problems you missed, like leaks or poor drainage that need long-term solutions.
Here’s the honest truth: it’s smart to try DIY first, but there’s no shame in getting help if things get complicated. Your safety and peace of mind are worth it.
When in doubt, a quick consultation with a local carpenter can save you from a much bigger repair bill later.
Wrapping Up Your Rotten Wood Threshold Repair
Repairing a rotten wood threshold on an exterior door isn’t just about making things look neat—it’s about protecting your home from water, drafts, pests, and bigger headaches down the line. By catching rot early, using the right tools, and sealing your work, you’ll keep your entryway strong and inviting for years. Whether you patch or replace, you’ll walk away with a sense of accomplishment (and maybe a story or two about conquering your first real door project). Keep an eye on that threshold, give it a little TLC now and then, and future repairs will be a breeze.