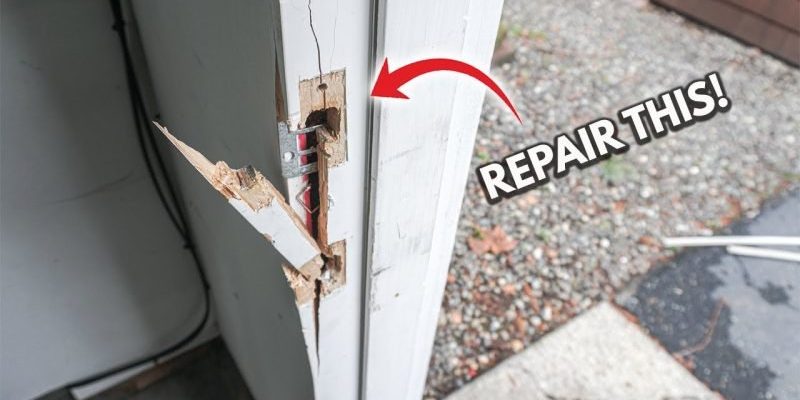
In this guide, we’ll break down how to repair a damaged door edge before you install new hardware. Whether you’re working with a wooden door or a hollow-core option, getting the edge right ensures that your new hardware not only fits but also functions well. This repair isn’t just about looks—it’s about making sure your door operates smoothly for years to come.
Assess the Damage
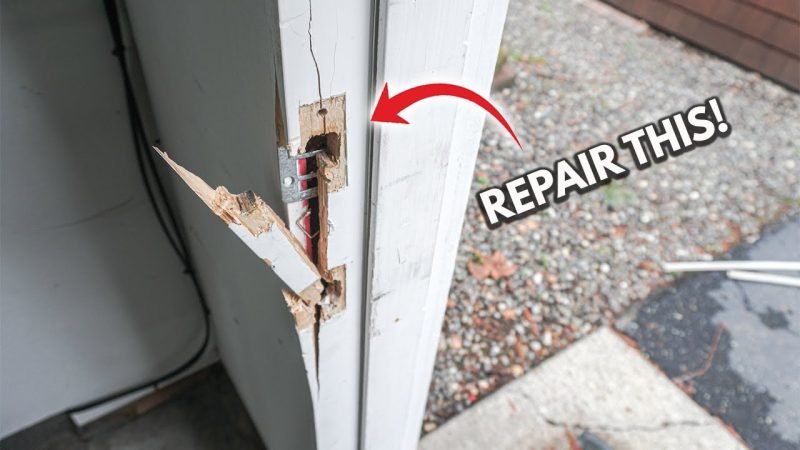
Before diving into repairs, you need to take a good look at the door edge. Assessing the damage is like inspecting a car before a road trip. You want to know what you’re dealing with so you can make the right decisions.
Start by checking for any cracks, chips, or splinters on the edge. If the damage is minor, you might just need some wood filler. For more severe damage, you may have to replace the edge entirely. *Here’s the thing*: knowing the extent of the damage helps you decide on the right materials and tools. It’s a bit like figuring out whether a simple tune-up or a full engine rebuild is necessary.
Tools and Materials You’ll Need
To repair a door edge properly, gather the right tools and materials. Here’s a simple list to get you started:
- Wood filler
- Putty knife
- Sandpaper (various grits)
- Wood glue (if needed)
- Clamps (for larger repairs)
- Paint or stain (to finish)
Having these at hand will make your repair easier and more efficient. Think of it as gathering your ingredients before cooking—you want everything ready to go.
Preparing the Door for Repair
Before applying any wood filler or glue, prepare the area to ensure a solid bond. This is like cleaning a surface before painting—it ensures the best results.
Start by cleaning the damaged area. Use a damp cloth to wipe away dust and debris. Next, if you have any rough edges or splinters, carefully sand them down. *Honestly*, this step is crucial because it allows the filler or glue to adhere better. If the damage is significant and involves a chunk missing, you might need to fill that void with a piece of wood.
Repairing Minor Damage
For minor chips or small cracks, wood filler is your best friend. Take your putty knife and scoop out a small amount of filler. Apply it directly into the damaged area. Make sure to press it in well. You want to fill the gap completely without any air pockets.
After filling, smooth the surface with your knife and wipe away excess filler. Let it dry according to the product instructions. Once dry, find your sandpaper and refine the area until it’s flush with the rest of the edge. *You might be wondering* how to know when it’s ready to sand. A good rule of thumb is to wait until it’s hard but not rock-solid.
Repairing Major Damage
If the damage is extensive—think a significant piece missing or a splintered edge—your approach will be different. You might need to replace part of the door edge with a wood strip. You can find these at most hardware stores, and they can be cut to size.
Start by carefully cutting a piece of wood that matches the damaged section. Use wood glue to secure it in place and clamp it to ensure a tight bond. Allow it to dry thoroughly. Once it’s secured, sand the edges to blend with the door’s surface.
Remember, this isn’t a race. Take your time and ensure everything aligns properly. *Let me explain*: rushing can lead to an uneven surface, which will be noticeable once you install your new hardware.
Finishing Touches
Once the repair is complete, it’s time to make it look good. If you used wood filler, you’ll want to match the door’s color. Apply paint or stain to the repaired area, blending it with the surrounding wood. Allow it to dry completely before moving on.
You might want to apply a protective sealant to ensure durability. This step is similar to adding a protective coat to a freshly painted wall—it helps keep your work looking great for longer.
Installing New Hardware
Now that your door edge is repaired and looking sharp, it’s time to install your new hardware. Make sure you have all the necessary tools ready, and follow the manufacturer’s instructions carefully.
Start by measuring the correct spot for your new hardware. Once marked, drill the appropriate holes. It’s best to drill pilot holes to avoid splitting the wood. After that, simply screw in your new handle or lock. *Honestly*, this part is like putting the cherry on top of a sundae—much easier after all that hard work!
Post-Installation Checks
Once everything is installed, do a quick check. Open and close the door several times to ensure the hardware is functioning smoothly. If something feels off, you might need to adjust the screws or make minor tweaks. It’s better to catch these issues now than later.
*A little tip*: If you notice any gaps around the hardware after installation, you might want to add some more wood filler to make it look seamless. It’s that final touch that can make all the difference.
Repairing a damaged door edge before installing new hardware may seem like a daunting task, but it’s completely achievable. With a bit of patience and the right tools, you can give your door a fresh start. Remember, the key is to assess the damage, prepare properly, and take your time with repairs.
Once you’ve completed the repair, installing new hardware will feel like a breeze. A well-repaired door isn’t just about looks; it also improves functionality and longevity. So, roll up your sleeves and tackle that door edge—your home will thank you!