Here’s the thing: *preventing* exterior door hinges from freezing is almost always easier (and cheaper) than fixing them after the fact. Think of it like putting winter tires on your car—a bit of prep now saves you a lot of stress later. If you’re new to home maintenance or just replaced your front door, you might feel out of your depth. Don’t worry—it’s not as complicated as it sounds, and you don’t need a pro toolkit to tackle it.
Why Do Exterior Door Hinges Freeze in the First Place?
You might be wondering, “Isn’t a hinge just a piece of metal? How does it freeze shut?” Well, it’s not really the metal itself freezing. The main culprit is a combination of moisture and cold air. When water—think rain, melting snow, or humidity—finds its way into the tiny crevices of a hinge, it can freeze solid as temperatures drop. Suddenly, the hinge can’t move, or it grinds and squeaks when you try to open the door.
Another thing to consider is *exposure.* Hinges on exterior doors—especially those facing the wind or without much shelter—take the brunt of winter weather. If your door is north-facing or doesn’t have an awning, you’ll see problems much sooner. Certain brands, like the classic Emtek or Yale door hinges, are built to handle tough weather, but even the best hardware strains under constant freeze-thaw cycles.
It’s also worth mentioning that metallic expansion and contraction isn’t your friend in cold climates. As temperatures swing, hinges can warp just slightly—enough to break the seal or let more moisture in. So, the process becomes a cycle: a little water, a deep freeze, and slowly the hinge locks up. Over time, repeated freezing can even lead to rust or broken hardware.
Making Sure Hinges Are Properly Installed and Sealed
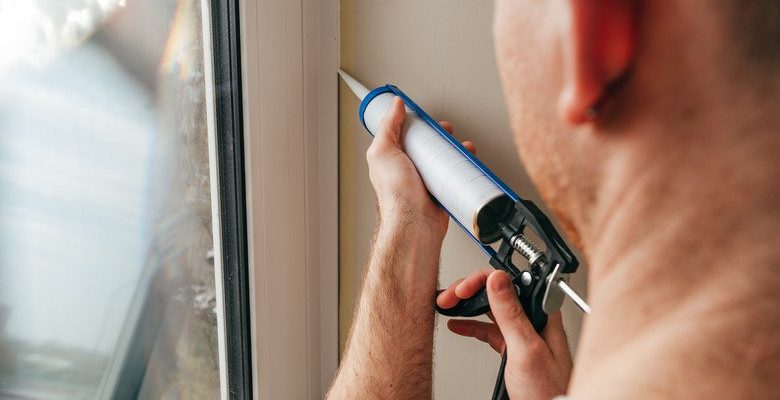
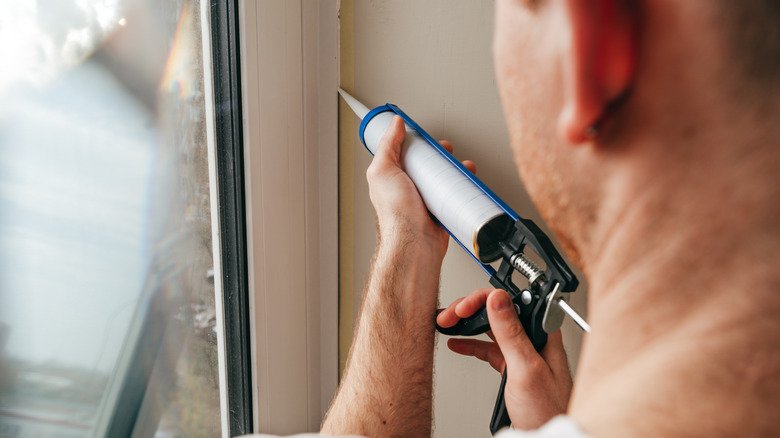
Before winter even arrives, check how your exterior door hinges are installed. Sometimes, tiny gaps between the hinge plate and the door frame act like highways for water. Even top-tier brands like Baldwin or Weiser can struggle if moisture finds its way in. Spend a few minutes doing a close inspection. Are the screws tight? Are there gaps or signs of old caulking?
If you spot gaps, fill them with a high-quality, weather-resistant caulk. This isn’t just a one-off job, either. It pays to check the seal every fall, especially if you’ve had heavy storms or fluctuating temperatures that can wear down materials. For doors that aren’t sitting flush or are slightly out of alignment (which is common in older homes), adjusting the hinges can go a long way. A properly fitted door keeps out rain and snow before it ever touches your hardware.
Don’t forget the *strike plate* and other hardware, too. If cold air can sneak through there, it can encourage frost to develop on your hinges. Think of this as “troubleshooting” your door’s defense system. Proper installation and sealing are your first—and often best—line of defense against frozen hinges.
Choosing the Right Lubricant to Prevent Freezing
When it comes to keeping hinges moving freely, not all lubricants are created equal. Some people grab the first can of WD-40 they find, but let me explain why that’s not always the best move. While oil-based sprays can help in a pinch, they sometimes attract dirt and dust, which, over time, can gunk up your hinge and make things worse.
Instead, look for a *silicone-based* lubricant. These are excellent for exterior door hinges because they create a slick barrier that repels water—so moisture has a harder time sticking around and freezing. Popular brands like 3-IN-ONE Lock Dry or CRC Heavy Duty Silicone are designed for this kind of job. They won’t freeze, and they don’t turn sticky in cold weather.
Here’s how to do it:
- Open the door wide to expose the hinge.
- Wipe away dirt, dust, or old oil with a dry cloth.
- Spray or apply the lubricant directly into the gaps and pin of the hinge.
- Open and close the door several times to work it in.
- Wipe away any extra spray to avoid drips or mess.
Do this at least twice a season—once in late fall and again in midwinter—especially if you live somewhere with heavy snow or ice.
Creating a Physical Barrier Against Moisture
Lubricant is great, but there’s more you can do. Consider installing or upgrading your door’s *weatherstripping*. This foam or rubber seal keeps drafts and moisture out, which, in turn, prevents water from getting to your hinges in the first place. If your weatherstripping is cracked, peeling, or coming loose, swap it out. It’s an inexpensive project with a big payoff—less moisture means less freezing.
You might also add a *storm door* or canopy over your main entryway. These act like umbrellas for your door hardware, shedding rain and snow before they reach your hinges. Think about it: most garage doors, which are tucked away or shielded, rarely have frozen hinge problems.
One trick I’ve seen: for exposed doors, some folks use a thin, clear plastic film (like window insulation film) to cover the hinge area during the harshest part of winter. It’s not pretty, but for a few months, it can save you a lot of hassle. Just be careful not to trap moisture behind it when installing.
Routine Maintenance: Your Winter Hinge Checklist
Honestly, the best way to prevent exterior door hinges from freezing is to build a quick routine into your seasonal home care. It doesn’t take much time, but a little consistency helps a ton. Here’s a basic winter hinge maintenance checklist:
- Inspect each hinge for dirt, rust, or signs of moisture buildup every couple of weeks.
- Reapply silicone lubricant if hinges feel sticky, squeaky, or slow to move.
- Tighten any loose screws or hardware—shifting hinges can let in water.
- Check your weatherstripping and replace it if it’s worn down.
- After heavy snow or rain, dry off the door area if you notice any water pooling or dripping near the hinges.
Don’t forget: if you see signs of rust, gently scrub with a wire brush and touch up with a rust-resistant paint or spray. Letting rust go unchecked is a surefire way to lose a hinge before spring even arrives.
What To Do If Your Exterior Door Hinges Freeze Anyway
You’ve done your best, but sometimes winter just wins. If you wake up to a frozen hinge, don’t panic—or force the door. That’s a good way to bend the hinge pin or damage your door frame. Instead, try this:
- First, gently warm the hinge using a hairdryer or warm (not boiling) water. Don’t use an open flame—it’s not worth the risk.
- Once the ice starts to melt, work the door back and forth slowly. Never force it or you might damage the screws or mounting plate.
- Wipe away any extra water, then dry the hinge area completely.
- Reapply a silicone-based lubricant to the hinge before it refreezes.
If you’re still stuck after trying this, it’s worth calling a local handyman or the brand’s support (especially if your door is under warranty). Some manufacturers, like Kwikset or Schlage, offer troubleshooting help or replacement advice for stuck or damaged hardware.
Comparing Universal and Brand-Specific Hinge Solutions
When picking products to protect your hinges, you’ll see both *universal* lubricants and sealants, as well as brand-specific solutions aimed at common names like Schlage, Kwikset, or Emtek. Is there a difference? Sometimes. Universal products are designed to work with any hinge, but they might lack the longevity or weather resistance of the ones made for specific brands and climates.
Brand-specific lubricants or protective finishes often come with coatings that are tested for durability in harsh weather. If your home uses matching brand locksets and hardware, sticking with the recommended solutions is a smart move—especially if you want to keep your warranty intact. On the other hand, if you have older hardware or a mix of brands, a universal silicone spray or anti-freeze lubricant usually does just fine.
The main thing is sticking to products that are safe for metals—especially if you have brass, bronze, or treated steel. Using the wrong kind (like a harsh solvent) can strip the finish and actually make your hinges more prone to freezing down the road.
Extra Tips for Battling Stubborn Winter Conditions
Sometimes, even the best-prepared hinge faces tough odds against a brutal winter. If you live somewhere with weeks of sub-zero temperatures, it helps to double down. Here are a few extra tips:
- Use a de-icing spray on hinges if you expect an overnight freeze or have had problems before.
- Position a small, insulated doormat or draft snake near the bottom of the door to catch moisture before it travels upward.
- On stormy nights, tape a folded towel around the hinge side of the door—yes, really! It acts as a quick, homemade shield against blowing snow or sleet.
- Make sure your gutters and roofline are clear, so water doesn’t drip directly onto the hinges from above.
Every house is a little different, but these tricks can save you from pulling your hair out when the weather turns nasty. Sometimes, it’s the small, slightly odd habits that make the biggest difference.
*Forgetting to prep your hinges before the first big freeze is like leaving the house in slippers for a snowball fight—you’ll wish you’d planned ahead!*
Wrapping Up: Keep Your Doors Moving All Winter
A frozen hinge isn’t inevitable, even if you live where winter shows no mercy. With a bit of prevention—tightening hardware, sealing gaps, adding the right lubricant, and building these steps into your winter routine—your exterior doors will swing open smoothly, no matter what’s going on outside. Whether you’ve got a shiny new Schlage entry set or a decades-old back door, these small acts of care go a long way.
If you’re ever in doubt, remember: it’s all about keeping water out and hinges moving freely. Stick to proven products, keep an eye on your door after every big storm, and don’t get discouraged if you still run into problems now and then. With a little time and the right approach, you’ll keep your home warm, your hardware healthy, and those annoying frozen hinges firmly in the past.