
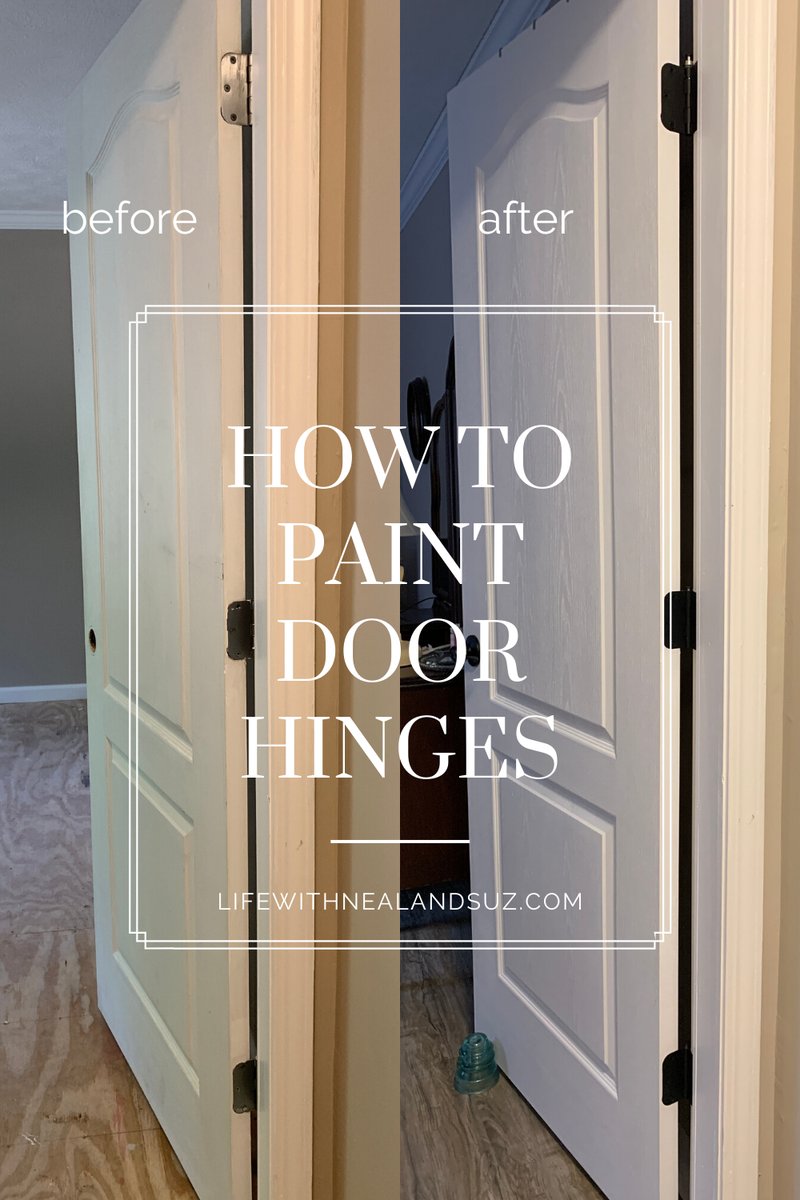
Picture this: you’ve just painted your room a fresh, inviting color, but those bright silver hinges are still staring at you like a sore thumb. It’s like wearing a fabulous outfit with mismatched shoes. You know you can fix it; you just need to know how. In this article, we’ll explore everything from prepping the hinges to the final touches, ensuring your hinges look as good as new—and just as painted as your doors.
Gather Your Supplies
Before diving into the project, make sure you have all your supplies ready. It’s a bit like going on a road trip; you wouldn’t want to forget essentials like snacks and a map, right? Here’s what you need:
- Screws and screwdriver: If you’re planning to remove the hinges, having the right tools on hand is crucial.
- Sandpaper: Fine and medium-grit sandpaper will help smooth the surface.
- Cleaner: A degreaser or mild soap will remove any grime or grease.
- Primer: A good-quality primer is essential for a durable finish.
- Paint: Choose a paint that matches your project, preferably one that bonds well to metal.
- Paintbrush or spray can: Depending on the finish you want.
- Drop cloth: To protect your floors and surrounding areas.
Once you’ve gathered your supplies, you’re ready to tackle those hinges with confidence!
Preparing the Hinges
Proper preparation is key when it comes to painting over hinges. Think of it as getting your canvas ready before painting a masterpiece. If you skip this step, you might end up with paint that peels or chips off later.
Start by removing the hinges from your door or cabinet. This isn’t always necessary, but it makes the process easier and helps you avoid getting paint on the surrounding areas. Use a screwdriver to detach the hinges, and be sure to keep the screws in a safe place—losing them can be frustrating!
Next, clean the hinges thoroughly. Use a cleaner or degreaser to remove any dirt, grease, or old paint. This step ensures that the primer will stick properly. After cleaning, dry them completely before moving to the next step. If you’re like me, you might even enjoy the satisfaction of seeing shiny, clean metal.
Sanding for Smoothness
Now that your hinges are clean, it’s time to smooth them out. Think of sanding as giving your hinges a little spa treatment. Using medium-grit sandpaper, gently sand the surface of the hinges to create a rough texture. This helps the primer adhere better. Follow up with fine-grit sandpaper to refine the surface. You want it to be smooth, but not so smooth that the primer won’t stick.
After sanding, make sure to wipe off any dust with a damp cloth. You’d be surprised how much dust can cling on, and a dust-free surface is crucial for a good finish.
Priming the Hinges
Priming is one of the most important steps in this process. Think of primer as the foundation of a house. Without a good foundation, everything else becomes unstable, right? Choose a metal primer that’s suitable for the type of paint you’re planning to use.
Apply the primer evenly using a brush or spray can. If you’re using a brush, be careful not to overload it—too much primer can lead to drips. Allow the primer to dry according to the manufacturer’s instructions. This usually takes about one to two hours. You might be wondering, “Is this really necessary?” Yes! Skipping the primer could mean an uneven paint finish or premature chipping.
Painting the Hinges
Now we get to the fun part: painting! Choose a paint that complements your overall design. It’s like picking the perfect icing for a cake. You want something that not only looks good but also stands up to wear and tear.
Using your paintbrush or spray can, apply the first coat of paint. If you’re using a brush, make sure to use even strokes and avoid leaving brush marks. If you go with spray paint, keep the can about 6-12 inches away from the surface for an even application.
Once the first coat is dry, inspect the hinges. If you see any patches or uneven spots, a second coat may be needed. Let the first coat dry completely (usually a few hours) before applying the second coat. Trust me; the extra layer will pay off in durability and appearance.
Reinstalling the Hinges
After your last coat is thoroughly dried (and isn’t it a gratifying sight?), it’s time to put the hinges back on. If you decided to remove them, like a chef returning a dish to the table, carefully align them with the screw holes.
Using your screwdriver, securely fasten the hinges back onto the door or cabinet. Take a moment to admire your handiwork—you’ve transformed those once shiny hinges into a seamless part of your design!
Maintaining Your Newly Painted Hinges
Now that you’ve completed this project, let’s talk about maintenance. Just like your favorite pair of shoes requires a little love, your painted hinges will need some care too.
Keep an eye out for any chips or scratches. If you notice any, you can easily touch them up with the same paint. Regular cleaning with a damp cloth will also help keep them looking fresh.
It’s also a good idea to avoid heavy-duty cleaning products. They might strip the paint over time, ruining all your hard work.
Painting over hinges isn’t just about aesthetics; it’s a small detail that can make a big difference in the overall look of your space. With a bit of preparation and the right techniques, you can achieve a professional-looking finish that elevates your home decor.
Remember, it’s all about taking your time and doing things right. By following these steps—from gathering your supplies to maintaining your newly painted hinges—you’ll ensure that your project is a success. So grab those brushes, channel your inner artist, and transform those hinges!