But here’s the thing: weatherstripping isn’t a “one size fits all” solution—especially if you own something a bit unique, like an older wooden door or a fancy new Andersen sliding window. To get a perfect seal, you need to measure the exact gap. Think of it like tailoring a suit: measure wrong, and you’ll end up with cold ankles or water leaks no matter what you buy.
Honestly, the measuring part trips up a lot of DIYers. If you’ve never done it before, it can feel a little intimidating. But don’t worry—I’ll walk you through each step, using everyday examples and a no-fuss approach. By the end, you’ll know exactly how to measure for custom weatherstripping—and why every detail matters.
Why Measuring The Gap Is So Important
You might be wondering, “Why can’t I just eyeball it?” Here’s why precise measurement makes such a difference. Custom weatherstripping works by filling in the exact space between your door or window and the frame. Too thick, and the door won’t close smoothly. Too thin, and you’ll still get drafts or leaks.
If you’re using a brand like Andersen, Pella, or even a universal kit, the instructions always mention checking the gap first—and there’s a good reason. Weatherstripping isn’t there just for fun. It’s a shield against wind, water, dust, and bugs. A perfect fit means your home stays comfortable, your energy bills drop, and your nice floors stay safe from water.
It’s kind of like syncing a remote to your TV. If something’s off—even by a little bit—nothing works quite right, and you’re left troubleshooting (with a cold house, in this case). Getting the right measurement saves you from that cycle.
Tools You’ll Need To Measure The Gap
Before you start, make sure you have the right tools handy. You don’t need anything fancy—most items are probably in your junk drawer or toolbox.
- Measuring tape: For larger gaps, especially around doors.
- Feeler gauge: Ideal for smaller, tight window or door frame gaps. It’s like those little metal strips mechanics use to measure the space between spark plugs.
- Calipers: Digital or manual calipers offer the most precise measurement for custom work, like syncing weatherstripping to non-standard frames.
- Notepad and pencil: Don’t trust your memory—write your measurements down right away.
- Flashlight: For peeking into tricky corners and gaps.
- Flat object or card: Something thin, like a credit card or loyalty card, can help test how tight your gap is.
You don’t have to buy anything expensive. If you’re missing a feeler gauge or caliper, your measuring tape and a sturdy card will do for most doors and windows.
How To Identify The Areas That Need Weatherstripping
First, you’ll want to figure out *exactly* where the gaps are. Not every door or window needs full weatherstripping—sometimes it’s just one edge or corner causing trouble.
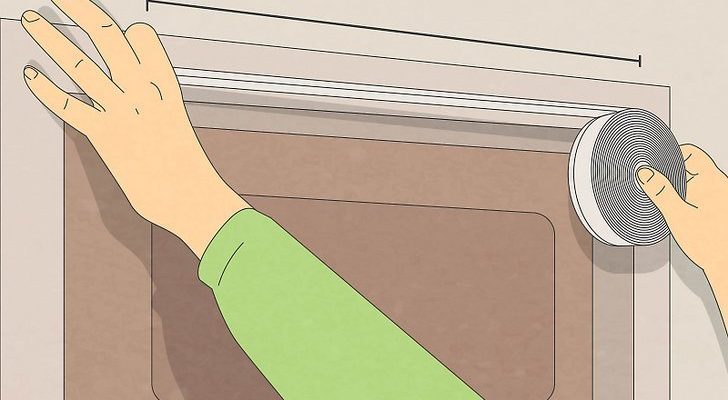
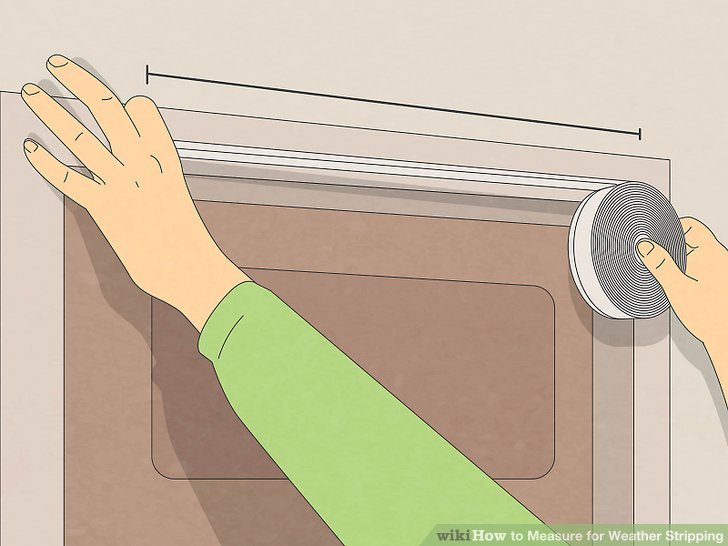
Start by closing the door or window and running your hand around the edges. Feel for cold air, moisture, or light peeking through. On a breezy day, you might even see a curtain flutter or feel the wind change. These are your trouble spots.
Check common weak points:
- The bottom edge (threshold) of doors
- The sides and tops of exterior doors
- Window sashes and frames, especially old wooden ones
- Sliding glass doors—where the panels overlap
Sometimes you’ll find a gap that’s just a few millimeters wide—barely enough to slip a key card through. Other times, there’s a visible line of daylight. For Andersen or Pella brand frames, check around the hardware and hinges; these areas often settle over time or after repairs.
Pro tip: At night, have someone shine a flashlight from the other side of a closed door or window. Wherever you see light shining through, you’ve found a gap that needs attention.
Step-By-Step: Measuring The Exact Gap For Custom Weatherstripping
Here’s the part where you’ll want to go slow and steady. Getting an accurate measurement is just like entering a code into your universal remote—one wrong digit, and it won’t work right.
Step 1: Clean the Area
Dust, dirt, or old sealant can throw off your numbers. Wipe down the frame and the moving part (the door or window itself) with a damp cloth. Let it dry fully.
Step 2: Close The Door Or Window Fully
The idea is to measure with everything in its normal, “closed” position. This is how the weatherstripping will actually sit.
Step 3: Use Your Measuring Tool
- For large gaps (over 1/8″): Press the measuring tape or a ruler into the gap, noting the width at several points—top, middle, and bottom. Jot down the largest measurement.
- For small or uneven gaps: Slide a feeler gauge, card, or caliper into the tightest spot that still lets the door or window close smoothly. Note the measurement. If the gap is wider at one end, write down the smallest and largest measures.
Step 4: Check Multiple Points
Gaps aren’t always even. Honestly, you might see a door that’s tight at the top but loose at the bottom. Measure at least three spots (top, middle, bottom for doors; all four sides for windows).
Step 5: Record The Largest Measurement
Order custom weatherstripping that matches the largest gap. This way, you won’t end up with spots that don’t seal. If the difference is huge—say, half an inch at the bottom and barely anything at the top—you might need to add a second, thinner layer or do some frame repair.
What To Do If The Gap Is Uneven Or Irregular
Not all gaps are simple. Some doors or windows are worn, warped, or just a little out of sync—especially in older homes where shifting and settling happen over the years.
Here’s what you can do if your gap isn’t the same size all the way around:
- Use compressible weatherstripping: Foam or rubber seals are flexible and can handle slight variation.
- Add shims or adjust hardware: Sometimes tightening a hinge or resetting a strike plate will even things out.
- Layer up: For seriously uneven gaps, use a thicker weatherstrip on the wide side and a thinner or “low-profile” strip on tighter sections.
It’s a bit like troubleshooting a remote that only works from certain angles—you might need a custom code or a little extra fiddling to get everything synced up and working right. Take notes on each spot, and order accordingly—don’t just guess.
Comparing Custom Weatherstripping To Off-The-Shelf Options
You might be thinking, “Do I really need custom weatherstripping, or can I grab a universal kit from the hardware store?” Here’s how they stack up.
Custom weatherstripping:
- Perfectly matches your unique gap size and shape
- Ideal for older, non-standard, or specialty doors and windows (like custom Andersen or vintage frames)
- Usually lasts longer and offers a tighter seal
- Costs a bit more, but saves on energy bills over time
Off-the-shelf (universal) weatherstripping:
- Faster and easier to install—just cut to length
- Best for standard gaps (usually 1/8″ to 1/4″)
- Might leave small leaks if your frame is warped or extra-wide
- Less expensive up front, but less effective for tricky gaps
If your door or window is standard and in good shape, a universal kit may do the trick. But if you’ve measured an odd-sized gap—or you’re tired of resetting or pairing replacement strips that just don’t fit—custom is the way to go.
Tips For Ordering And Installing Custom Weatherstripping
Once you have your measurements, ordering the right weatherstripping is like entering the correct reset code on a stubborn electronic device—it just works.
Order slightly wider if unsure: If your gap varies by more than 1/16″, go with the wider size. Most weatherstripping compresses a bit, so a snug fit is better than a loose one.
Choose the right material: Foam works for uneven gaps or quick fixes. Rubber or silicone offers better durability and a stronger barrier, especially for doors that see a lot of use.
Double-check the brand: If you’re using custom options for Andersen or Pella windows, check if they require a specific style, color, or code for that frame. It’s better to pair and sync the right product upfront than to troubleshoot a mismatch later.
Install patiently: Clean and dry the area well. Remove old adhesive or residue. Apply the new strip, pressing firmly, and let it set before opening or closing the door.
Common Mistakes and How To Avoid Them
Honestly, most weatherstripping projects go sideways for the same few reasons:
- Measuring only one spot: Gaps change along the frame—always check top, middle, and bottom.
- Guessing the size: Don’t wing it. Double-check your gap before buying.
- Picking the wrong material: If your door gets a lot of sunlight or movement, pick tougher materials (like reinforced rubber).
- Skipping prep: Leaving behind dirt or old glue means your new strip won’t stick right—and you’ll be troubleshooting again in a week.
Take your time with measurements, choose the right weatherstripping for your door or window, and you’ll avoid these common pitfalls.
Wrapping Up: Why Getting The Right Measurement Matters
Measuring the exact gap for custom weatherstripping might sound tedious at first, but it makes all the difference. When you take those extra minutes to get things right—whether that’s checking each edge or writing down the numbers instead of guessing—you’re basically syncing your home’s comfort and efficiency settings to “perfect.”
No more drafts. No mysterious water stains. No endless rounds of troubleshooting with sealant or foam tape that never fits quite right. With the right weatherstripping, every door closes with a satisfying seal, and you get peace of mind for years to come.
So, grab that tape measure, check those corners, and don’t rush through the steps. Your future, cozier self will thank you.